The Homebuilding & Renovating Suppliers Directory
From flooring to glazing, construction systems to consultants, the Homebuilding & Renovating Suppliers Directory will provide you with the key contacts you need for your self build, renovation or extension project
Welcome to the Homebuilding & Renovating Suppliers Directory — a dedicated list of the self build and renovation suppliers, services and products you may need for your building project.
From finding specialist site insurance to specifying bespoke glazing, planning a kitchen to buying flooring, procuring a timber frame to sourcing a woodburning stove, we've got it covered. If you're hoping to undertake a self build, renovation, loft conversion or extension project, then the directory below could prove invaluable.
Building materials
CDI Innovative Construction Materials provides superior suspended floor systems that offer exceptional performance when compared to other upper floor systems. Cost-effective, quick to install and high strength, with excellent acoustic, fire and underfloor heating performance, our systems are ideal for self builders.
Direct Flues is a UK-based supplier offering a comprehensive range of flue systems, chimney products and installation materials, including flexible flue liners, twin wall systems and chimney cowls. They serve both trade professionals and the public, provide fast delivery, and are a trusted one-stop shop for all flue needs.
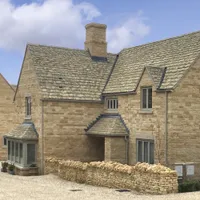
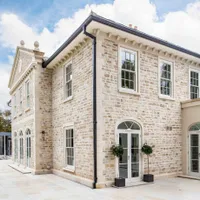
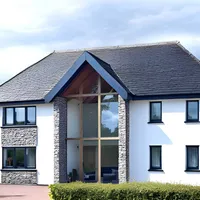
Greys Roofing Products creates an authentic roofscape with detailed moulding, a choice of colours and a range of sizes to create a coursed and diminishing stone slate or slate roof with a range of compatible products including ridges and in-line ventilation systems, creating an extremely versatile and cost-effective alternative to natural slate products.
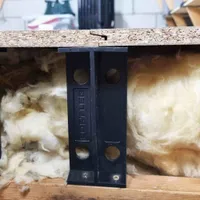
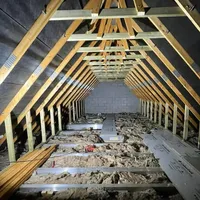
Loft Leg design and manufacture unique loft products for raising loft boards above insulation, creating additional loft storage. All Loft Leg's products are designed to work with, and protect, insulation in the loft to create useful storage spaces while saving households energy and money.
Northern Slate Supplies are a family-owned business, which have grown to be leading agents, importers and distributors of natural slate, primarily for roofing. They have a wealth of knowledge and expertise in the natural slate sector. Well placed to meet your requirements when undertaking your large, small, prestigious or traditional project.
Osmo, with over 140 years of expertise in wood and finishes, offers a seamless combination of quality materials and superior coatings. Our in-depth knowledge ensures that every product meets the highest standards, providing you with durable, reliable and expertly crafted solutions.
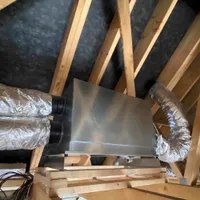
Rega Ventilation offers highly efficient, low power consumption MVHR systems that are specifically designed to meet the demands of the UK climate. With over 40 years of experience, Rega brings deep expertise to every stage of the process — from design and supply to installation and commissioning.
Forget steel beams and cranes — TeleBeam is a bespoke, prefabricated, lightweight aluminium beam system for the conversion of modern trussed roofs. The system provides a quick, easy and cost-effective way of converting a loft into habitable space. This family-run business also has BBA Accreditation for national Building Regulations compliance.
Vastern Timber is a family-owned hardwood sawmill and timber merchant in Wiltshire, producing high-quality, durable British timber cladding, panelling and flooring for over 100 years. Our expert team helps self builders find the perfect locally sourced timber for their projects, with guidance every step of the way.
Yeoman Rainguard is a leading UK provider of rainwater drainage systems, offering a comprehensive range of products to suit various specifications and budgets. We pride ourselves on delivering a professional, personalised service, ensuring reliable, high-quality solutions for self builders and renovators, offering installation or supply only.
Consultants, finance and insurance
ABC+ Warranty provides mortgage lender-approved Structural Warranties and Professional Consultants Certificates across the UK. As the only RICS-registered provider offering both, they deliver exceptional value, no hidden fees, and flexible payment plans. Backed by 30+ years of experience, their Chartered Surveyors ensure high-quality certification for residential and commercial properties.
CLPM Construction Project Management provides independent consultancy services for self builders, renovators and home improvers. Services include: quantity surveying support to facilitate your costs, tendering and financial monitoring; Sustainability advice; and project management, site support and contract administration.
Protek is an established site insurance and 10-year structural warranty provider, recognised by lenders. We're focused on providing clients with comprehensive site insurance and offer competitive solutions for self builds, conversions, extension and renovations. We underwrite on behalf of ‘A’ rated UK insurers.
Designers
Brightman Clarke Architects designs exceptional self-build residences and elegant extensions across the north of England, the Midlands and Wales.
As a Homebuilding & Renovating Award-winning practice, they combine creativity, planning insight, and reassuring technical excellence.
Clients value their calm, collaborative approach and the refined, enduring homes they create, with spaces that are crafted for comfort, refinement and modern family living.
MB Architecture is a multi-award winning, family-owned architectural practice specialising in residential property.
The company designs and builds dream homes to bespoke designs by either proposing a new home from the ground up, or by re-modelling and extending an existing building.
MB Architecture creates bespoke designs for each project.
Heating
Charlton & Jenrick is a leading UK manufacturer of woodburning, multi-fuel, electric and gas fires and stoves. Our dedication to efficiency, sustainability and cutting-edge technology is matched by meticulous attention to detail. We offer comprehensive support, cementing our reputation as a trusted name in the heating industry.
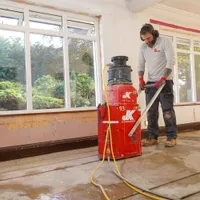
The JK Floorheating system is the UK’s only certified in-ground, retrofit, warm water underfloor heating system with no floor build-up. The company boosts over 25 years’ experience in creating unique underfloor heating solutions. Quick installation, bespoke floor cutting on site, and responsive heat-up times, are amongst the benefits.
Interiors
EASipanel is a stand-alone panelling system created and manufactured at Leeds-based Spa Laminates. EASipanel is moisture-resistant, can be used in every room, is ready to prime and pain, and is the thinnest of its kind on the market. Pre-cut panels enable classic height panelling, tall panelling and stair panelling.
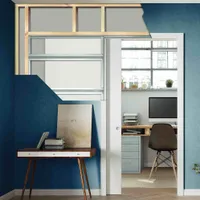
ECLISSE UK offers innovative pocket door systems that maximise space and enhance interior aesthetics. With a focus on quality and design, ECLISSE products seamlessly integrate into any home, providing a sleek solution for space optimisation. Elevate your renovation or self build project with ECLISSE’s reliable and stylish door solutions.
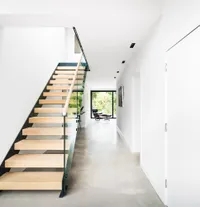
Complete Stair Systems provides custom-made steel, glass and timber staircases with a focus on modern styles. Our models are designed to be a statement within a hallway whilst maintaining the passage of light. Straight flights, quarter-turn and half-turn models, or spiral staircase, are all made to measure for your home.
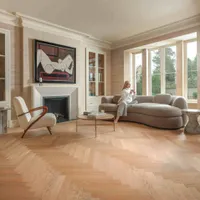
For over 30 years, Ted Todd has crafted premium solid and engineered wood flooring, using new, reclaimed and antique woods to blend sustainability with timeless design. With showrooms in Cheshire, London and New York, Ted Todd create bespoke flooring solutions for all interiors, rooted in craftsmanship and history.
Landscaping and garden buildings
Warwick Buildings has been constructing timber sectional buildings for over 30 years and is a market leader of garages and insulated timber garden offices. Warwick Buildings construct all their own buildings at their UK manufacturing site, using timber from Scandinavia, registered with the FSC and PEFC.
Structural systems and package companies
Baufritz is one of leading European manufacturers of timber frame eco homes. We have over 100 years' experience in the German market and have been operating in the UK for over 15 years. We produce highly engineered prefabricated modules, which can be erected on a customer's site in a matter of days.
BecoWallform insulated concrete formwork (ICF) is a fast and cost-effective form of construction. Providing low, zero or passive energy performance standards to counter the effects of climate change, BecoWallform is an integrated building system for any architectural style and all types of cladding including brick, stone, timber and render.
Carpenter Oak are award-winning structural timber frame specialists. For over 37 years, they've been designing, manufacturing and raising bespoke frames across the UK to create stunning spaces for their customers. They work on projects ranging from small extensions to large homes, and everything in between, such as swimming pool buildings, bridges and boathouses.
Econoloft are the UK’s leading loft conversion specialists. For over 40 years, our experts have helped homeowners build their dream loft conversions. We take care of everything from plans to plaster, beginning with bespoke designs, securing planning permission where required, complete installation, and finishing with decorating.
English Brothers specialise in crafting high-quality timber frame structures for self builders across the UK. With a history steeped in expertise and a passion for innovation, we are dedicated to turning dreams of bespoke, energy-efficient homes into reality.
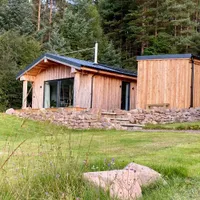
Lakeland Timber Frame offer a flexible, personal, nationwide service for construction and architectural professionals and to individuals for self-build projects. Their purpose is to engineer, manufacture and construct timber frames to individual design. Every project they undertake is unique, working with customers to create their dream home.
Norscot, established in 1984 in the Scottish Highlands, specialise in high-quality, eco-friendly timber frame kit homes for self builders. Offering customisable designs, we also assist with statutory consents as well as manufacturing the windows and doors, ensuring seamless quality and a stress-free self build process.
For over 25 years, Oakwrights has had the pleasure of working alongside clients to bring their oak framed home, extension, outbuilding and garage plans to fruition across the UK and beyond. Championing sustainable architecture, we craft and construct bespoke oak framed buildings which meet clients’ needs and exceed their aspirations.
Windows, doors, rooflights, garage doors and glazing
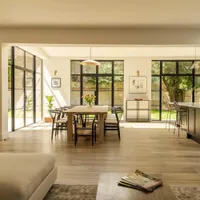
Aluco offers exclusive steel look architectural glazing solutions with the highest quality of hand-finished products. Each of their products is designed and handcrafted specifically to meet the needs of individual customers and provide the best possible service and product.
Clement Windows Group offers an innovative range of steel windows, doors, screens and conservation rooflights. Recognised as specialists in conservation work for both private residences and commercial projects, the company is based in Surrey and regularly supplies nationwide and to Europe and the USA.
ecoHaus supply and install bespoke windows and doors for new build and renovation projects, offering an unparalleled turnkey service including supply, survey and installation. Their product range includes premium brands such as Internorm, Velfac, Rationel and their own in-house brand, Visiline.
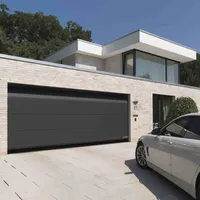
Hörmann UK are the market-leading suppliers of an extensive range of products for residential construction including garage, entrance and internal doors, together with a range of storage systems for the patio and garden.
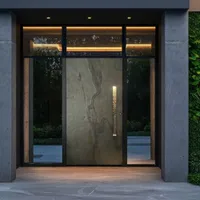
Inspiration Doors designs and manufactures premium bespoke entrance doors in the heart of Cornwall. Each piece blends striking design with exceptional craftsmanship, drawing on natural textures like weathered stone and oxidised metal. Handcrafted by skilled artisans, these doors offer timeless elegance and create powerful first impressions rooted in Cornish inspiration.
Internorm premium windows and doors are the ultimate choice for homeowners embarking on a self build, planning a retrofit, or looking to build to PassivHaus standard. By investing in quality products, you will not only save on your energy bills but will also be able to enjoy your windows and doors for 30-plus years.
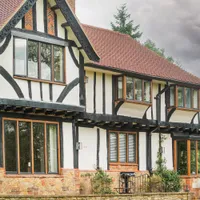
Jennyfields continue to meet the challenges of replicating slim sight lines with the demanding requirements of modern building specifications, from a bygone era to modern styles. Working closely with designers and engineers, we have produced our own unique products that truly capture the elegance of the past.
Kloeber is an award-winning, market-leading manufacturer and supplier of bespoke doors and windows including the FunkyFront entrance door, bifold, sliding and French doors, windows, rooflights and fixed glazing in timber, aluminium and alu-clad. From site surveys to installation, we offer the complete package to self builders and home improvers.
Korniche aluminium products combine sleek design, precision engineering and superior performance. Ideal for homeowners and self builders, their range includes multi-award-winning bifolding doors and roof lanterns that maximise natural light and energy efficiency, and are easy to install, durable, and crafted to the highest standards.
Norrsken supplies triple-glazed composite windows and doors that empower homes to reach their full potential. Their bespoke, energy-efficient products, expert team, and commitment to exceeding expectations make them the ideal choice for discerning homeowners and self-builders. Enquire online today, and start your journey to an extraordinary home.
The Sash Window Workshop specialises in high-quality timber windows and doors for renovation, extension and new build projects. Working with both homeowners and trade, the company offers a supply-only service nationwide and a supply and install service in London and Southern England. They are endorsed by Which? Trusted Traders.
Storm Windows specialises in custom-made secondary glazing for historic, period and listed properties. Trusted by conservationists, architects and homeowners, our bespoke solutions enhance warmth, reduce noise and improve energy efficiency — while preserving the character of even the most unique or unusual windows.
VELFAC specialises in high-performance composite windows and doors, combining slim 54mm frames, superior insulation and low maintenance. Designed for self builders and renovators, VELFAC offers custom-made solutions, triple glazing, and a wide range of colours and styles, ensuring efficiency, durability and a modern aesthetic.
The majority of the content on the Homebuilding & Renovating website is created solely by our editorial team, but on occasion we also work with external commercial partners to create content we hope our readers will find interesting and useful.
Homebuilding & Renovating is proud to work with some of the UK’s leading manufacturers and suppliers of products and services to the self build and renovation industry in creating this directory. Please note, however, the above entries are paid for by commercial partners.
If your company would like to be featured in the Homebuilding & Renovating Suppliers Directory, then please contact Jackie Sanders, Future Homes & Gardens Network Business Director: jackie.sanders@futurenet.com
Bring your dream home to life with expert advice, how to guides and design inspiration. Sign up for our newsletter and get two free tickets to a Homebuilding & Renovating Show near you.
