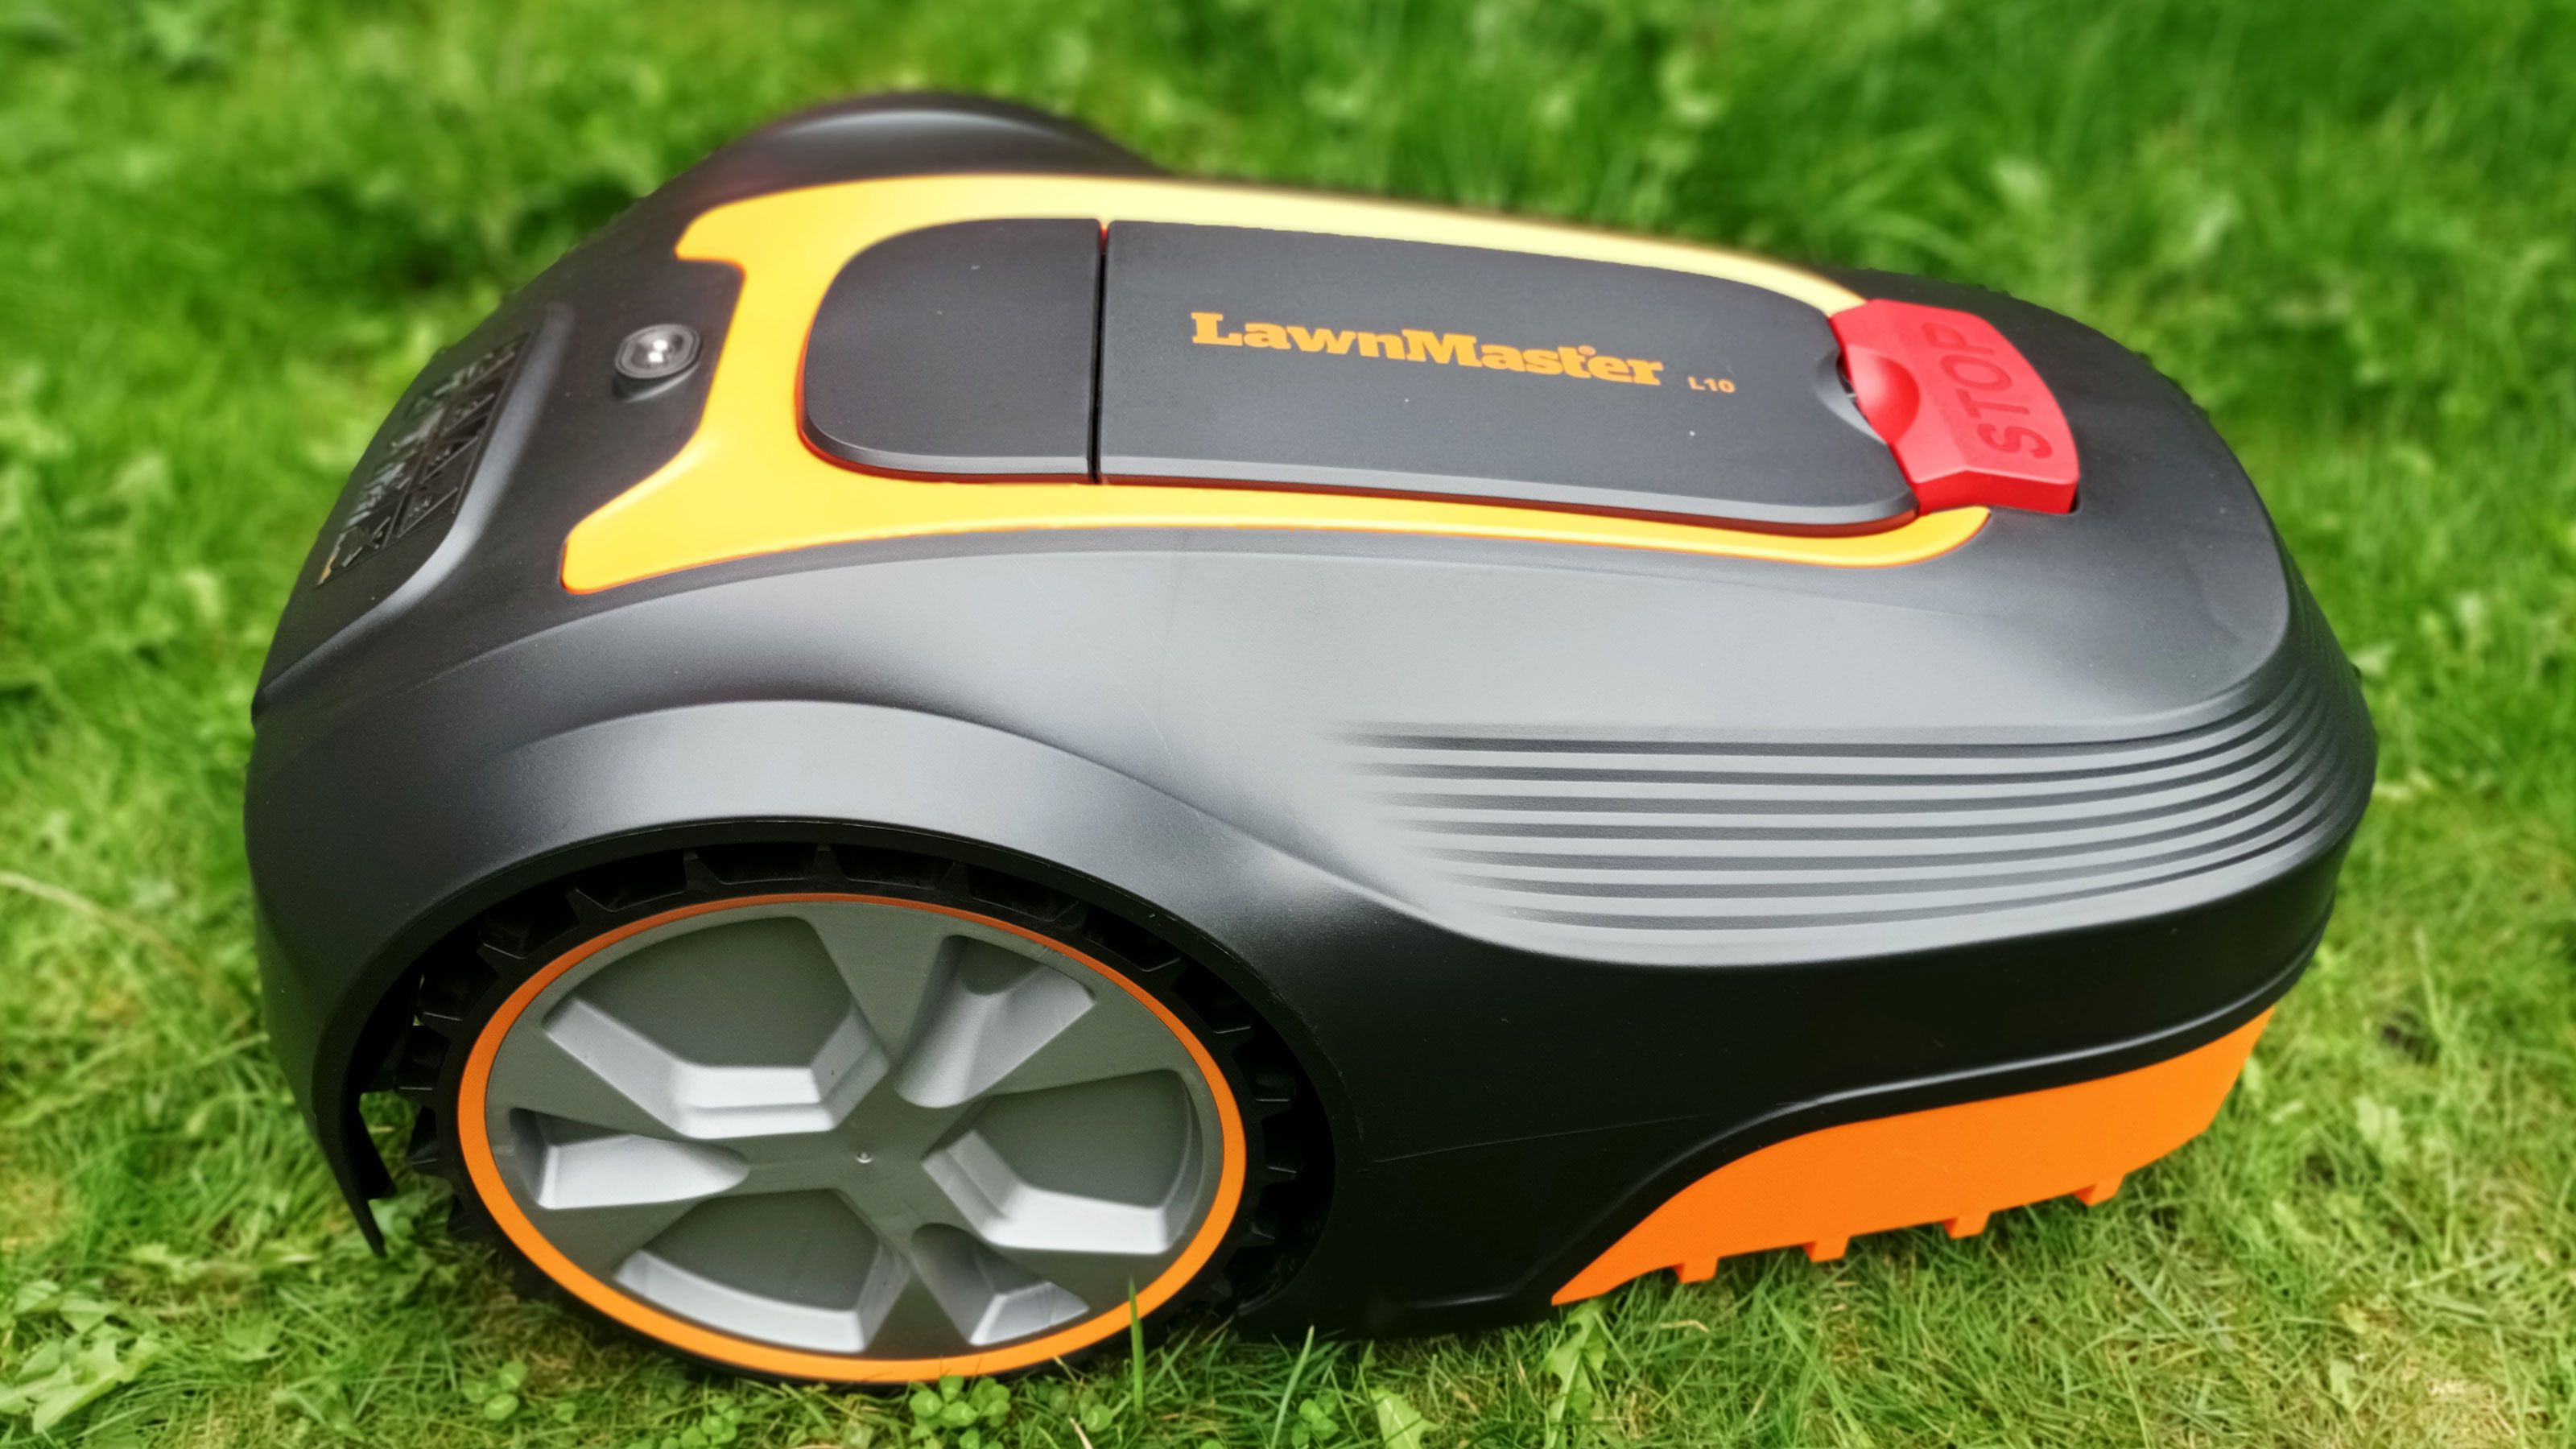
Homebuilding Verdict
If you have a small to medium sized lawn and want to delve into the world of robot mowers without a heavy investment then the compact LawnMaster L10 is a great place to start. It's pretty easy to set up and operate and does a decent job of cutting your lawn. It may lack the features of more expensive robot mowers, but it offers enough to keep your grass in great shape without too much human interaction.
Pros
- +
Compact and lightweight
- +
Hands free mowing
- +
An affordable mower for suburban gardens
- +
Easy to use
Cons
- -
No grass collector
- -
Random cutting pattern
- -
No app
You can trust Homebuilding & Renovating.
The Lawnmaster L10 robot mower is the perfect garden buddy if you want a lawn that looks lovely, but aren’t so keen on its upkeep. With this smart futuristic cutting companion there’s no pushing a mower around the garden. Simply set it up, hit Start and let the wonder of technology take over. All you need to do is sit back, relax, and take a sip on your favourite cocktail - or cup of tea - and watch the L10 majestically mow your lawn.
The Lawnmaster L10’s compact nature means it is meant for smaller gardens with a maximum recommended cutting area of 400m2. That’s 20m x 20m – or 65ft x 65 ft for imperial lovers. So still ideal for most suburban gardens and a little bit more. And just to make sure it got a good workout I left my lawn to grow for at least three weeks before giving the mower its first run out.
Is it better than a push mower? Find out what we thought of the Lawnmaster L10 and whether or not it could be a real alternative to the best cordless lawn mowers on the market today.
LawnMaster L10 specifications
- Lawn mower type: Robot mower
- Drive type: Automatic
- Cutting width: 18cm
- Cutting height: 20mm-60mm
- Weight: 8.1kg
- Rotary or cylinder: Rotary
- Guarantee: 2 years
- Charge time: 45 mins
- Cutting area: 400m2
First time with the LawnMaster L10
I’ve worked with some hefty robot mowers before so I was looking forward to working with a more compact and lightweight - or at least easier to lift - model, and that is exactly what I got with the LawnMaster L10.
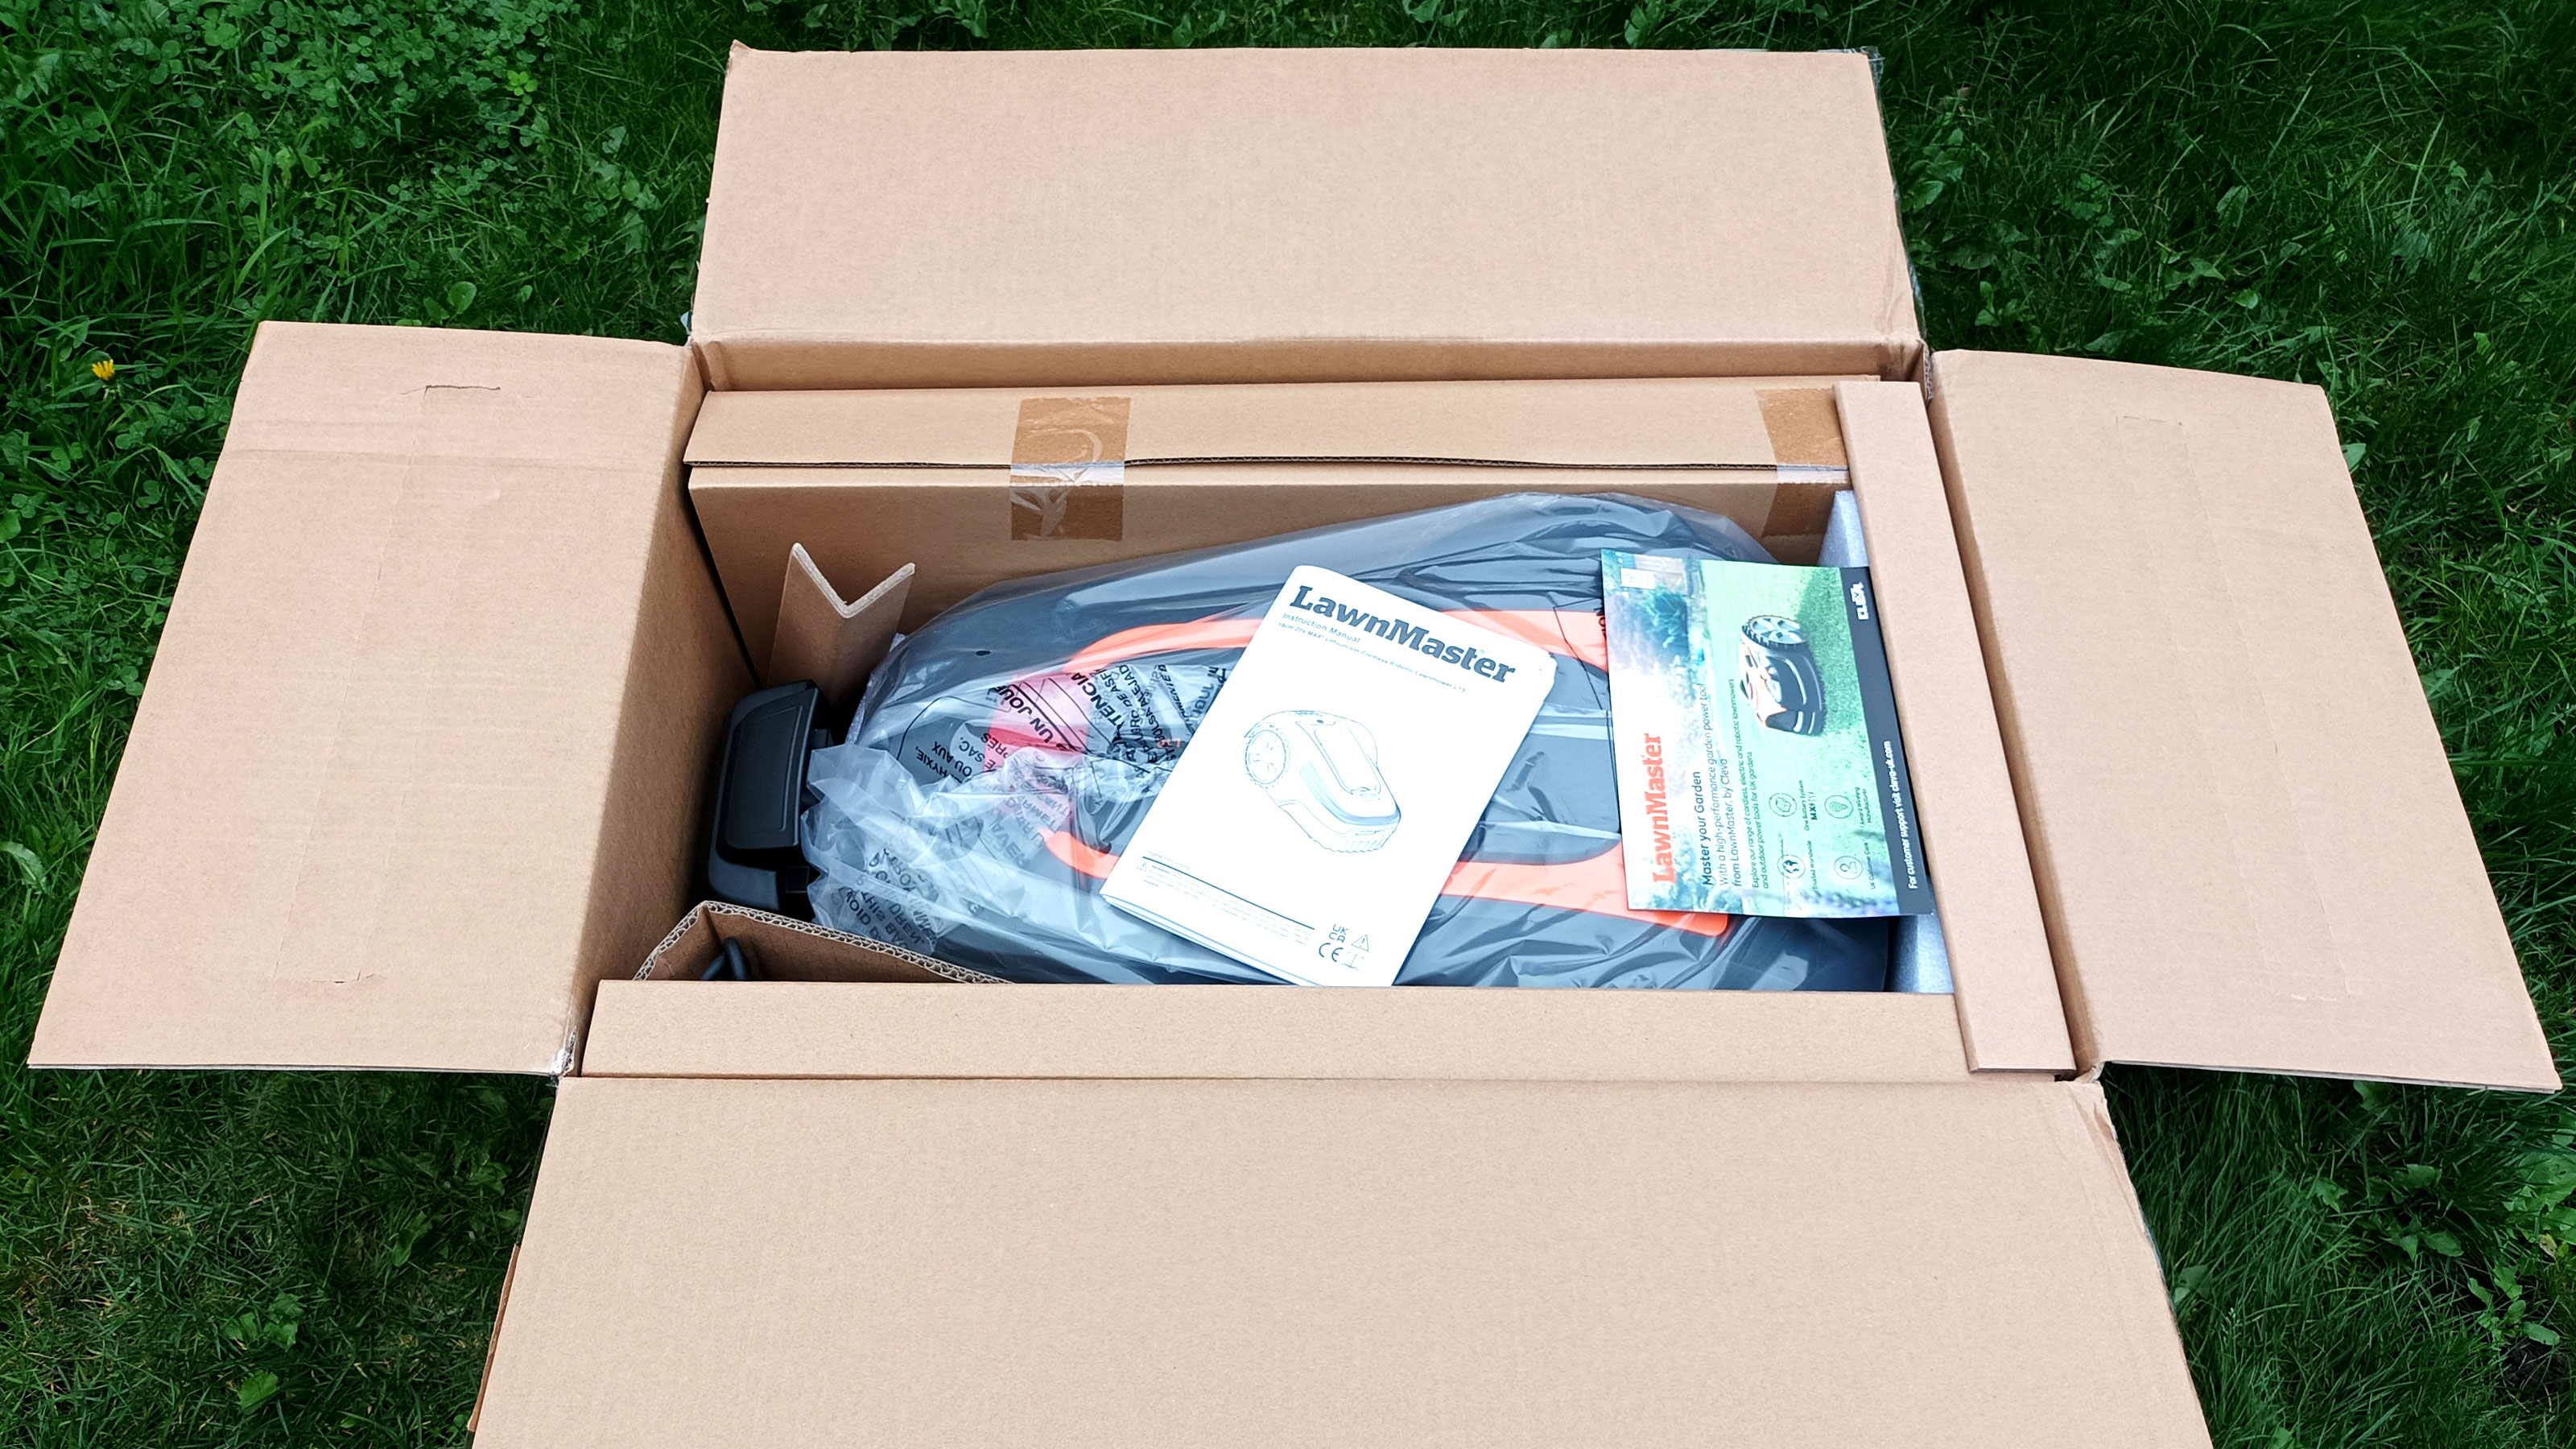
Neatly packaged in recyclable cardboard emblazoned with the Lawnmaster logo, I could easily lift the box and manoeuvre it outside with no problem. The box itself is only 68cm x 46cm x 26cm and weighs around 10 kg including the mower, accessories and packaging.
Now it was time for the fun part – the unboxing. Revealing the L10 for the first time saw a neatly arranged box with some solid cardboard corner packaging to help ensure that the edges of the box didn’t collapse if hitting anything in transit. This ensured that the contents were in good shape and in working order once out of the box.
The mower itself is resplendent in a favourite colour combination for many mowers – black and orange – and only took up three quarters of the box. The unit itself measures – approximately – 54cm x 34cm x 26cm, meaning it's smaller than most cordless lawn mowers and it has no handle to hinder storage, when, and if you put it away for the winter.
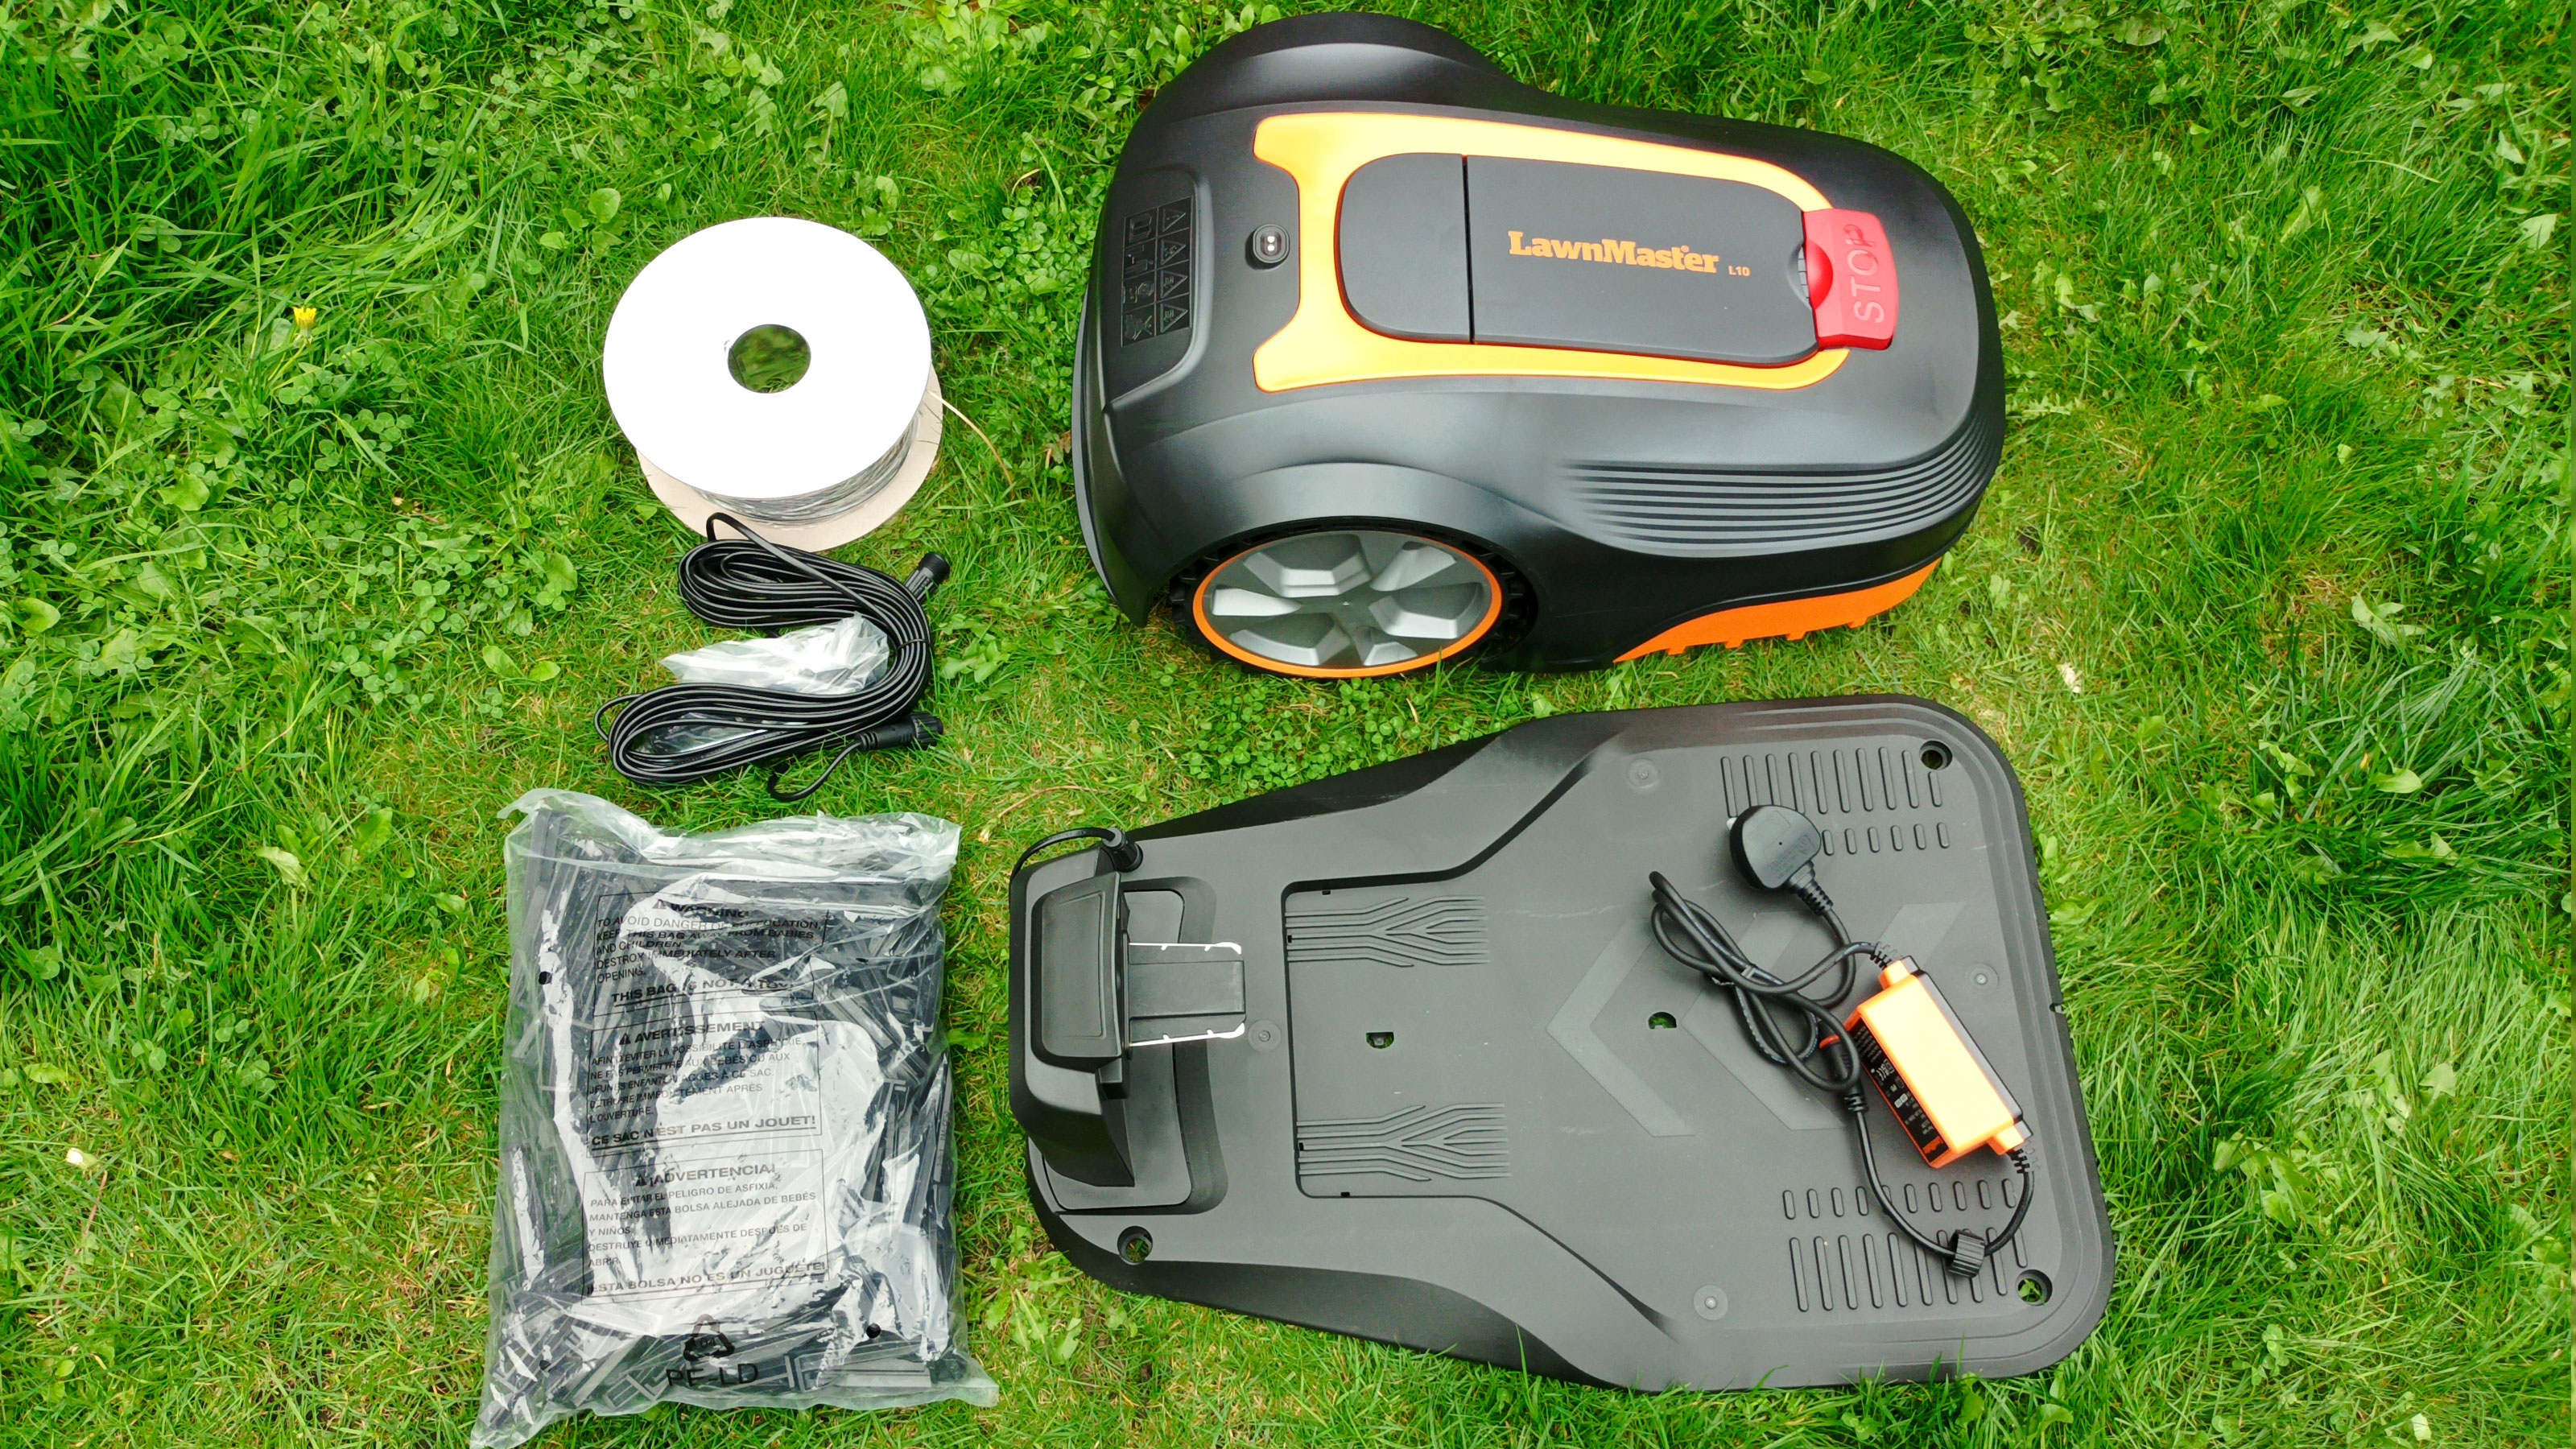
Sitting next to the mower is a box of accessories, which contains almost everything you need to set up the mower. There’s a 150m reel of boundary wire, 250 plastic pegs, a power cord, wire strippers, a set of couplers, an Allen key and four bast station fixing screws. Lifting the 8kg mower revealed the neatly tucked away base station. At first glance it seems like a lot, but we promise you it isn't as overwhelming as it looks. One thing we did notice that wasn’t in the box was a grass collector. Robot mowers don’t like to bother with such things, they like to mulch.
Setting up the LawnMaster L10 was easy-ish
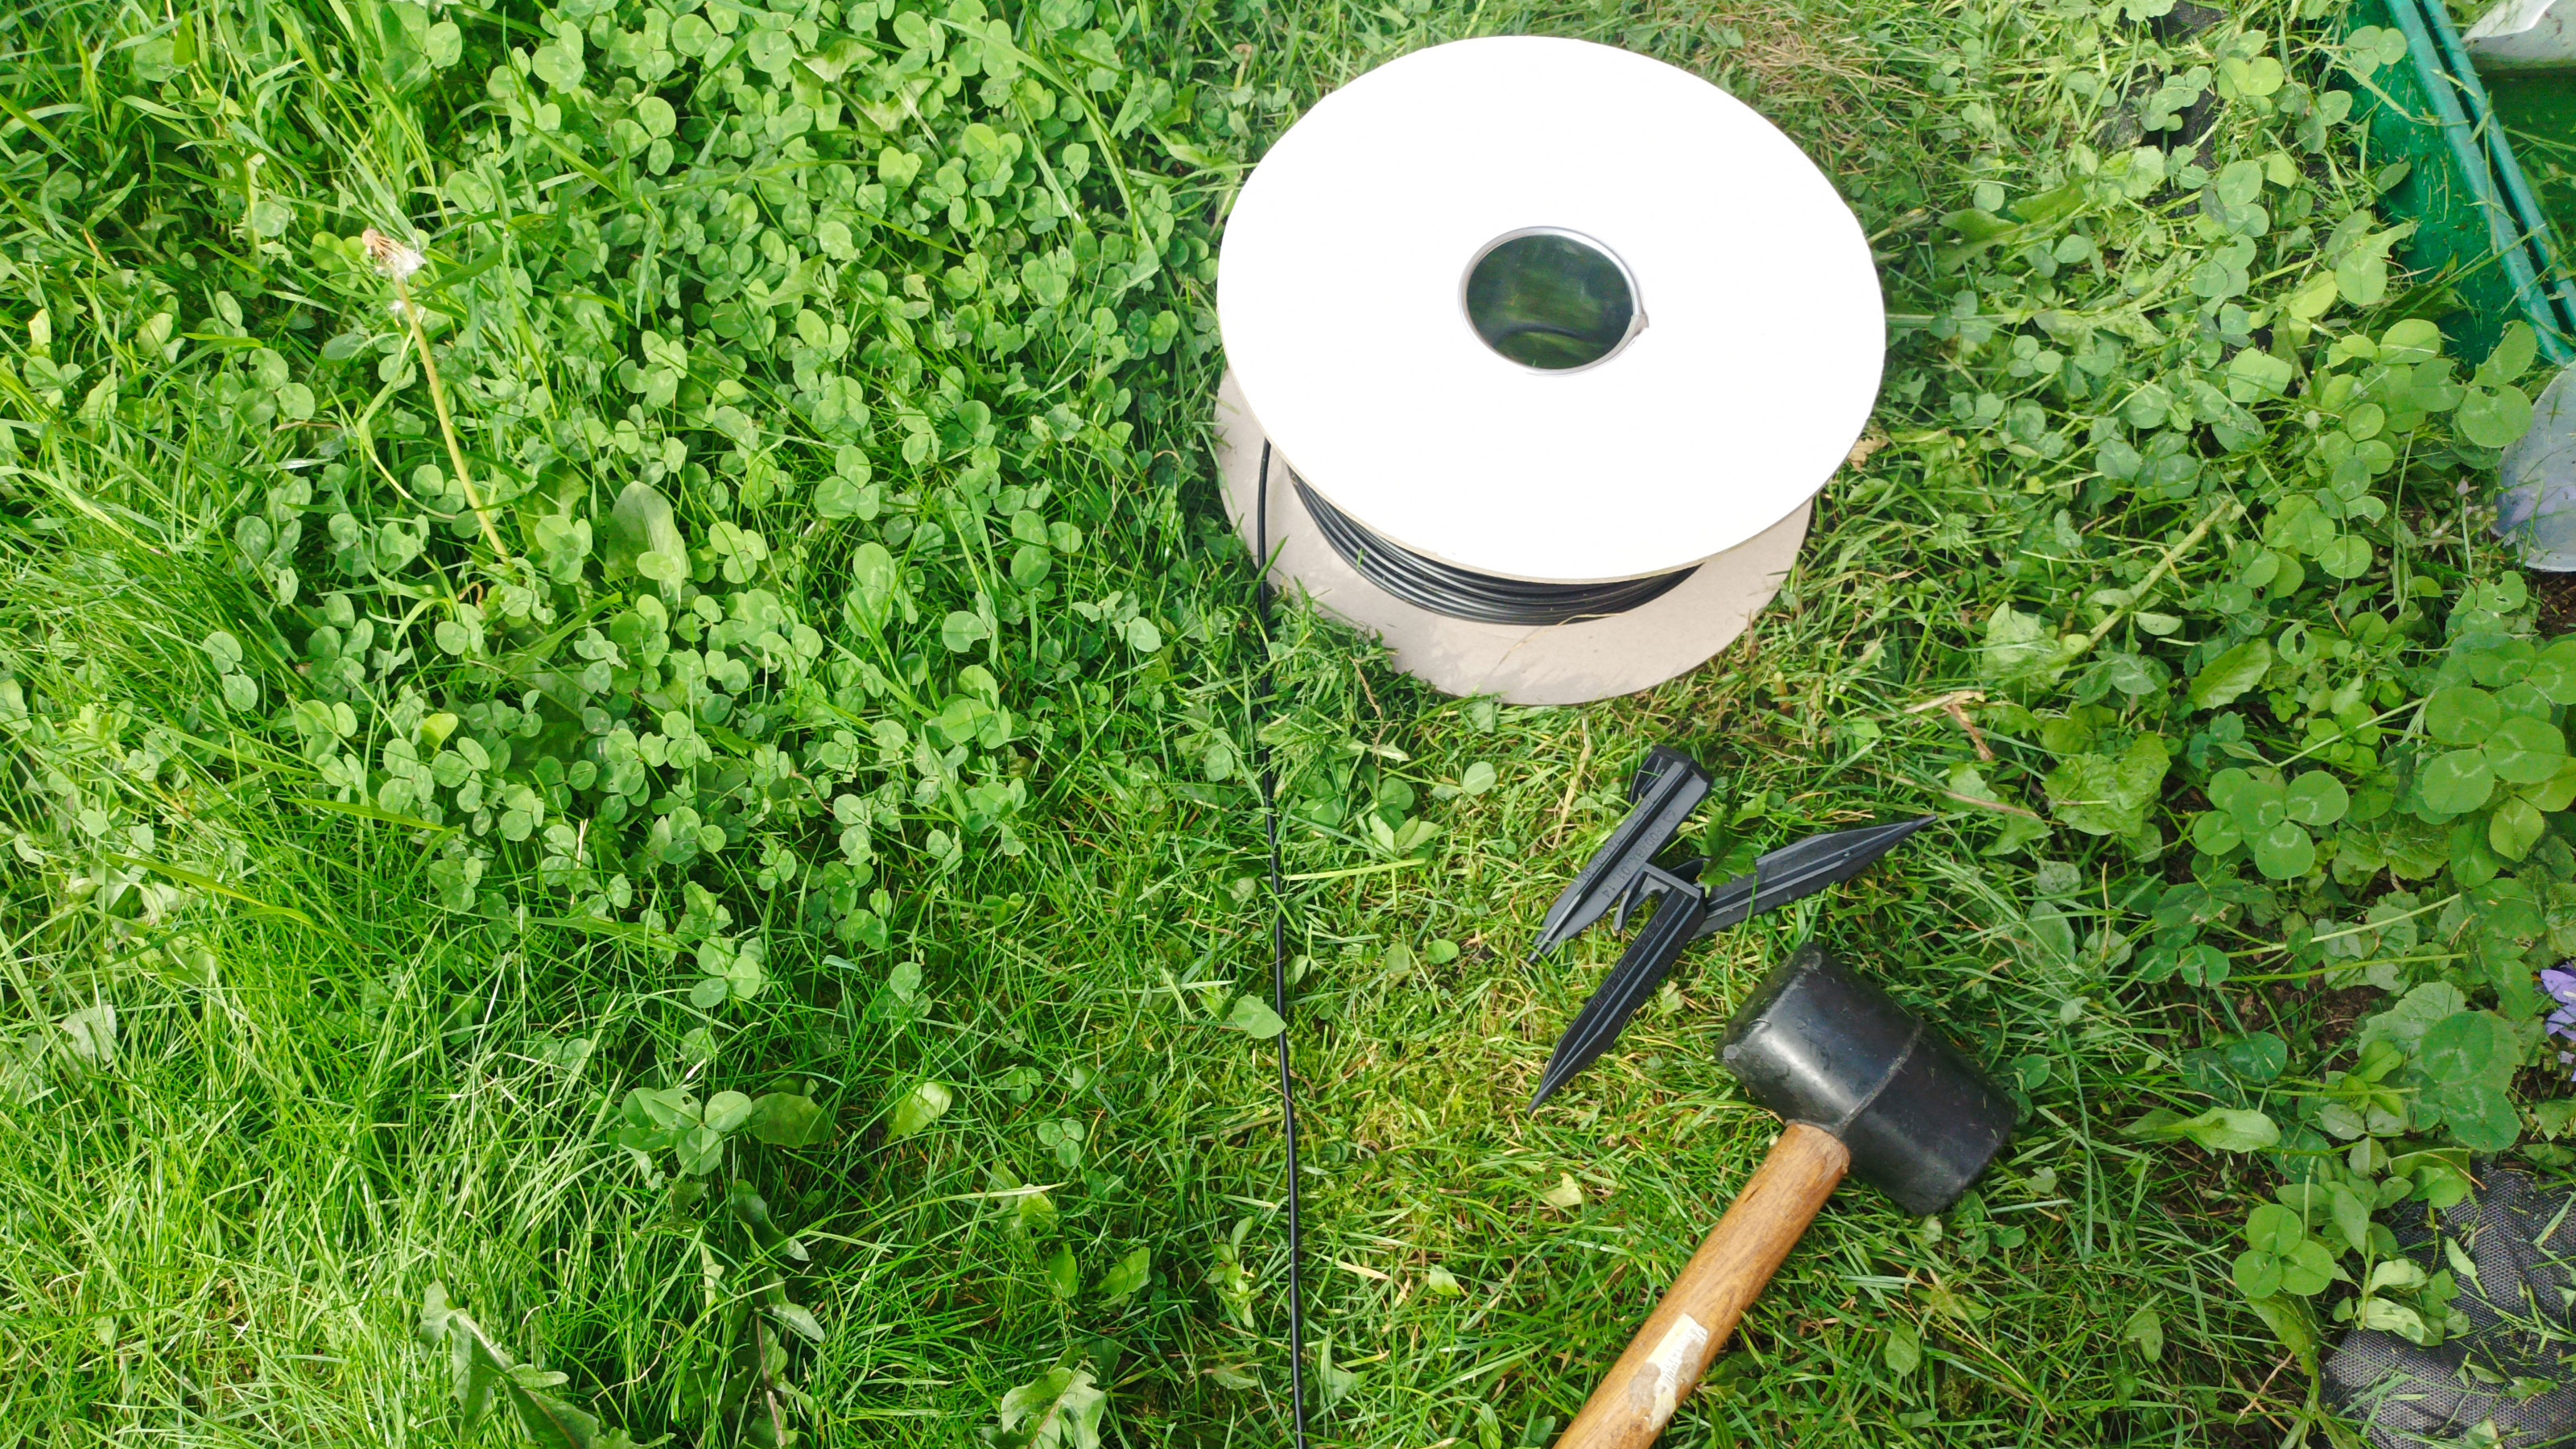
If you’ve never used a robot mower with a wire boundary before this is the most time consuming part. And you will need a rubber mallet and a pair of pliers. You need to lay the wire around the boundary of your lawn and peg down, so the bigger your garden the longer it will take. I have a 40m2 garden with straight edges most of the way all the way, so my setup was quite straight forward.
If there are any obstacles it is recommended that you go around at 90 degree angles. It took me around 20 minutes from start to finish, but this didn’t include mowing around the edges before laying, reading the instructions (beforehand) and connecting up the base station. So in reality, you need to allocate yourself at least an hour to get everything in place. Make sure you follow the manufacturer’s recommendations, because once you're past the initial set up there’s not much to do apart from use the mower.
There are a few rules that you need to follow to help the Lawnmaster L10 stick to the boundary and not run over the wire and attack your flower beds. First rule is that you need to keep the boundary wire taut, and the second rule is if you have a small dip in your lawn don’t cross the dip, peg the wire to the bottom of the dip.
With the boundary wire in place you need to finish the set up by connecting to the base station and a power outlet. On the plus side the L10 comes with a long power cable which gives you options to place the charging base pretty much wherever you want without the need for an extension cable.
Wiring up the perimeter cable wasn’t as easy as I hoped, but it was still reasonably straightforward. You need to read the instructions carefully and thoroughly to make sure everything is in the right place. And you will need to cut the wire to the right length, strip the wire’s casing and connect. You get a wire stripper included but it was still a little fiddly, but it's pretty much the same for most robot lawn mowers.
Let the LawnMaster L10 mow
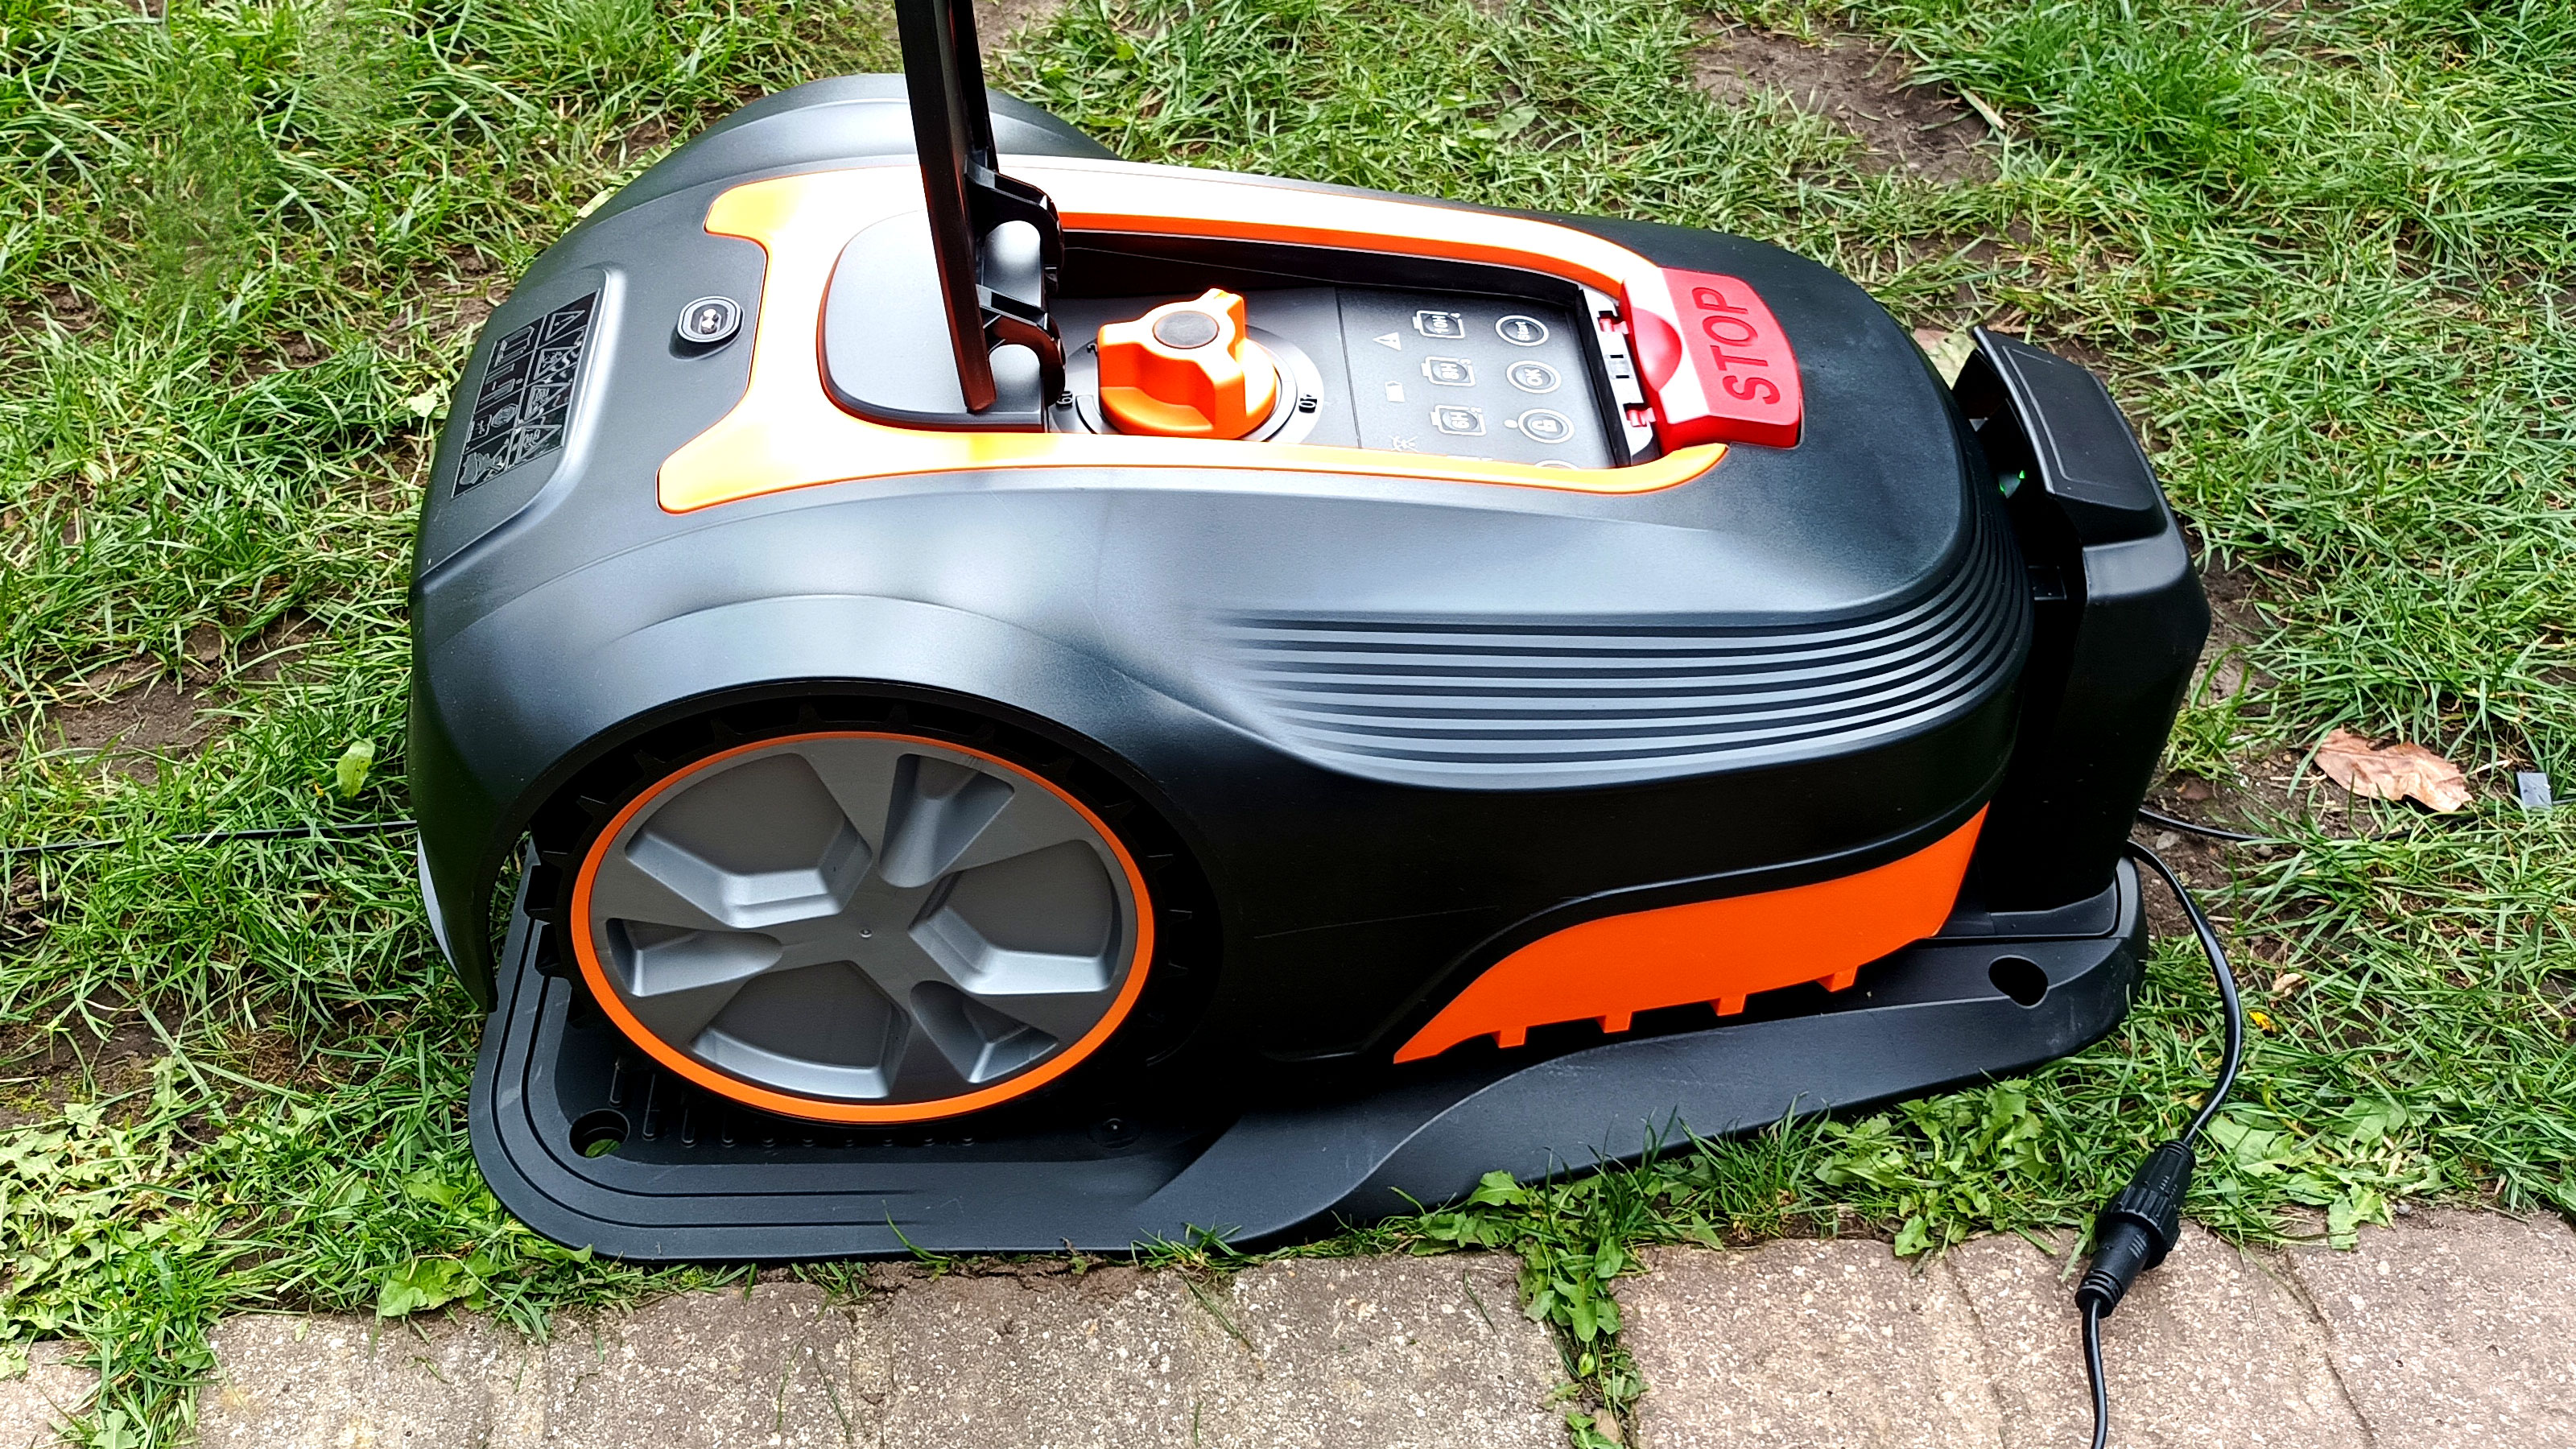
Every time I test a lawnmower I leave my lawn to grow to around 4 inches (100mm) to give it a good test. The Lawnmaster L10 has varied cutting heights from 20-60mm, so I set the first run at 60mm using the large orange twist handle. This has markings for different heights, but felt a little clunky when changing heights, but it worked effectively.
If you have a longer lawn you might need to get out your grass trimmer before letting the LawnMaster do its thing. In fact, like every mower you are still going to need a trimmer to finish the edges and the L10 is no different. You can adjust the perimeter wire to get closer to the edges. But, it's worth noting that the mower follows the wire back to the charging station when you press the Home button, so it's best to stick to the recommended distance.
Now we were finally ready for the first cut. You need to pull the cover on the top of the Lawnmaster to reveal its simple control panel. There’s no app here, so you need to be hands on. There’s a home, lock, OK and Start button along with scheduling buttons. You can choose how long to run it each day or alternative days with a simple press. We would have liked to see more scheduling options, but there is always the option to start manually when you want. There is a sequence you need to follow which includes the default PIN number (it's in the instruction manual) to start mowing. We forgot the sequence the second time around so it was back to the manual, but it's really not difficult.
How well does the LawnMaster L10 cut?
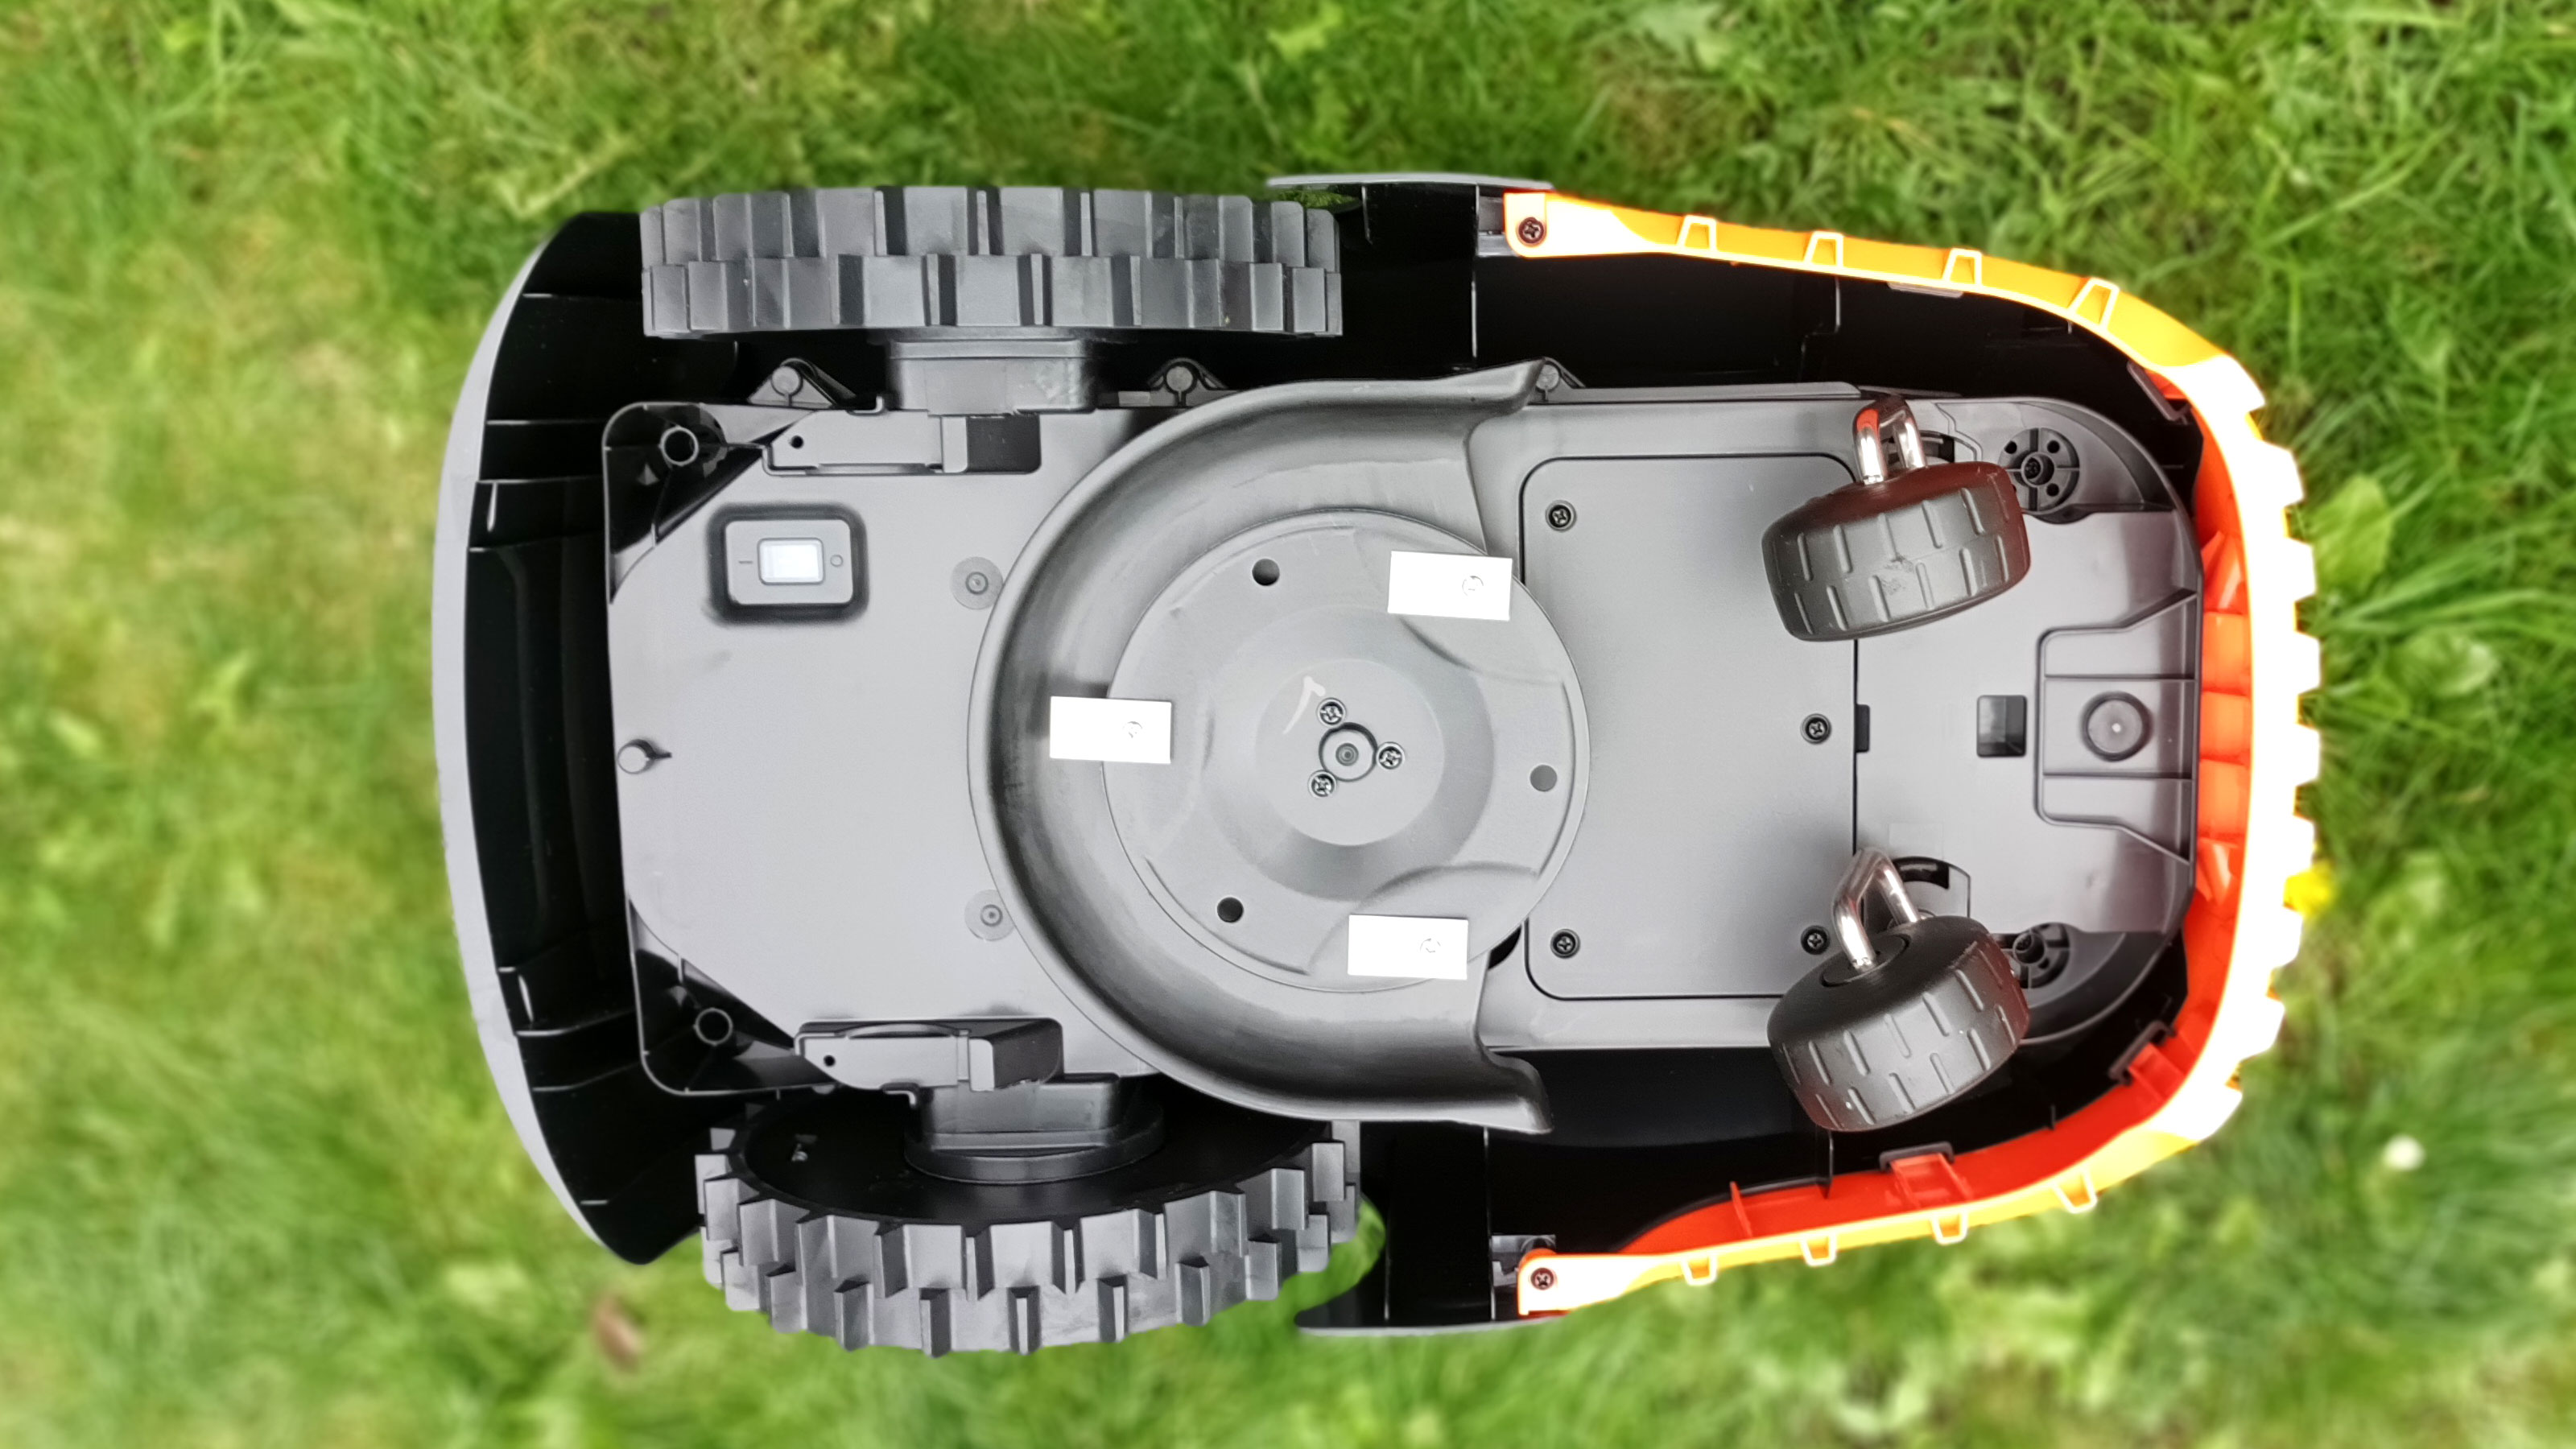
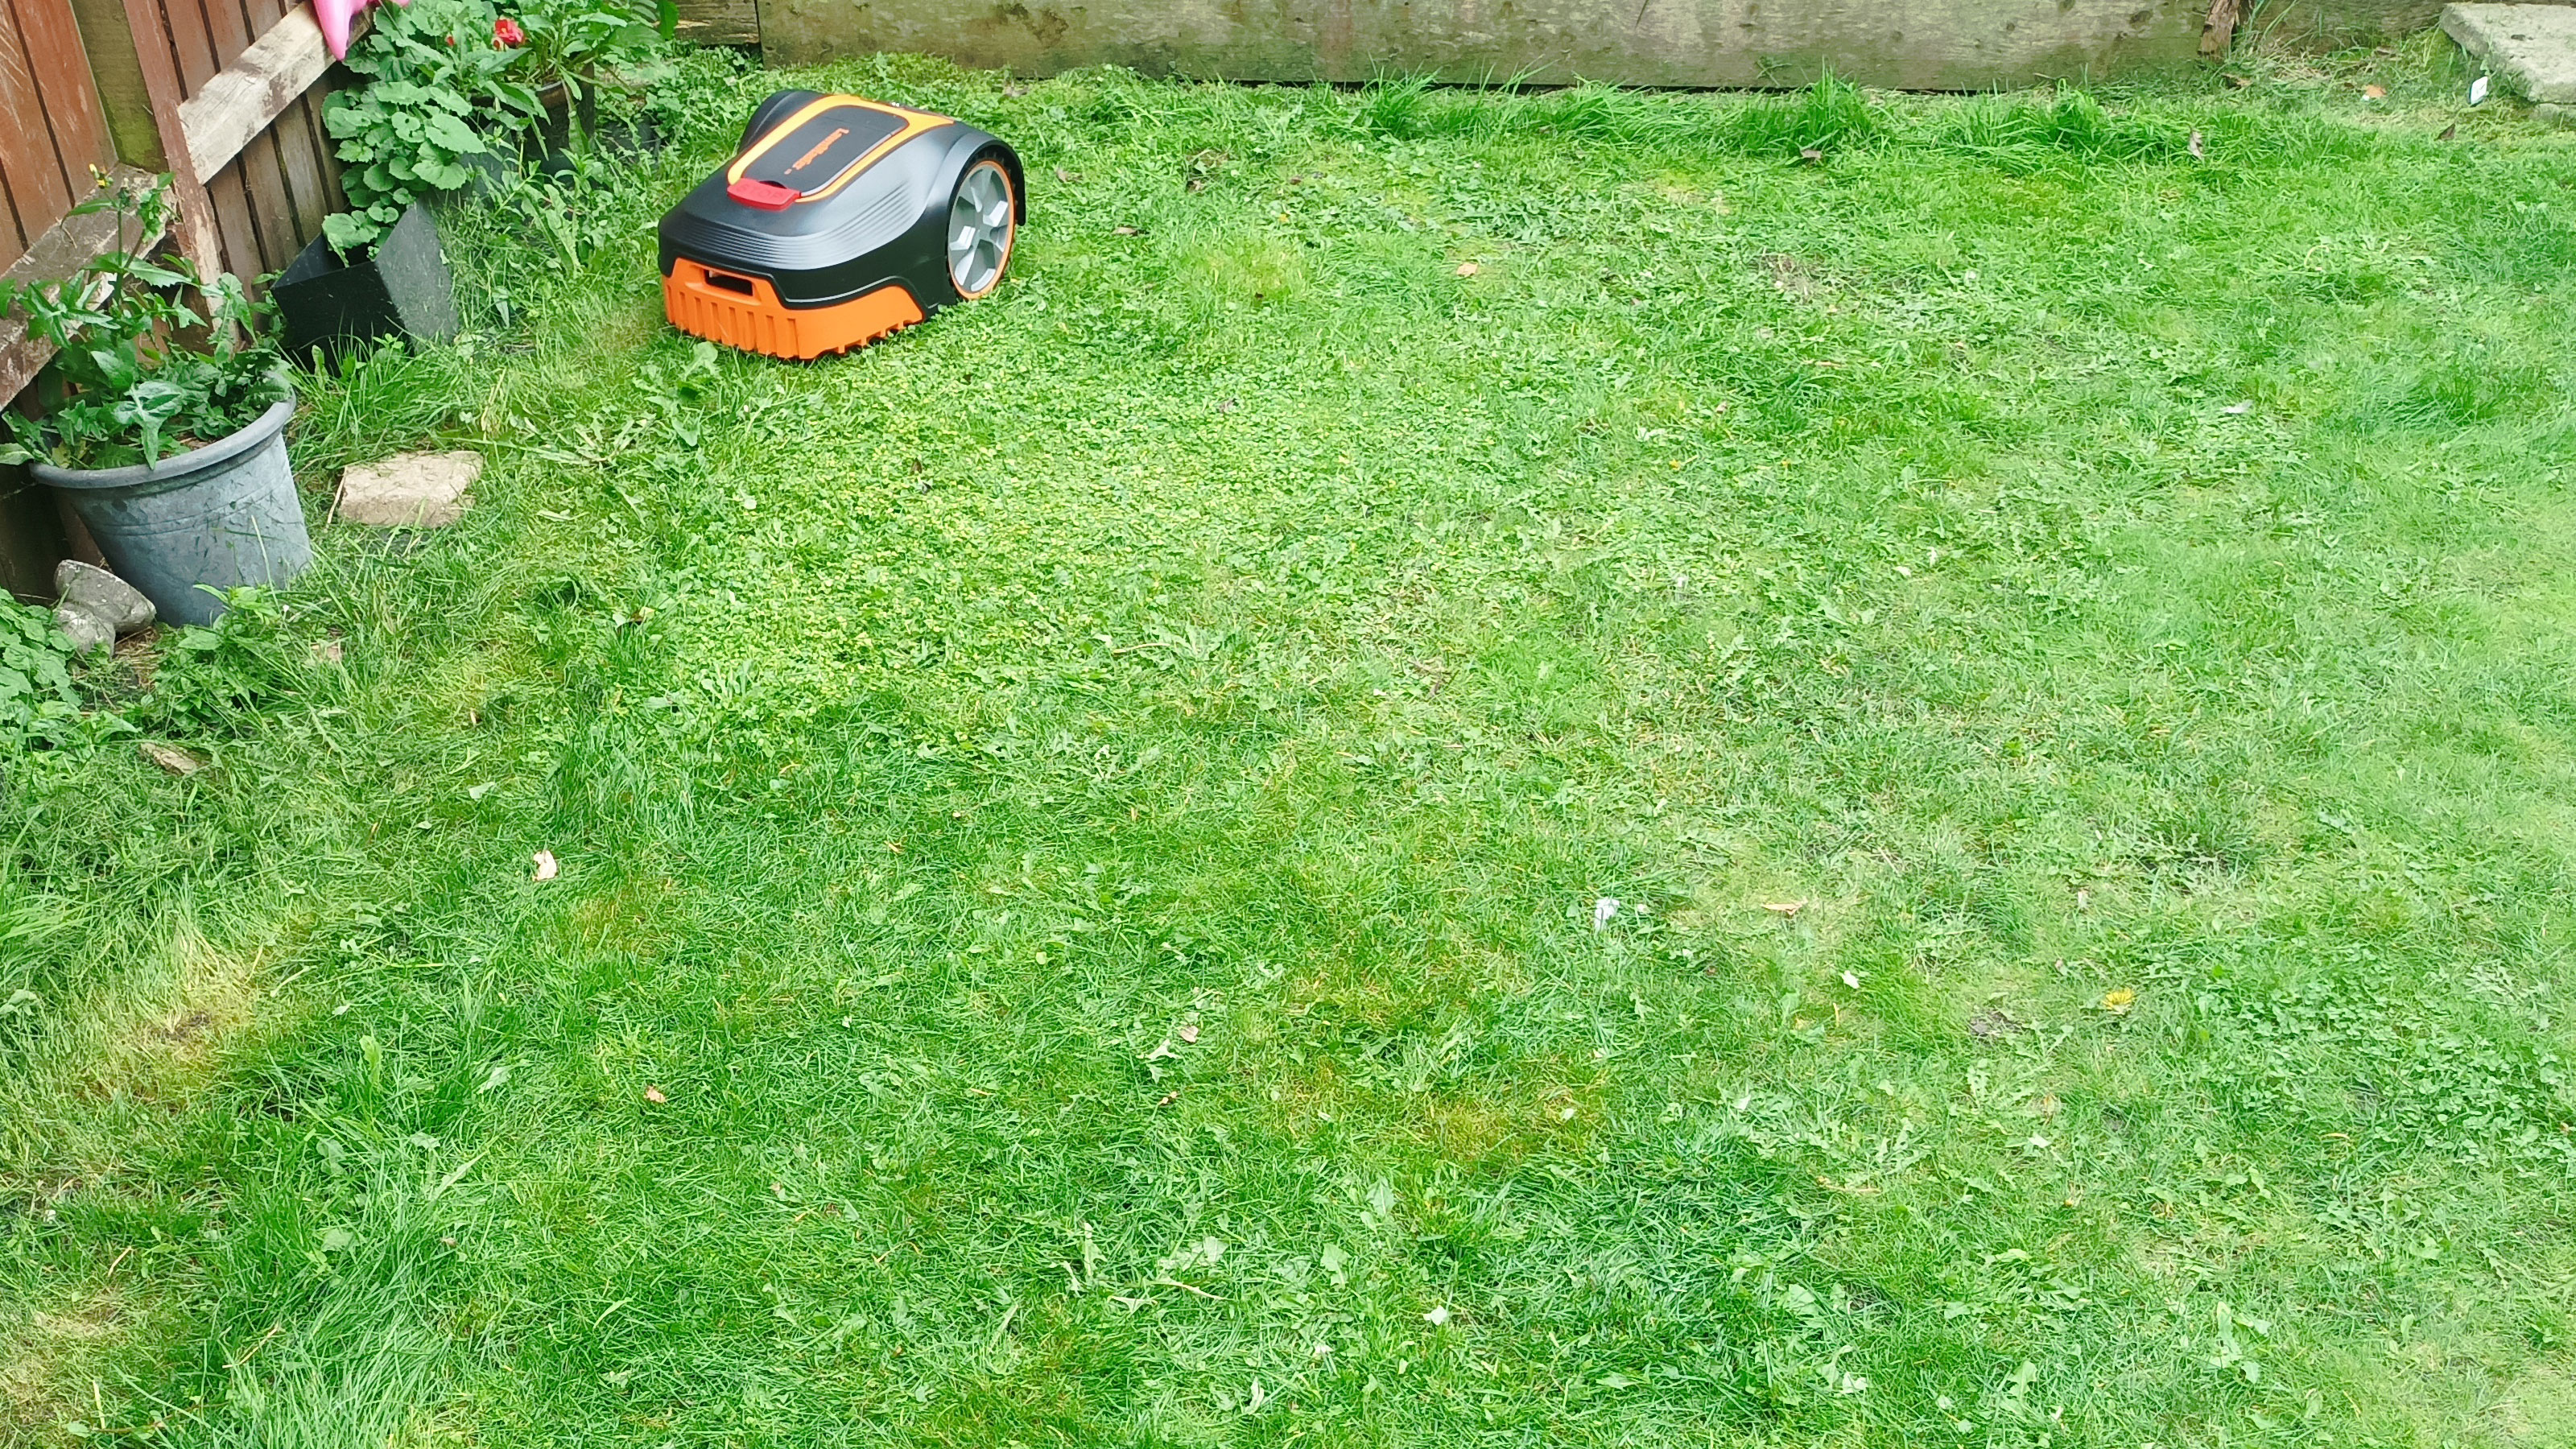
Like most robot mowers the L10 uses three small blades to cut the grass and they did a decent job. But – there’s always a but isn't there – the mower uses a random pattern which we found confusing. And, if we didn’t leave running long enough it missed small patches of grass. The first time we left it running for 30 mins to get the lawn in a decent state. For consecutive cuts we dropped the cutting height to 20 mm and ran for about 15-20 mins.
This gave a good finish, as good as my Mountfield cordless lawn mower. And, if it hits an obstacle it has bump collision detection, which means it simply reverses and carries on. You will need to hit the Stop button to stop mowing and hit the Home button to send it back to base and ready to recharge. To fully recharge takes around 45 minutes, but we recharged after each cut so the L10 was always ready for action.
What else does the LawnMaster L10 have to offer?
The option to set up a mowing schedule means you can leave the LawnMaster L10 to do its things on a regular basis. But if you do, rain is almost certain to come your way at some point. So can you leave outside? The L10 has an IPX rating of 5 which means it is protected against low pressure water from any angle, so the answer is yes. But, we kept ours covered in heavy rain and at night. And, there is a rain sensor that ensures that the mower doesn’t attempt to cut grass when wet.
The IPX rating also means you can easily wash the L10 without having to worry about water ingress. You don’t need a high powered pressure washer to clean, just standard hose pressure will suffice.
There isn’t a grass collector, which has its pros and cons. It means there is less to store in your shed and the cuttings are left to mulch. Which in some cases isn’t always the ideal choice. While not perfect the LawnMaster L10 is definitely a contender if you have a small/medium lawn and want a straightforward robot mower that does what it's supposed to do – cut your grass.
Steve Jenkins is a freelance content creator with over two decades of experience working in digital and print and was previously the DIY content editor for Homebuilding & Renovating.
He is a keen DIYer with over 20 years of experience in transforming and renovating the many homes he has lived in. He specialises in painting and decorating, but has a wide range of skills gleaned from working in the building trade for around 10 years and spending time at night school learning how to plaster and plumb.
He has fitted kitchens, tiled bathrooms and kitchens, laid many floors, built partition walls, plastered walls, plumbed in bathrooms, worked on loft conversions and much more. And when he's not sure how to tackle a DIY project he has a wide network of friends – including plumbers, gas engineers, tilers, carpenters, painters and decorators, electricians and builders – in the trade to call upon.
