Tiling a Kitchen Splashback: A DIYers How-to Guide
Tiling a kitchen splashback isn't something to be afraid of undertaking yourself. Here's how to tackle this project as part of your kitchen renovation

Tiling a kitchen splashback might seem like a daunting job to undertake if you're not an experienced DIYer, but it can be relatively easy, depending on the tiles you've chosen and the space to be tile.
A kitchen splashback tends to be a simple, rectangular area, and when using something like a metro tile, you'll only have to make relatively simple cuts at the edges, or for around plug sockets. What's more, a kitchen splashback only typically consists of around three to five rows of tiles, making installing a splashback yourself a good place to start when learning how to tile a wall.
If you're hoping to take on this DIY job yourself, there are a few things you should know to make your project a success. Here, we outline exactly what you'll need to tile a kitchen splashback, as well as the steps you'll need to take and best practice tips.
Tiling a Kitchen Splashback: A Step-by-Step Guide
Tiling a kitchen splashback is an effective choice, especially where budget is concerned when taking on a kitchen renovation.
"In the kitchen, one of the best ways to create instant wow factor is with a striking splashback behind the sink and hob," says Grazzie Wilson, creative lead at Sarsen Stone Group. "As well as being ultra practical and easy to clean, a tiled feature area brings colour, pattern and even unusual shapes to these hardworking zones."
Mosaics are one of the easiest DIY kitchen backsplash tiles to lay yourself, and they don't require cutting with specialist equipment like a wet tile cutter. You can simply cut the mesh backing to the size you need. There are modern mosaic styles coming through that mean this can still offer a stylish finish for your space.
Before laying down the steps you need to take, here are the tools you'll need for the job:
- Suitable tiles
- Grout
- Tile adhesive
- A sponge
- A grout float
- A notched trowel
- Spirit level
- Protective gloves
- Tile spacers
- A wet tile cutter
- A timber baton or strip
- A cordless drill
- A mixer attachment
- Silicone sealant and gun
1. Prepare the Walls
Ensure that your walls are dry and clean, with no uneven or bumpy surfaces. It can be worthwhile giving them a light sand to remove any grease or other residues on the wall. Lay protective covers over your kitchen surfaces.
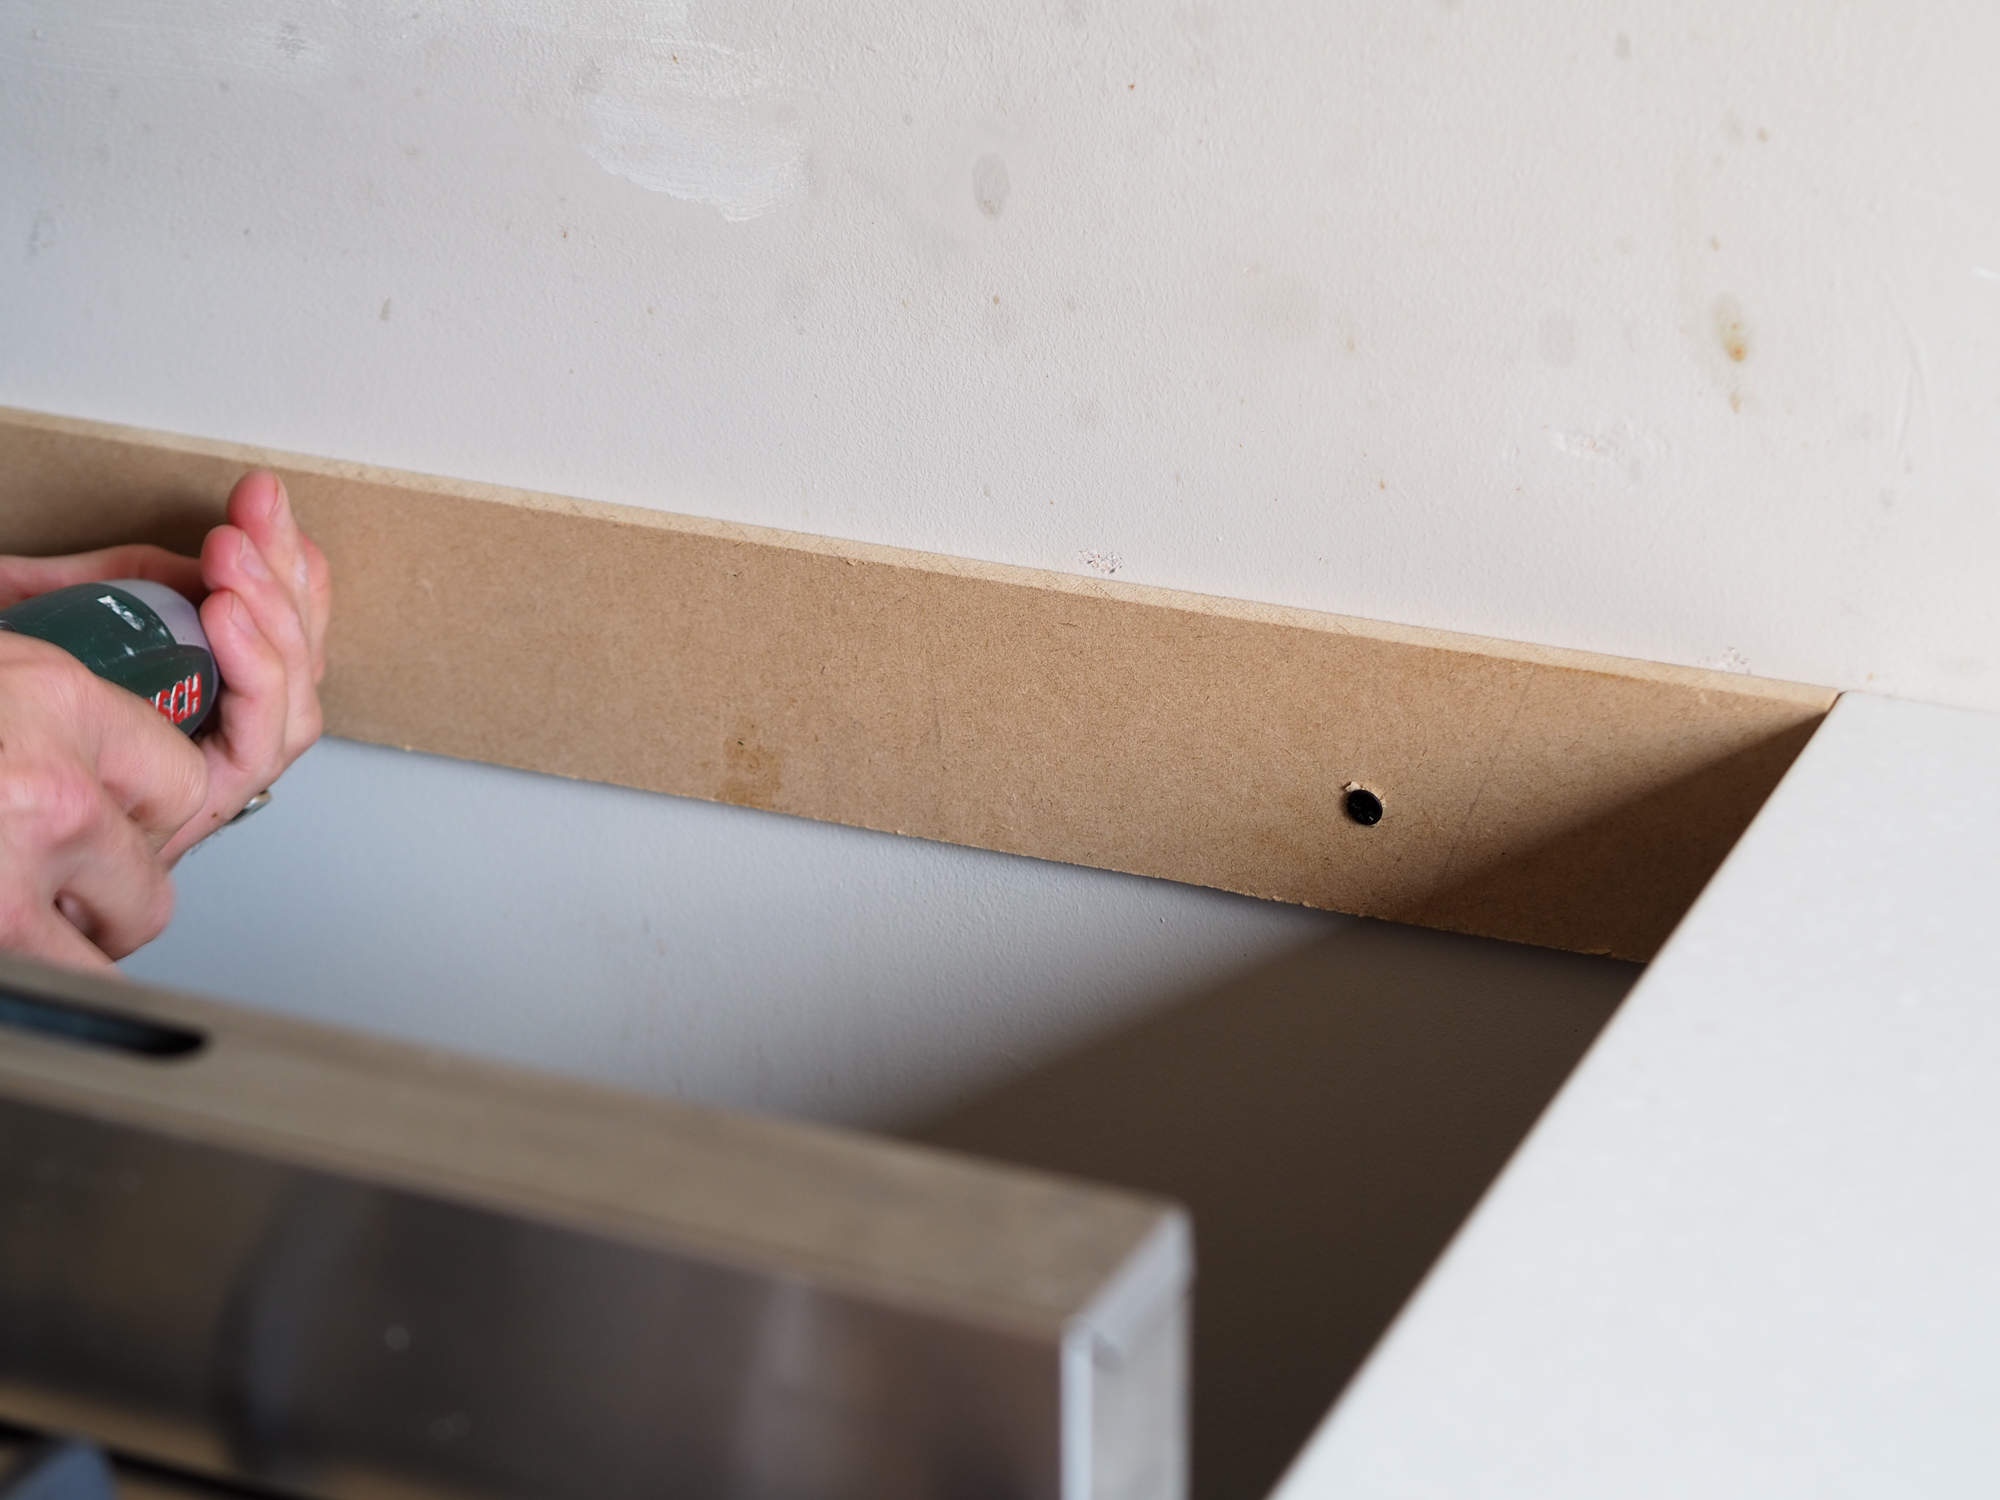
If you're tiling behind a range cooker, it's a good idea to pull it out and fix a timber batten or piece of straight MDF in the recess, level with the worktop. This gives you a plumb line to work with when tiling which can be removed afterwards.
2. Plan the Layout of Your Tiles
Before you get into the tiling, it's a good idea to take a quick look at how your tiles are going to sit, looking out for any problem areas where you might need to cut small pieces of tile to fill gaps.
At this point, you'll be able to identify where tiles will meet elements like plug sockets and switches. You can cut these now, but I prefer to do this when I come to tile that area, so I'm sure how the other tiles have been positioned.
It's worth checking that your surfaces and any surrounding walls or cabinetry are straight at this point, so you know whether they can be easily used to guide your tiling.
Using a spirit level, mark a vertical and horizontal plumb line in various areas of the wall to help you keep on track.
3. Apply the Tile Adhesive to the Walls
If you've bought a tile adhesive mix, make this now to the manufacturer's instruction, or use a ready made mix. I find the latter easier to work with as a tiling beginner, as you can pop the lid back on as and when you need to do without the adhesive starting to set.
Apply the tile adhesive in small areas, no bigger than a metre for the first row of tiles. If you've got cuts to do, do these before applying the adhesive to that section.
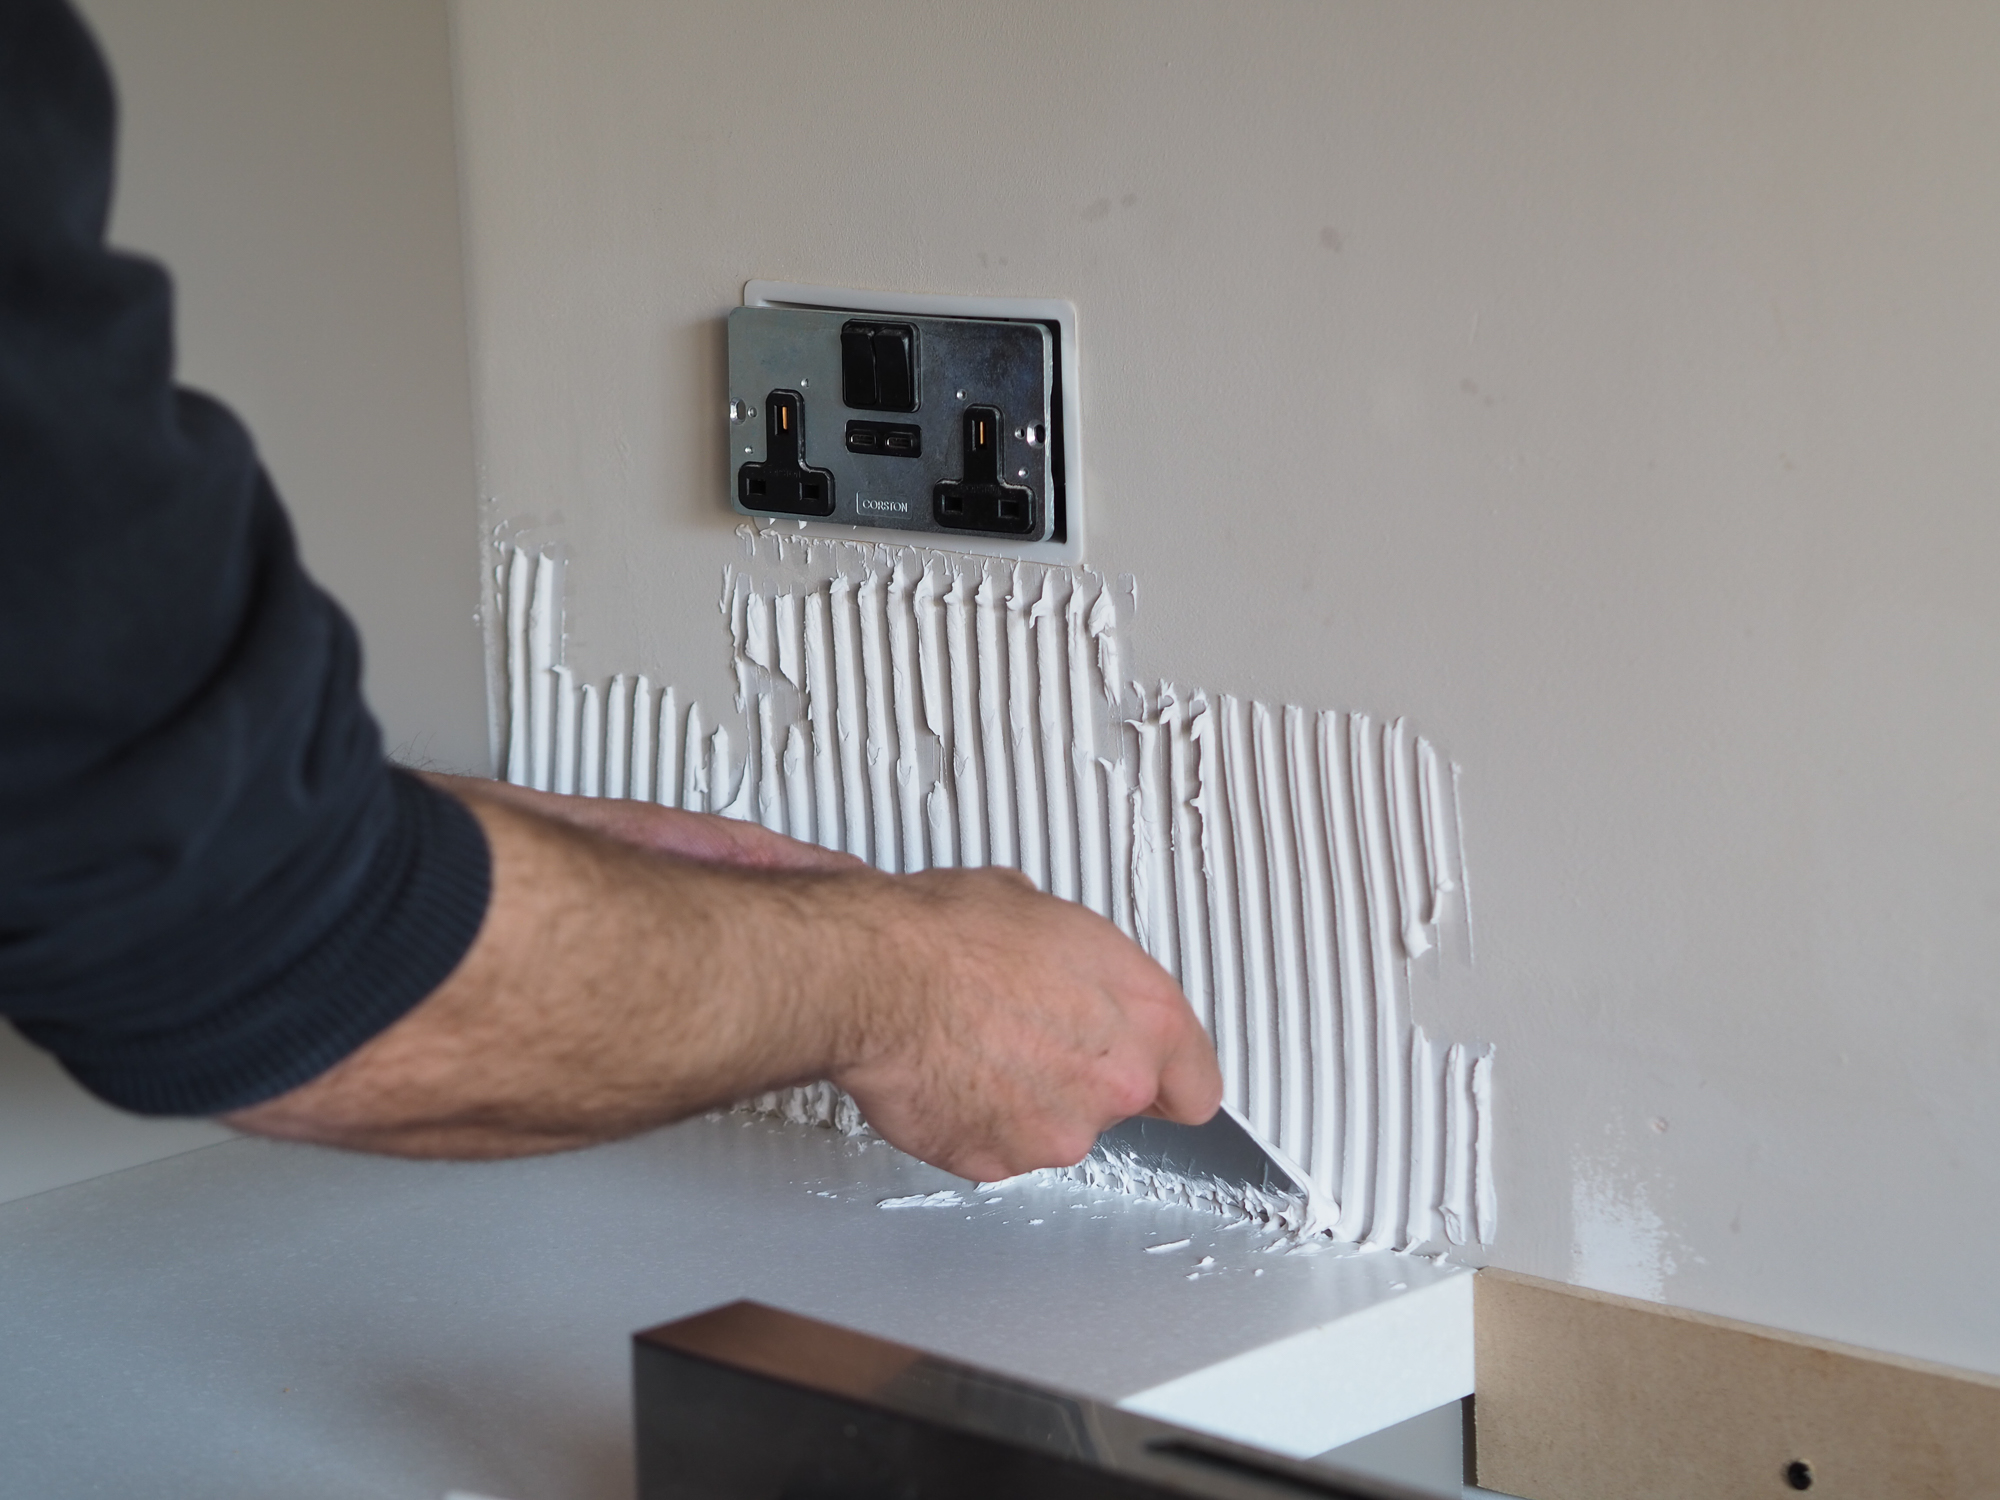
Apply the adhesive using a notched trowel (which is one of the best tiling tools for the job). This is really important in ensuring the tiles adhere properly to the wall. Make sure all the notches (lines) are in the same direction, as shown below.
4. Start to Tile
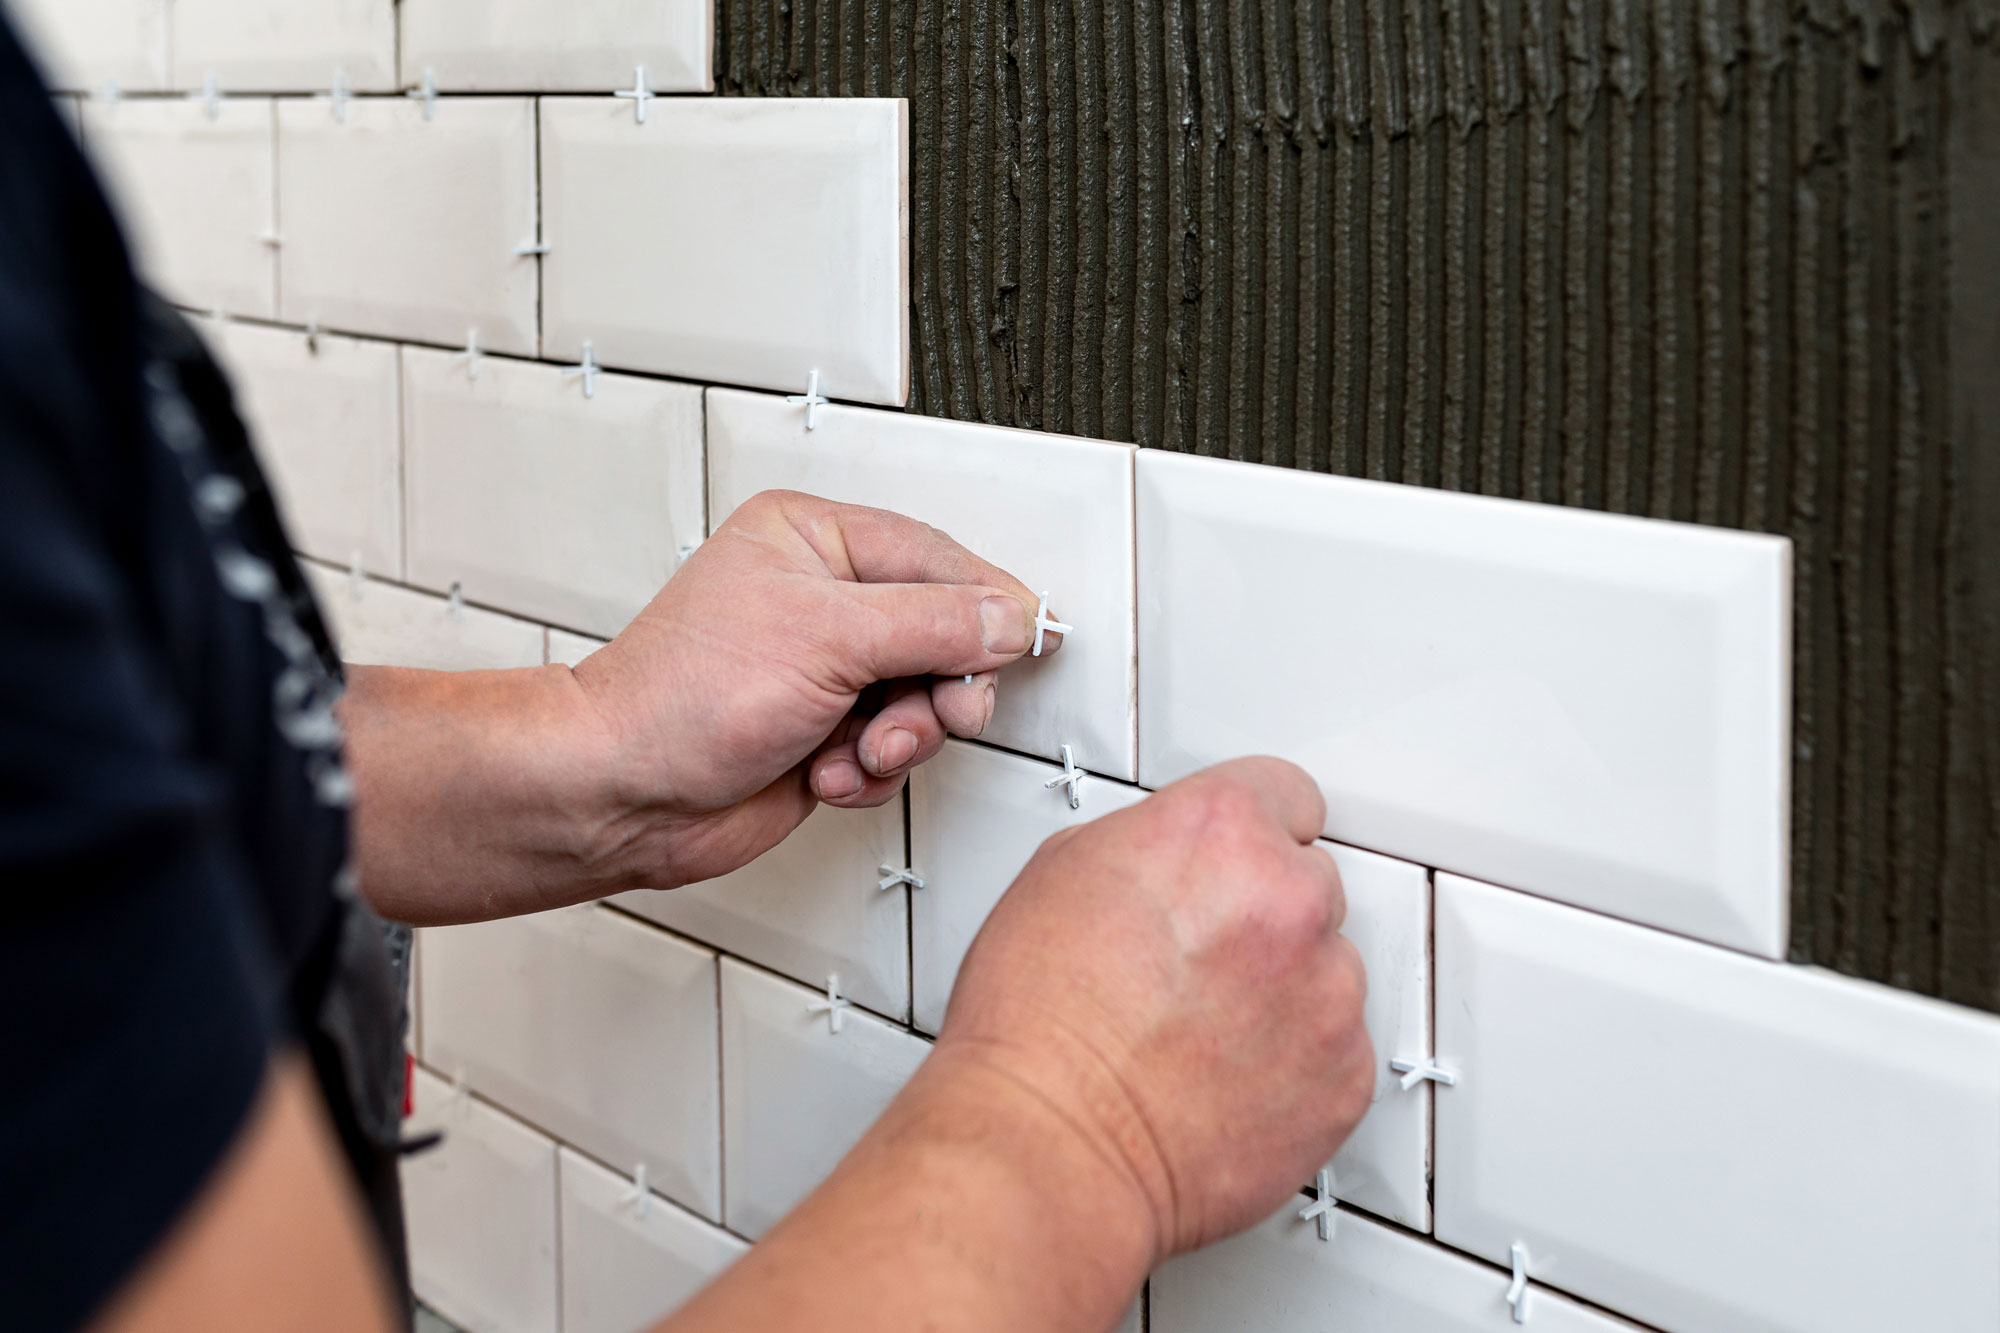
To adhere the tiles, push them into the adhesive. Using tile spacers is required in most instances. Use them under around each edge, including between the tile and the worktop as this will give your splashback some give if walls shift, and between each tile.
5. Measure and Cut Tiles for Around Plug Sockets
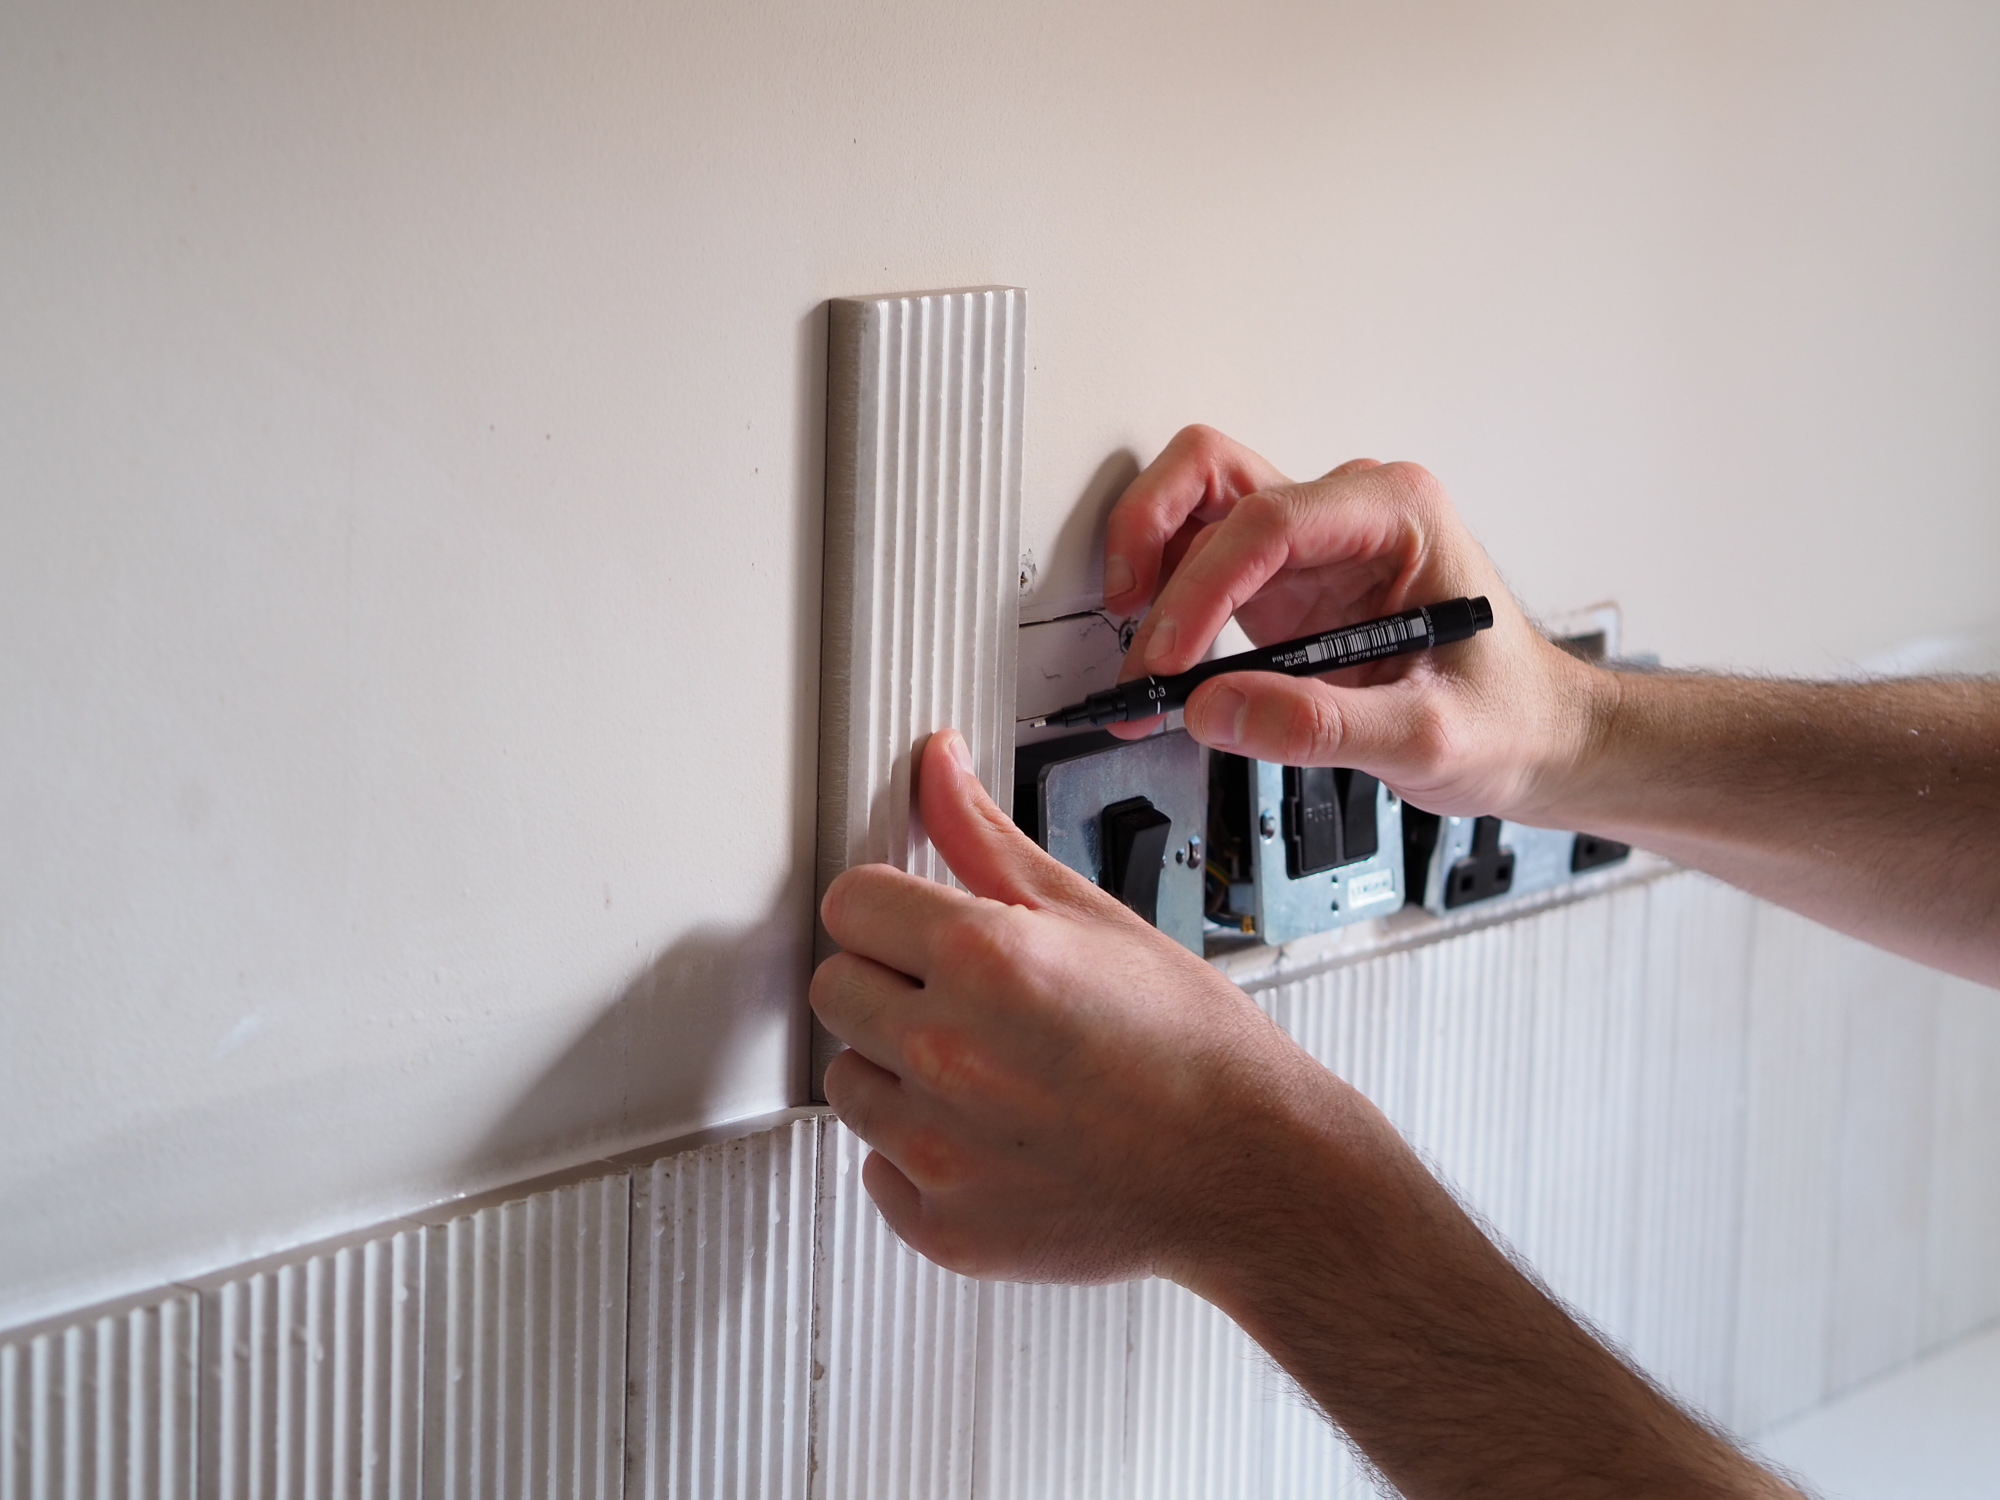
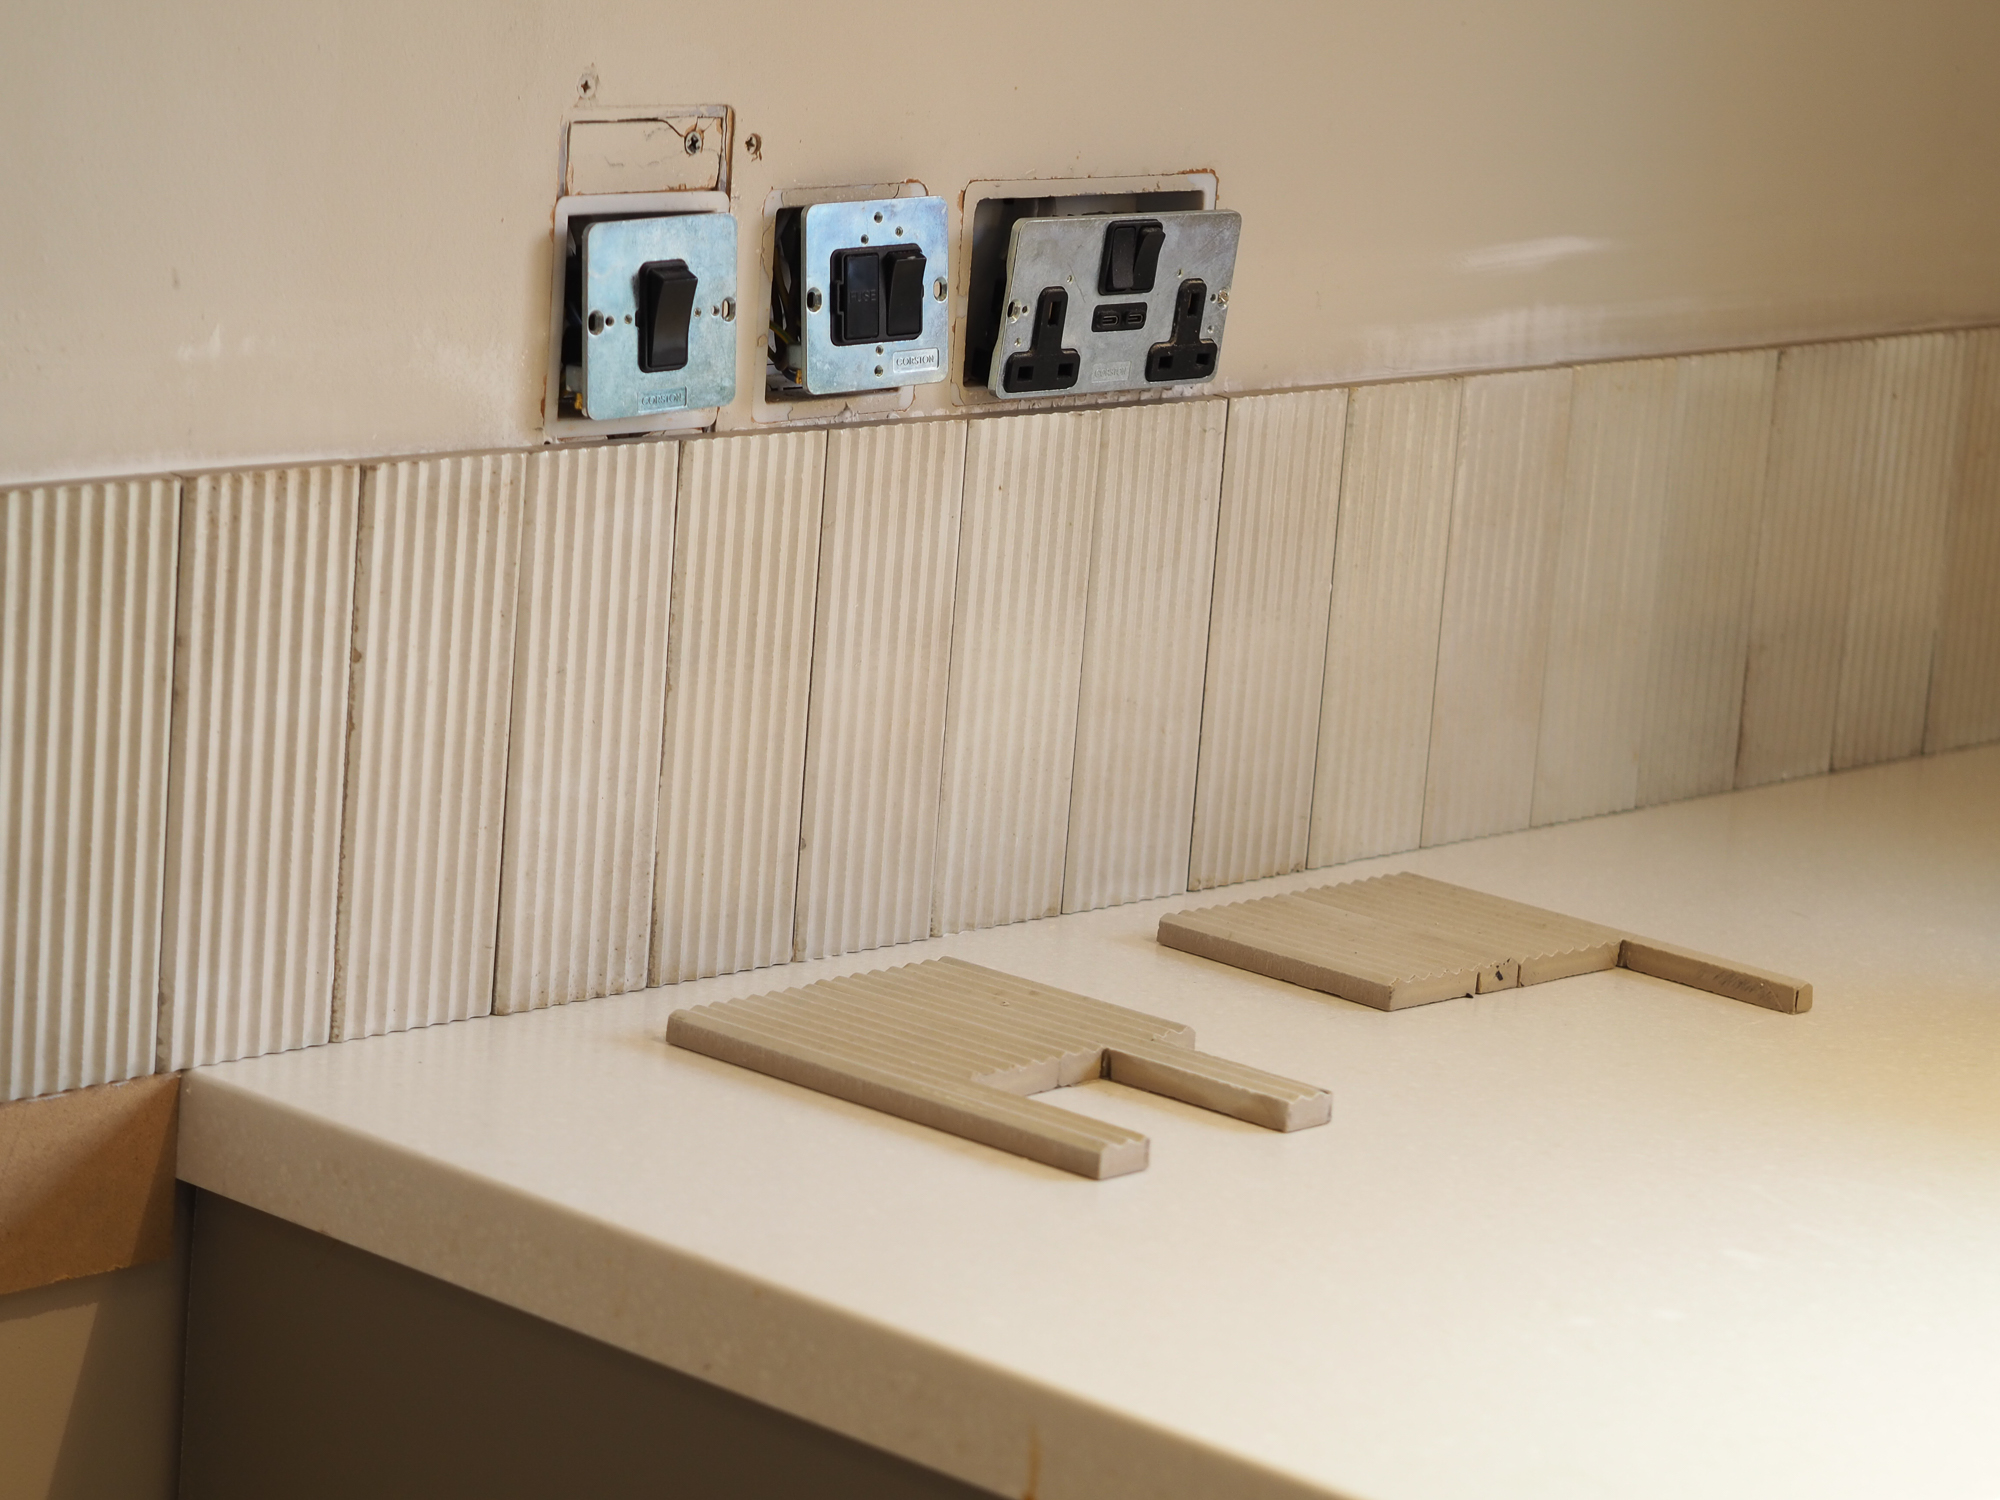
When you reach plug sockets or where you'll need to cut tiles for the ends of the splashback (it will be both ends if you're using a brick bond-style tile layout), set up your tile cutter to begin cutting tiles. A manual tile cutter will work for end cuts, but for plugs where you may need to cut right angles, you'll require a wet tile cutter.
Mark the tiles against the plug and cut with the wet tile cutter to fit. In some instances, your builder or electrician may have left you with raised socket boxes that you can tile up to, that have a lip the tiles will sit under.
In other cases, such as this, tile up to the box, ensuring the socket faceplate will cover any gaps. You may need to resize your socket's electrical screws to include the thickness of the tile in this instance.
6. Wait for Adhesive to Dry
Once you've tiled the entirety of the splashback, wipe the front of the tiles clean and leave the tile adhesive to dry, following the manufacturer's instructions. This might be overnight, or a few hours. Once dry, you can remove your timber level from behind the range.
8. Apply the Grout
Mix the grout as per the manufacturer's instructions, or use a ready made mix. Using protective gloves, apply the grout into the spaces between the tile using the grout float. Press it into the gaps, holding the float at a 45° angle to do this.
Wipe the tiles clean as you go, but be careful your sponge isn't too wet. This can affect the grout mix consistency, weakening your grout. A slightly damp sponge is best. Leave the grout to dry.
10. Apply Sealant and Add the Socket Fronts
After you've finished tiling, it's a good idea to run a small amount of silicone along the base edge, especially if your splashback is behind a sink. This will help prevent water ingressing between the worktop and the splashback.
Fix your socket fronts back in place using the original screws, or longer ones if required.
Do you Tile Before or After Fitting a Kitchen?
Tiling a kitchen splashback is always done after the kitchen has been fitted. You'll want to make sure you protect your kitchen surfaces and cabinetry while doing this, though both grout and adhesive should be easy enough to wipe away if done so immediately when spilled on these surfaces.
Do I Need to Seal a Kitchen Splashback?
Some tiles will require sealing, such as encaustic tiles, to prevent stains from oil and water. Using a grout sealant can also keep your grout looking better for longer, though it's not strictly required.
How Long Does it Take to Tile a Splashback?
Tiling a splashback is a relatively quick job if it doesn't require lots of tile cutting. Tile adhesive can dry in as little as a few hours, and you should only be working in small areas at a time, or else the adhesive can go off before you apply the tiles.
With the prep work done ahead of time, you can easily tile a kitchen splashback in a few hours. Add another hour or two for grouting.
Can you Tile Over Existing Tiles?
It's certainly possible to tile over existing splashback tiles (although it's advisable to remove old tiles in order to tile directly onto the wall). There are benefits, such as speed and ease compared with removing existing tiles, but there are also drawbacks, such as the aesthetic appeal. Tiling over tiles will leave you with a thicker than average splashback, plus you won't be able to use a tile trim in the same way you could when tiling directly onto the wall.
Make sure the existing tiles are clean and still well-adhered to the wall before tiling over. You should also bear in mind that different walls have different loadbearing capabilities, and two layers of tiles, especially heavier ones, could cause you issues.
It's also worth taking advice on the best adhesive to use from manufacturers for a tile base.
Get the Homebuilding & Renovating Newsletter
Bring your dream home to life with expert advice, how to guides and design inspiration. Sign up for our newsletter and get two free tickets to a Homebuilding & Renovating Show near you.
Luke Arthur Wells is an award-winning interiors blogger and stylist. His blog has been one of Vuelio's top 10 interior blogs for four years running, and he recently won the Best Creative Skill category at the Amara Interior Blog Awards. Luke has worked with some of the UK's biggest brands, from John Lewis and Made to Farrow & Ball and B&Q. He's a big DIYer, and loves coming up with creative woodwork projects for his home, a Victorian terrace renovation in Essex.

