A DIY guide to spray painting wood for a smooth, professional finish
If you want a factory-like finish, spray painting wood is one way to make it happen. Discover all you need to know to achieve smart silky results

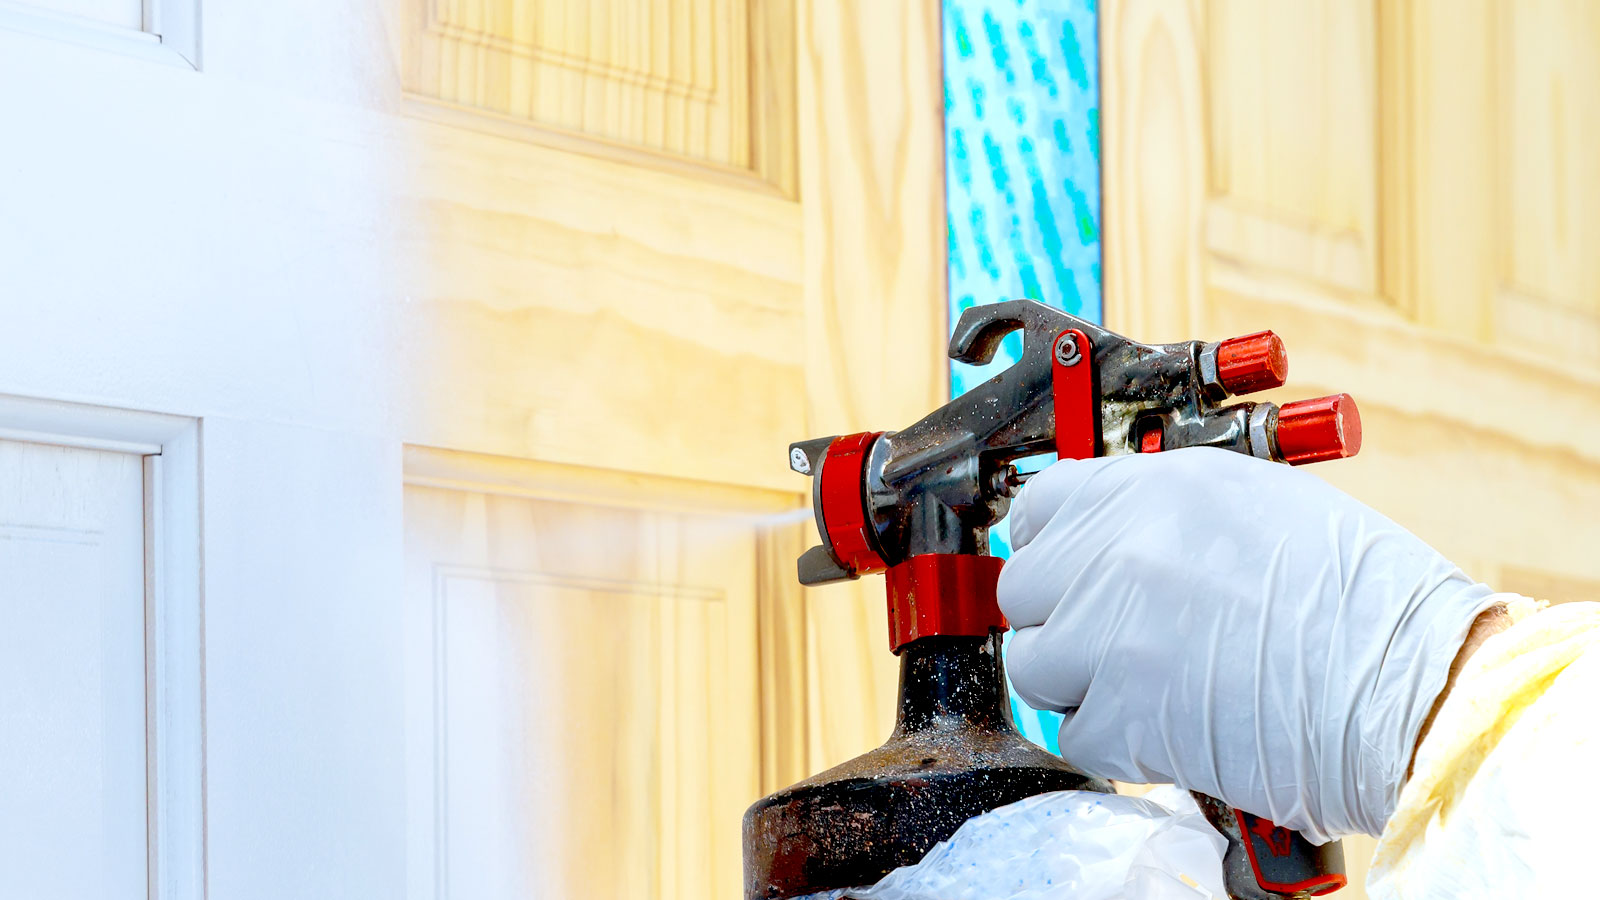
There’s an art to spray painting wood and done correctly this technique will give you impressive results. Spray painting is perfect for achieving a professional finish on your kitchen cabinets, doors, windows and wooden furniture.
Whether you’re spray painting natural woods or processed woods, like all painting wood projects, you need to get your prep right. Don’t, and that super, smooth finish will be a dream.
But it's not just the preparation that needs to be right, your technique wants to be consistent and assured. So you might want to do a few practice runs after reading this guide to hone your skills before you dive in on your next project.
Spray painting wood: The pros and cons
“The biggest benefit of painting wood with a professional sprayer is that you get a much more even and controlled coat than if you use a roller for coverage.” explains Brandon Walker, foreman at ASAP Restoration LLC. “This can be critical for highly visual spaces like kitchen cabinets, but it can also make DIY projects look cleaner and more professional as well.”
But getting a pro finish does have its drawbacks, “The downsides of using a professional sprayer for this type of work is that it can be much more to clean up than just using a roller for the project. The upfront cost of this tool is also a barrier that might not make it worth a purchase for many DIYers.”
Prepping before spray painting wood
A well-prepared surface will ensure that a sprayed surface will give the best finish. Here Walker reveals the steps he recommends you take to ensure a clean finish.
1. Clean the wood
It's essential to thoroughly and completely clean the wood surface to ensure proper adhesion and a smooth finish of the paint. Use a soft brush or vacuum with the brush attachment to remove loose dust and debris. Follow this up by wiping the surface with a damp cloth or a mild cleaning solution such as acetone to remove any remaining dirt or grime.
2. Sand the surface
Sanding the wood surface helps to create a smooth and uniform texture while also enhancing paint absorption too. Use sandpaper with the appropriate grit for the desired finish. Finer grits create a smoother finish and coarser grits are used for more texture. Sand in the direction of the wood grain to avoid damaging the surface if possible.
3. Prime the surface
Applying a bonding primer to the wood surface before painting helps to improve adhesion and durability of the final paint finish. Choose a high-quality bonding primer that is specifically formulated for wood surfaces for the best results. Apply the primer evenly using a brush, roller, or spray gun, and allow it to dry completely according to the manufacturer's instructions before painting.
4. Ensure proper hydration
Proper moisture content in the wood is crucial for achieving a successful finish. Excess moisture can cause issues such as peeling, cracking, popping, or even mold growth. Use a moisture meter to measure the hydration content of the wood and ensure that it is at or below the recommended level for the type of finish you are applying and for the species of wood being used.
If necessary, allow the wood to acclimate to the surrounding environment before proceeding with painting or staining to ensure the best results.
How to spray paint wood
1. Prepare area and yourself
Spraying paint can leave a lot of paint spray in the air and is harder to control where it will lie than a brush or roller. Ideally, spray outdoors on a bench or a couple of saw horses like this Evolution Power Tools Saw Horse from Amazon. If spraying indoors, spray in a well ventilated room, cover the surrounding areas with sheets – if needed – and wear a mask .
2. Do a test spray
Dilute your paint and load up your spray gun and do a test spray on an out of the way area. This will help pull the paint through the nozzle, ensure its working OK and give you an idea of how much pressure you are going to need to apply.
3. Spray paint the wood
Start your spray gun just outside the edge of your starting point, start at the top and move up and down the wood in even, consistent, constant moving strokes. Hold around 5-15 cm from the surface. Leaving in one area for too long will cause paint buildup, leading to an uneven surface and eventually runs.
Leave the first coat to dry and clean the spray nozzle if not going to be used for a while. Check manufacturers recommendations. Add a second coat, leave to dry and if needed add a clear top coat.
FAQs
What type of paint spray gun should I use?
This depends on what type of wood spray paint job is being tackled and how often you are going to use the spray gun. The cheaper spray paint guns like this WAGNER Wood & Metal paint sprayer from Amazon, are good for most general wood painting tasks such as fences, doors and furniture. But, they are best suited to occasional DIY use. They are not really built for regular everyday use.
For larger projects and regular use you will need to invest in a HVLP paint sprayer or an airless sprayer — depending on your project. These cost more, but are a worthwhile investment if you are going to do a lot of spray painting.
Alternatively, for smaller projects you can purchase paint spray cans like this Rust-Oleum Painters' Touch Spray Paint from Amazon, which negates the needs for investing in a spray gun.
How many coats of spray paint are needed on wood?
Typically you need two coats of top coat to get a strong, smooth finish. Make sure that the first coat is even and completely dry. Note the manufacturer's instructions on drying/curing times. Check the finish and rub down with a fine 240 grit sandpaper grade if needed.
Don’t forget to brush/vacuum and wipe down the surface with a damp cloth to get rid of any dust. Apply the second coat. Add a clear sealer coat if wanted/needed.
If spraying bare wood at least one coat of primer will need to be applied to provide a base for the top coats. A primer is also a good choice to cover stains, knots and help hide a darker colour paint if not painting bare wood.
Can I use gloss in a spray paint gun?
Yes, you can use pretty much any paint (or stain, varnish) you want in a spray paint gun. But you will need to thin the paint to ensure it doesn’t clog the nozzle and gives you an even spray.
The typical ratio for thinning is 80/20, or 70/30 if you have a thicker paint. So that’s 8 parts paint and 2 parts thinner. For water based paints simply dilute with water, for oils based paints dilute with white spirit like this Palace Langlow White Spirit from Amazon. But, don’t forget to check the manufacturer's recommendations for spray guns to make sure.
Can I spray paint MDF?
Yes you can spray paint MDF, it's very much the same process as prepping and painting any other wood. But you will need to use a primer to seal the MDF. And pay particular attention to the edges.
Adding paint will raise the wood grain, so one option is to fill with wood filler and rub down before painting. Another is to apply MDF edging tape before you start.
Preparation is key for any wood painting projects, so you need to know how to strip paint off wood and what are the best sandpaper grades to use to get a good finish.
Get the Homebuilding & Renovating Newsletter
Bring your dream home to life with expert advice, how to guides and design inspiration. Sign up for our newsletter and get two free tickets to a Homebuilding & Renovating Show near you.
Steve Jenkins is a freelance content creator with over two decades of experience working in digital and print and was previously the DIY content editor for Homebuilding & Renovating.
He is a keen DIYer with over 20 years of experience in transforming and renovating the many homes he has lived in. He specialises in painting and decorating, but has a wide range of skills gleaned from working in the building trade for around 10 years and spending time at night school learning how to plaster and plumb.
He has fitted kitchens, tiled bathrooms and kitchens, laid many floors, built partition walls, plastered walls, plumbed in bathrooms, worked on loft conversions and much more. And when he's not sure how to tackle a DIY project he has a wide network of friends – including plumbers, gas engineers, tilers, carpenters, painters and decorators, electricians and builders – in the trade to call upon.

