Sealing a bath the right way will give you a watertight finish that will stop water getting where it shouldn’t. Here we reveal the steps and tools you’ll need for a pro finish
Sealing a bath is crucial to stopping water from seeping into spaces where it's not wanted. Poorly applied silicone can be a key culprit, so you need to make sure that you prep and apply properly. This means you need to choose the right tools and the right sealant.
You also need to get your caulking application and finishing right. If you're new to using a caulking gun, make sure you practice before you start sealing your bath. And make sure you’ve got your smoothing process sorted. Get all of these elements right, and you’ll be left with a professional-looking finish.
Gareth Davies
Gareth Davies has over 20 years of design experience with an extensive background in overseeing intricate interior projects and ensuring attention to detail in bathroom and kitchen design.
Sealing a bath: A step-by-step guide
1. Clean the area
Begin by brushing away any debris or dust with a stiff hand brush. Next, use a vacuum to remove any remaining dust or debris. To clean the area where the silicone will be applied Gareth Davies, Design Director at Classic Interiors says, "I've found that starting with a simple mix of vinegar and water works wonders for cutting through soap scum and sanitising without harsh chemicals." He adds, "A good old microfibre cloth helps too; these grab dirt surprisingly well."
To finish, he says, "Always make sure the surface is dry before you begin sealing, or it'll undo all the good preparation work."
2. Mask bath and tiles
Apply a strip of masking tape – blue painters' tape works well – on either side of the area where the silicone will be applied. Leave a gap of about 3mm on both sides. Increase the gap if necessary.
3. Sort your silicone
Cut the silicone nozzle at 45 degrees around 5-20mm down the nozzle with a sharp knife. It's best to start small and then go larger if required. Put the cartridge in a caulking gun and squeeze the trigger until you get a tight fit.
4. Apply silicone
Davies says for a smooth finish, "It’s about having a steady hand and patience." He adds, "Practice on a spare board if you’re new to siliconing."
Position the gun at a shallow angle, starting in one corner, and squeeze the trigger of the caulking gun. Begin moving along the edge as soon as the silicone appears. It's important to maintain a consistent speed and pressure to achieve an even bead of silicone.
5. Smooth your silicone
How long does silicone take to dry? It dries very quickly so you will need to smooth out within 10 minutes. Get a damp sponge and start in one corner. Press the sponge gently on the silicone and drag along, not stopping until you get to the end. Wipe the excess in a cloth. Repeat if necessary.
Alternatively, use a finishing tool to get an even finish. These offer different shapes so you can mould the silicone into a shape that suits your bathroom style. Wet the silicone with a fine spray before using the finishing tool.
Davies suggests another option. "A soap-soaked ice lolly stick to smooth out the silicone bead - I highly recommend giving it a go!" He adds, "Use masking tape along the edges of where you’re sealing to keep lines clean and remove it immediately after application, so it doesn’t pull on the silicone as it dries."
Try these tools to help seal a bath
Evo-Stik Sanitary Silicone Stay White
A high-quality, moisture-curing sealant that won’t stain, blacken, or yellow over time. Contains a mould and fungi inhibitor and good adhesion qualities.
Amazon Basics Heavy Duty Sealant Caulking Gun
A heavy duty caulking gun that is designed for standard cartridges. Includes ergonomic rubber-coated handles for comfort and a silencing mechanism.
Silicone Profiling Kit
This kit includes five sealant finishing tools and a silicone removal tool with three metal blades. It is ideal for removing old sealant and achieving a sharp, smooth finish on new.
FAQs
What do you clean before siliconing?
Before you apply any new best bathroom sealant you need to make sure that all surfaces that the silicone is going to be applied to are clean and dry. Whether you have new or old tiles and bath, both need to be free from soap scum, shampoo and debris.
One option is to use a solution of sugar soap and a cloth. For stubborn stains, use a kitchen scourer and wash down the tiles and bath. When finished, wash down with a fresh cloth and clean water—or spray with a showerhead to get rid of any sugar soap residue. Get a dry cloth, wipe it dry, and then leave it to dry completely.
How long do you leave water in the bath after sealing?
A sealant is typically touch dry within 15 to 20 minutes, but it takes a lot longer to fully dry—or cure, as it is known. This takes around five to six hours for a quick-drying sealant or around 24 hours for a standard silicone sealant. Ideally, you want to leave the water in the bath for 24 hours to get the best finish.
If you are siliconing a shower or sink, you won’t need to fill the shower tray or the sink before sealing. Both of these will be installed on solid surfaces and will have much less water in them compared to a bath.
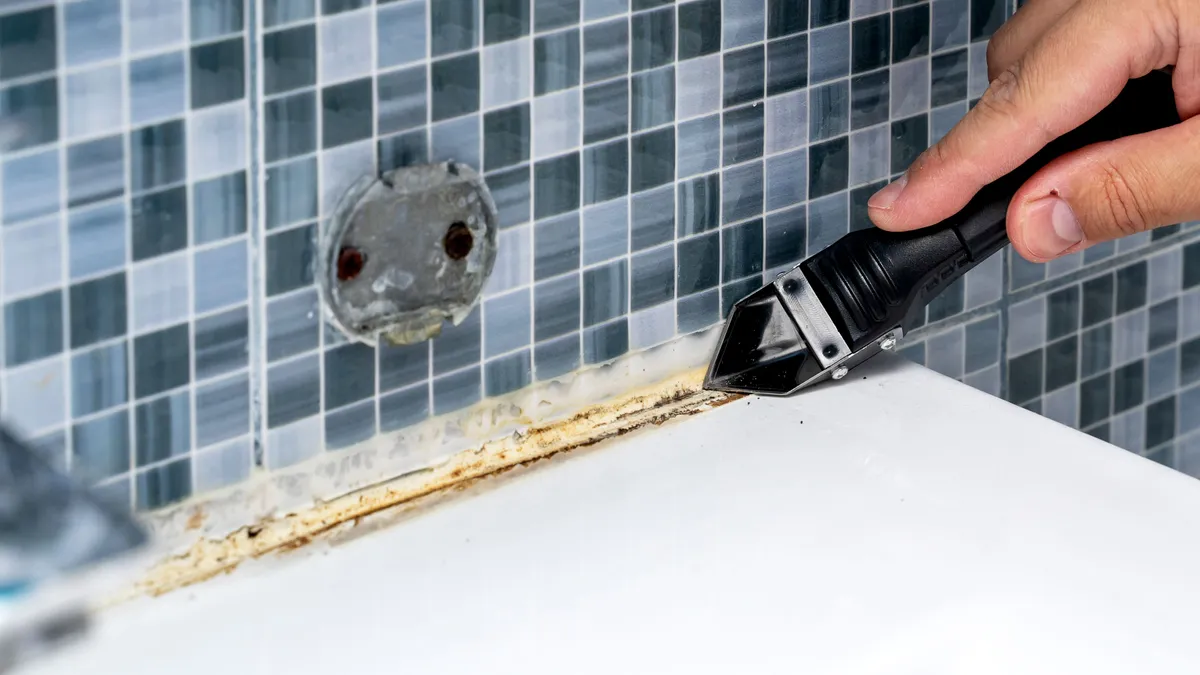
How do you remove old sealant?
If you are resealing your bath you will need to get rid of the old sealant before you can think about applying any new sealant.
There are a few options for removing silicone or caulk. The simple option is to use a sharp Stanley knife and some serious elbow grease. Alternatively, you can invest in a silicone removal kit that has all the tools needed for quick and easy removal.
Once removed, remember to clean up any leftover sealant residue to get ready to apply the new silicone.
Bring your dream home to life with expert advice, how to guides and design inspiration. Sign up for our newsletter and get two free tickets to a Homebuilding & Renovating Show near you.
Steve Jenkins is a freelance content creator with over two decades of experience working in digital and print and was previously the DIY content editor for Homebuilding & Renovating.
He is a keen DIYer with over 20 years of experience in transforming and renovating the many homes he has lived in. He specialises in painting and decorating, but has a wide range of skills gleaned from working in the building trade for around 10 years and spending time at night school learning how to plaster and plumb.
He has fitted kitchens, tiled bathrooms and kitchens, laid many floors, built partition walls, plastered walls, plumbed in bathrooms, worked on loft conversions and much more. And when he's not sure how to tackle a DIY project he has a wide network of friends – including plumbers, gas engineers, tilers, carpenters, painters and decorators, electricians and builders – in the trade to call upon.