Sandpaper grades: What does the 'P' mean and which grit you need
Choosing the right sandpaper grades for a project is essential for the right finish. Here we explain the different grades and grits and what they are good for

When it comes to sandpapering, you need to know what sandpaper grades to select to make sure you get the correct finish. You don’t want to be unleashing a coarse sandpaper on a job that needs a fine sandpaper, although, most mistakes can be rectified – it will just involve more work.
Essentially, there's an ideal sandpaper grade for different DIY tasks. For instance, if you have a heavy duty paint job that needs a lot of paint removal you want to kick off with a coarse, or even extra coarse sandpaper. But if you are preparing walls for painting you will probably need to use a fine sandpaper to get a lovely smooth finish.
Here we take a closer look at grade and grits and reveal which are best for the DIY jobs you have on the horizon.
Sandpaper grades and grits. What’s the difference?
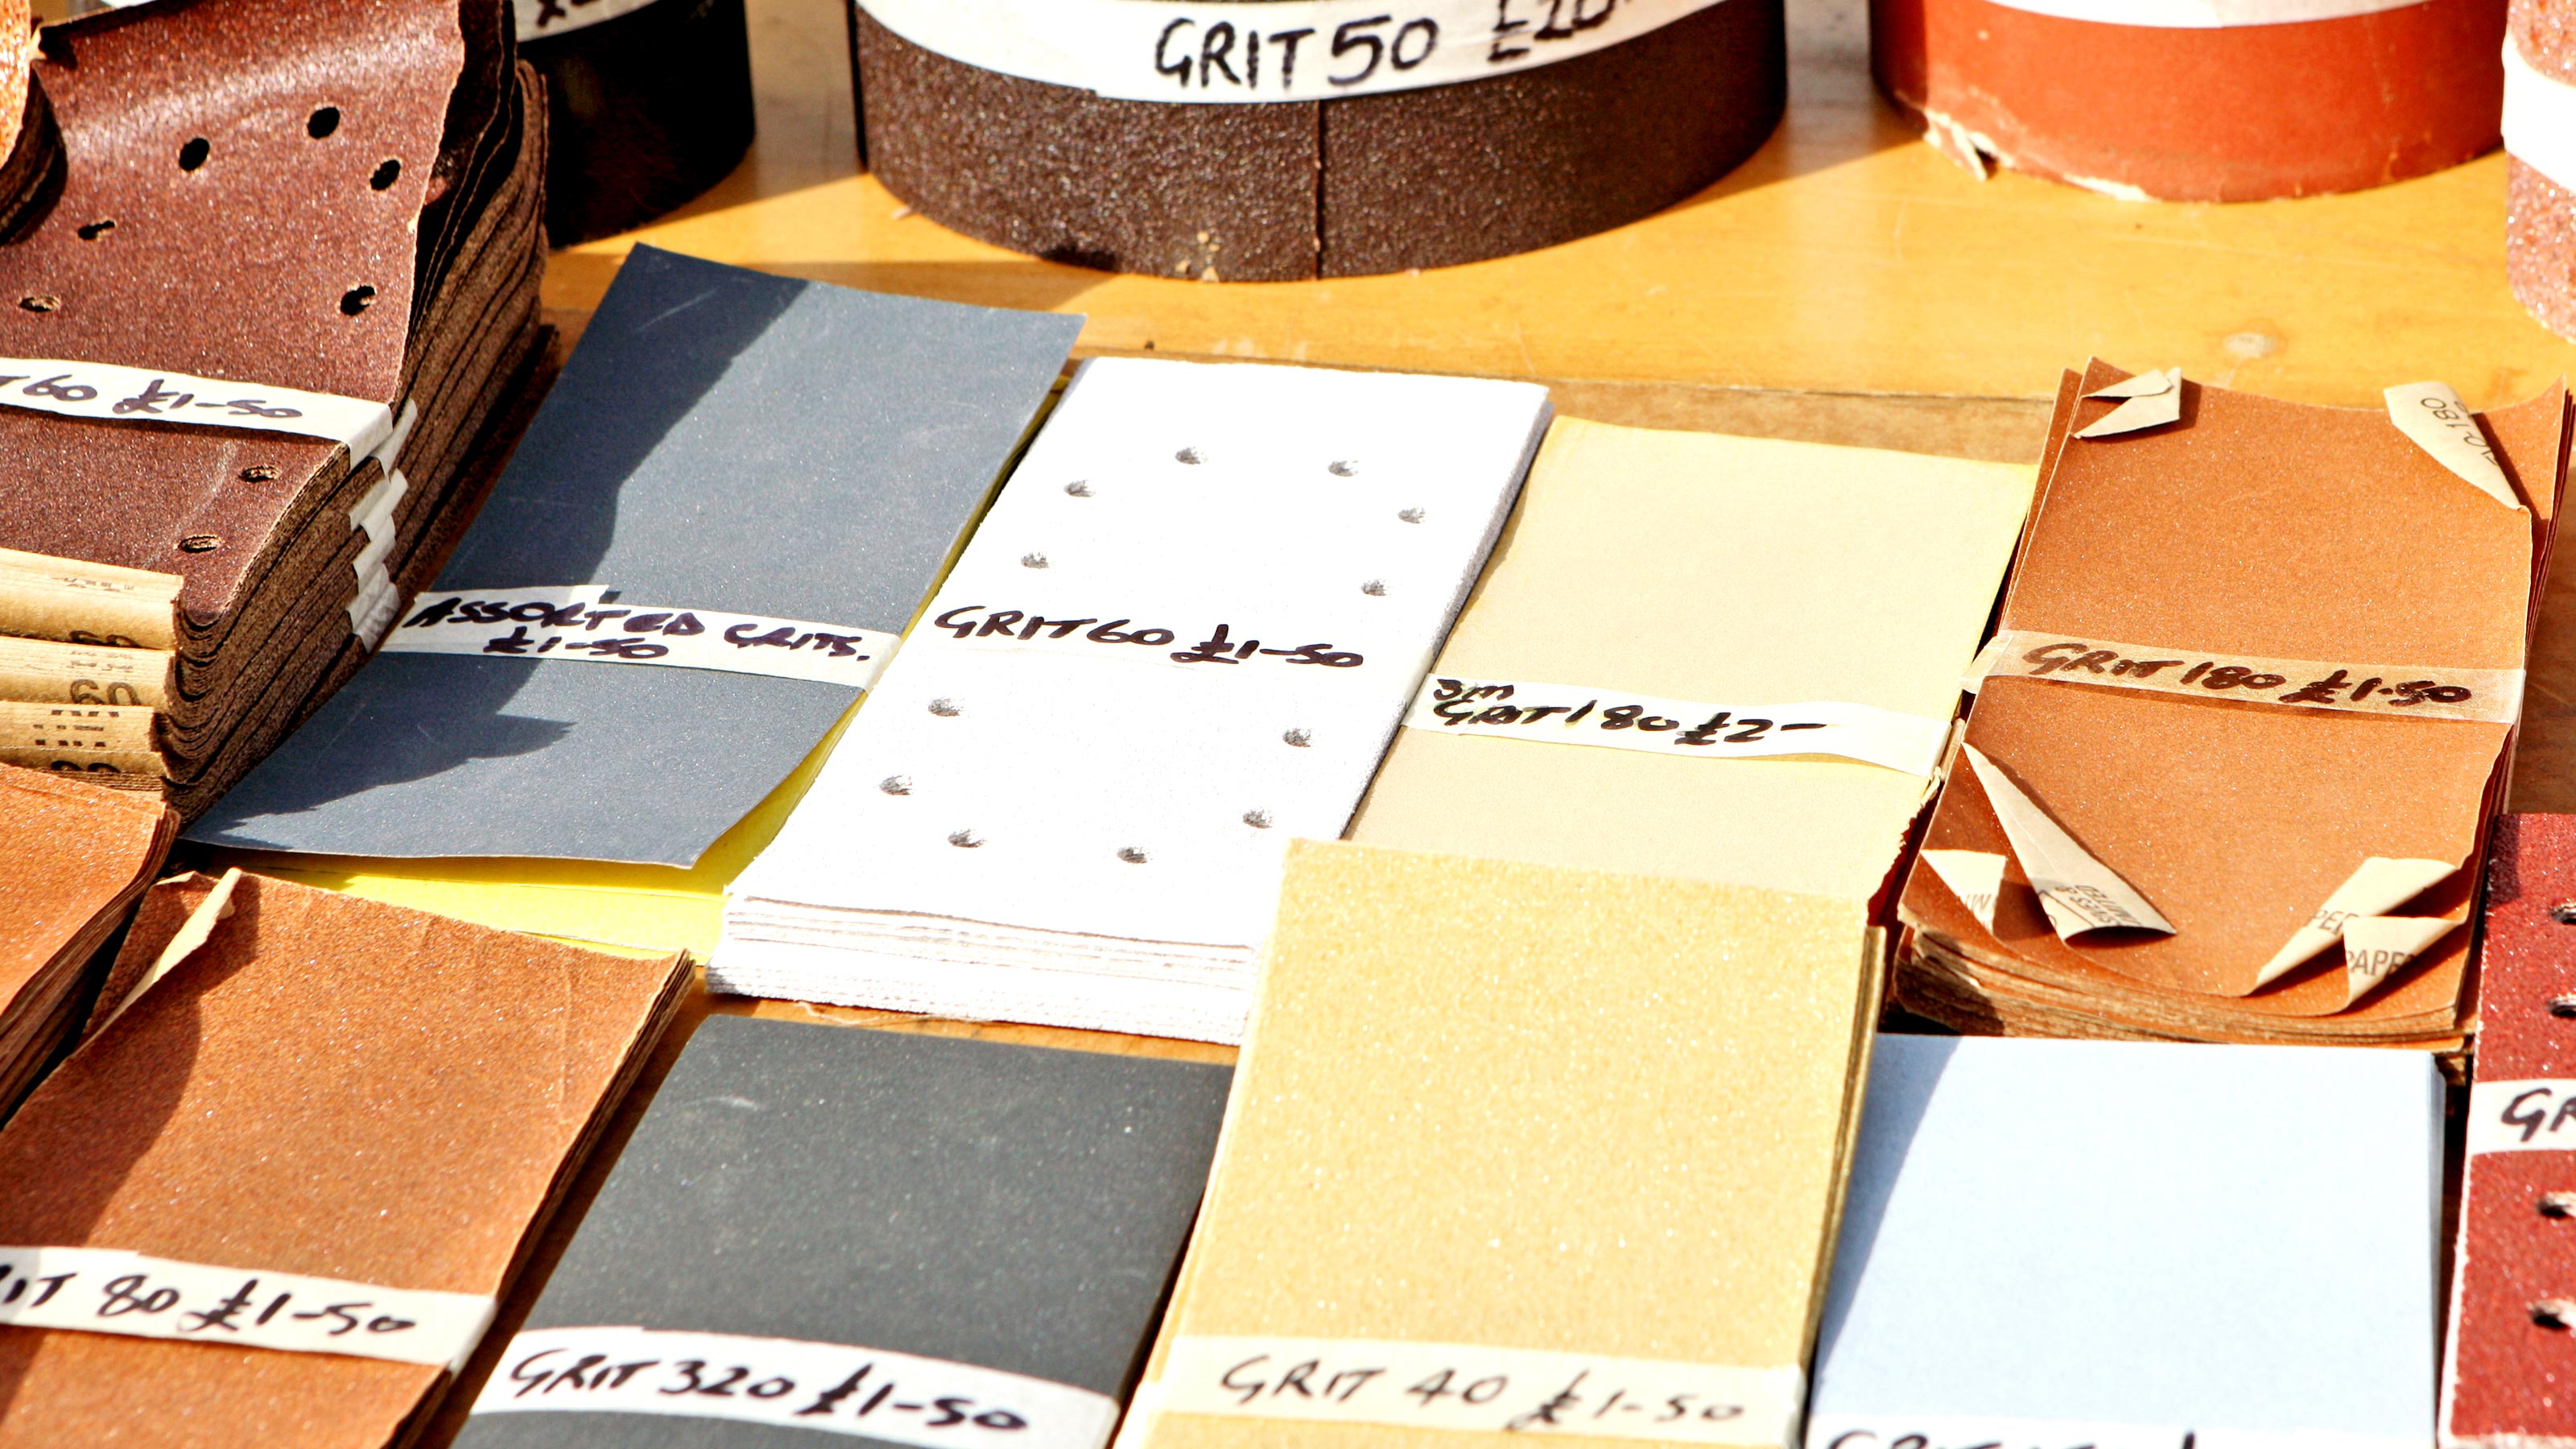
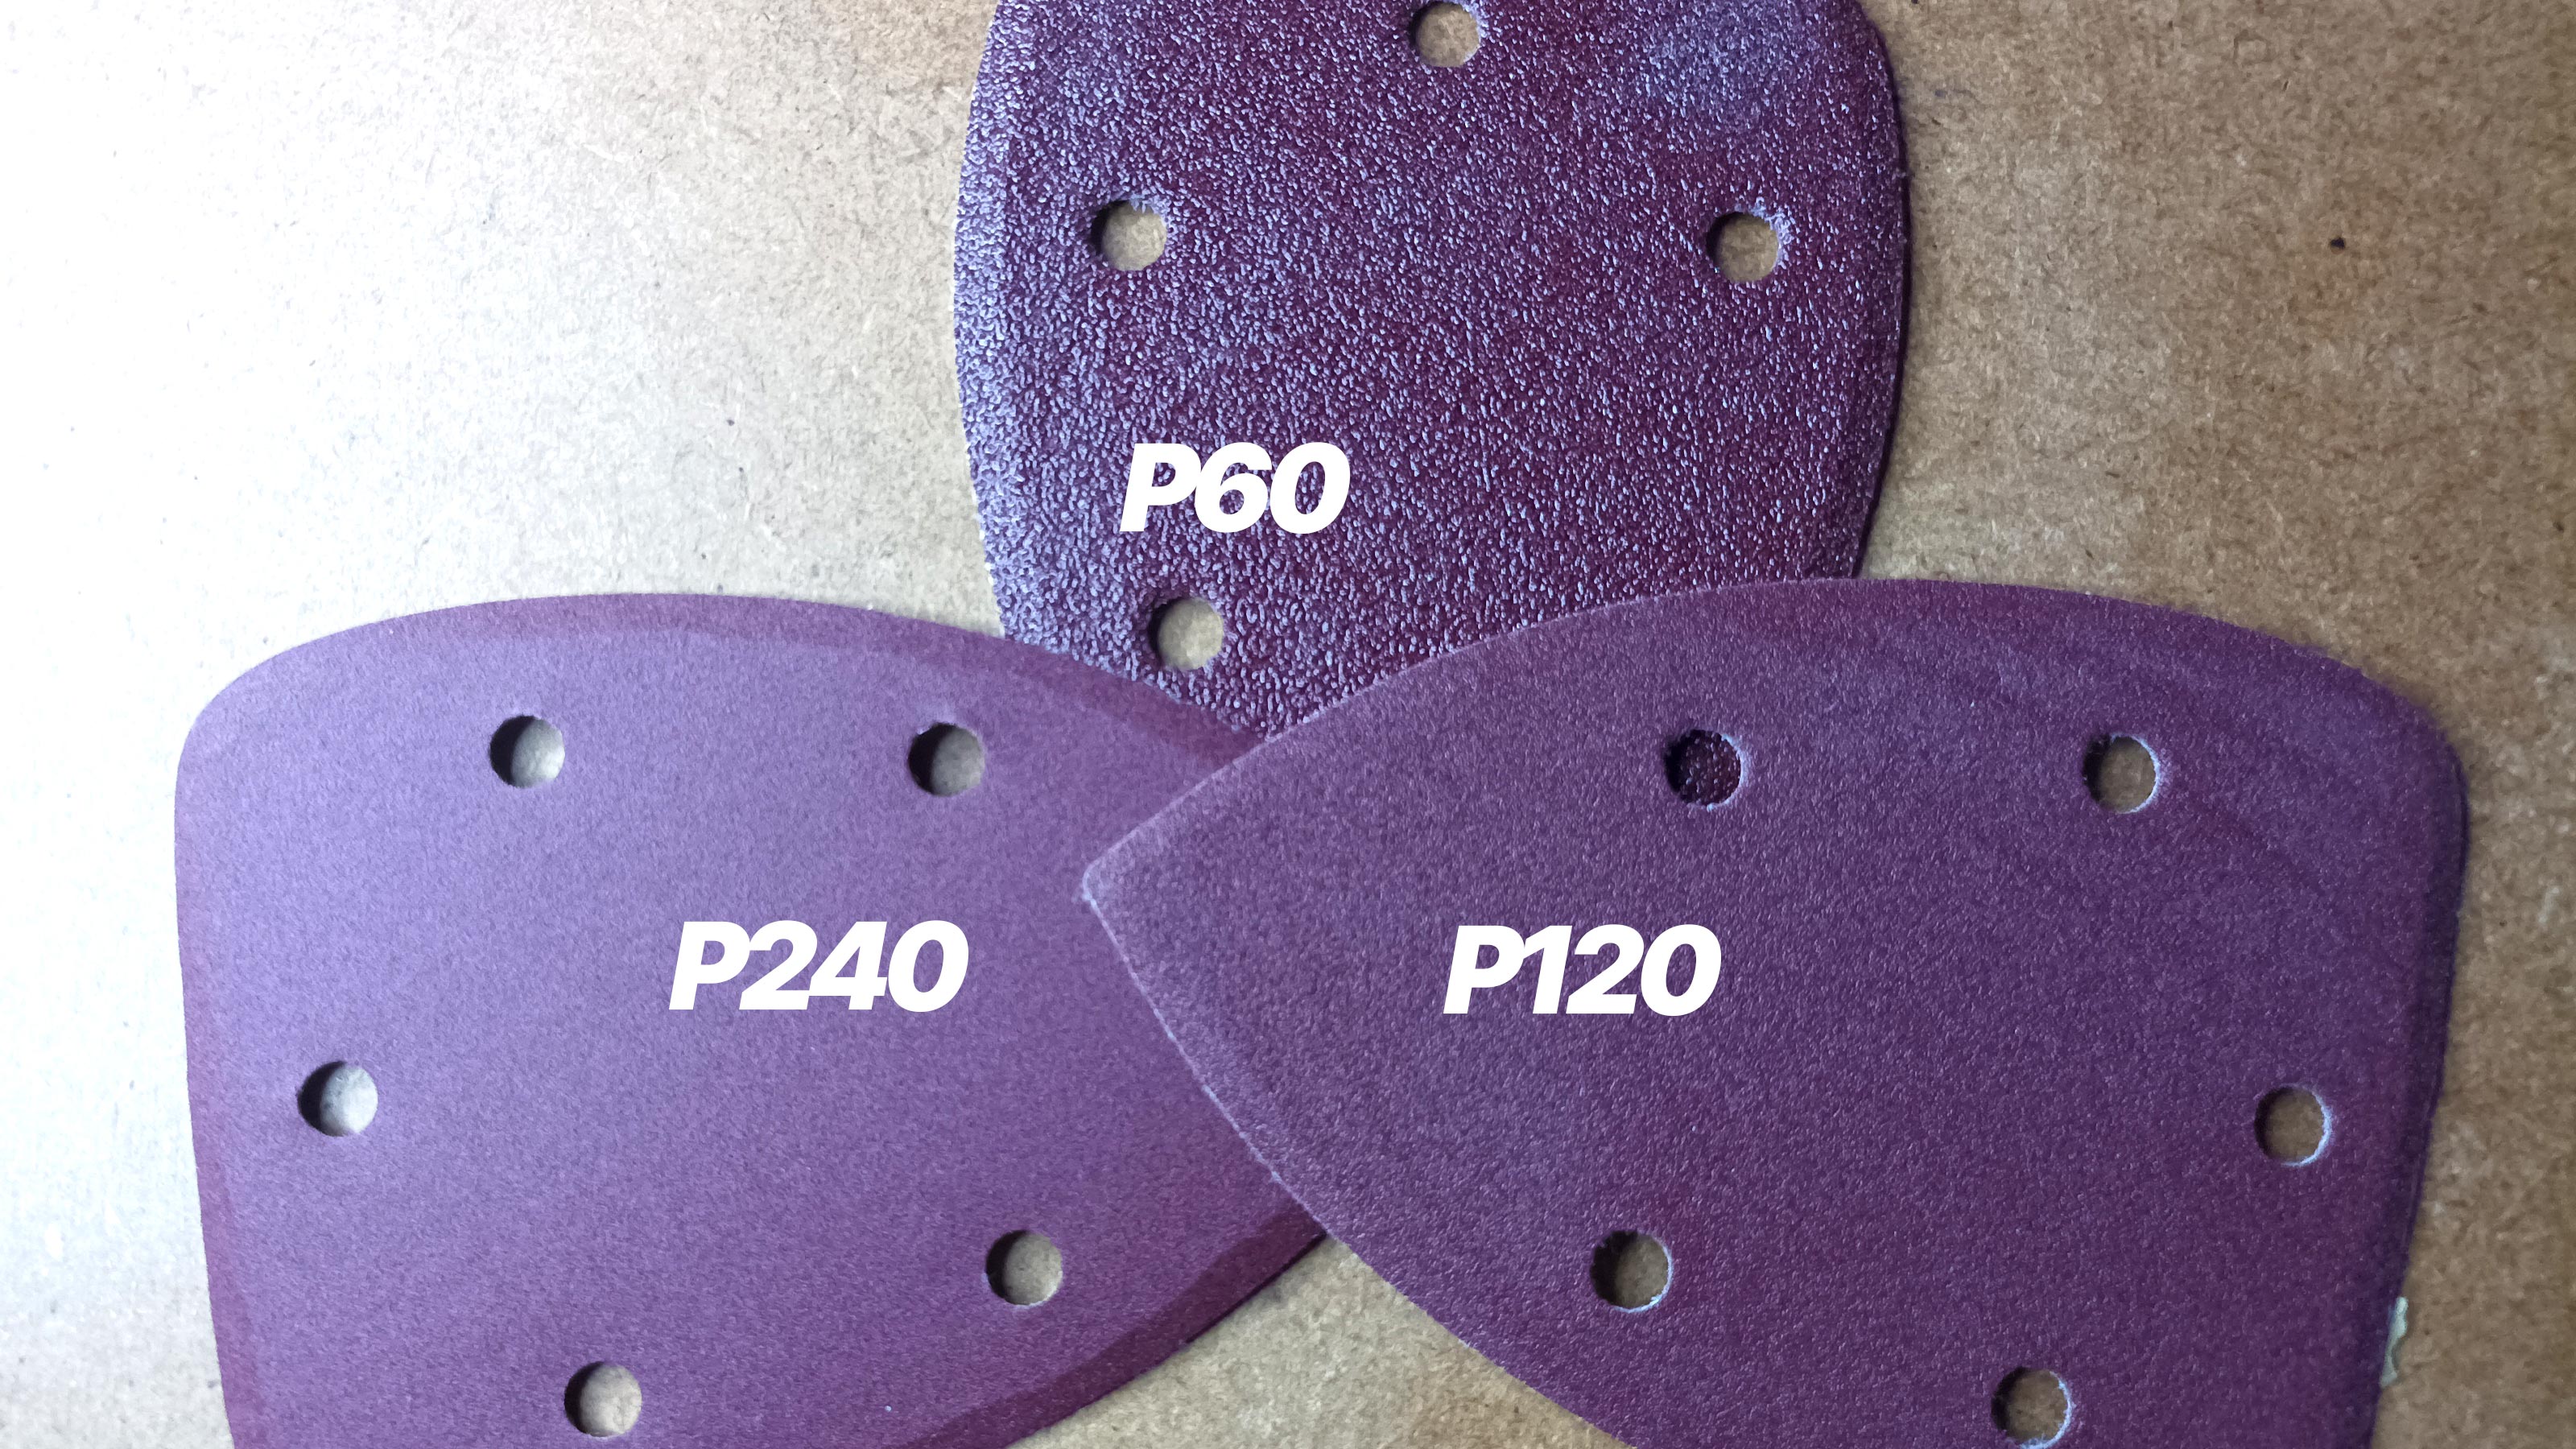
Sandpaper is split into grades such as fine, coarse and medium and each of these grades contains different levels that are defined by what are known as grit. So for example a medium grade sandpaper typically contains sandpapers with a rating 60-100 grit. A coarse grade sandpaper typically contains anything up to 60 grit sandpaper.
At the other end of the scale you have fine or extra fine sandpaper, which will have sandpapers with a grit rating of 240 and above.

What are the different sandpaper grades?
Sandpaper is split into five different grades from extra fine to extra coarse. The grades are defined as extra fine, fine, medium, coarse and extra coarse.
Within each of these grades are a range of grits, which give more control over the finish when sanding. But, in reality when doing everyday DIY projects such as painting a door frame or similar, you don't need to worry too much about what grit you need to use, just the grade.
What DIY tasks are the different grades used for?
While there are five different grades of sandpaper to choose from you are most likely to only need two or three grades on most common DIY projects such as painting wood. These will be fine, medium and coarse. Here we take a look at the common uses for the different grades.
Coarse sandpaper
This typically includes 40 or 50 grit sandpaper and is good for removing the top layer of paint and varnish. Its coarse finish means that it is great for removing a finish like paint pretty quickly, ready for finer sanding.
Medium sandpaper
This ranges from 60-100 grit is and is typically used on bare wood finishes that have coarse cuts and need the quick removal of splinters etc. It's often the first option on old bare wood such as doors and door frames that needs to be smoothed out ready for painting. It is also a good choice on windows, doors, skirting boards that have a lot of layers of paint, especially poorly-applied paint.
Fine sandpaper
This ranges from120 to 220 grit and is one of the most commonly used grades in home DIY projects. Painting projects often use 120-180 grit for sanding down previously painted surfaces. It gets rid of any minor imperfections and roughs up the surface to provide good adhesion for a new coat of paint. It is also used on bare wood to smooth out ready for the first coat of paint or varnish.
It is also the common choice when sanding painted walls, smoothing out plaster and rubbing down filler to blend in with the surface it's on.
Extra fine sandpaper
This is 240 grit and above. The common choice amongst DIYers is 240 grit, which is used between coats to smooth the previous layer of paint ready for the next to help ensure a smooth finish. Higher grit sandpaper such as 320 grit will provide an even smoother finish between coats.
Grits above 320 such as 400 to 600 are typically used to get a really fine finish on wood ready for waxing or polishing. It can also be used to smooth out a top coat and fine wet sanding.
Extra coarse sandpaper
This sits below coarse sandpaper and includes 24 and 36 grit sandpaper. It is used for jobs that have a lot of paint or varnish to remove. It's often used on rough timber that needs to be smoothed out and the first sanding when sanding floorboards.
What does the P mean in sandpaper grits?
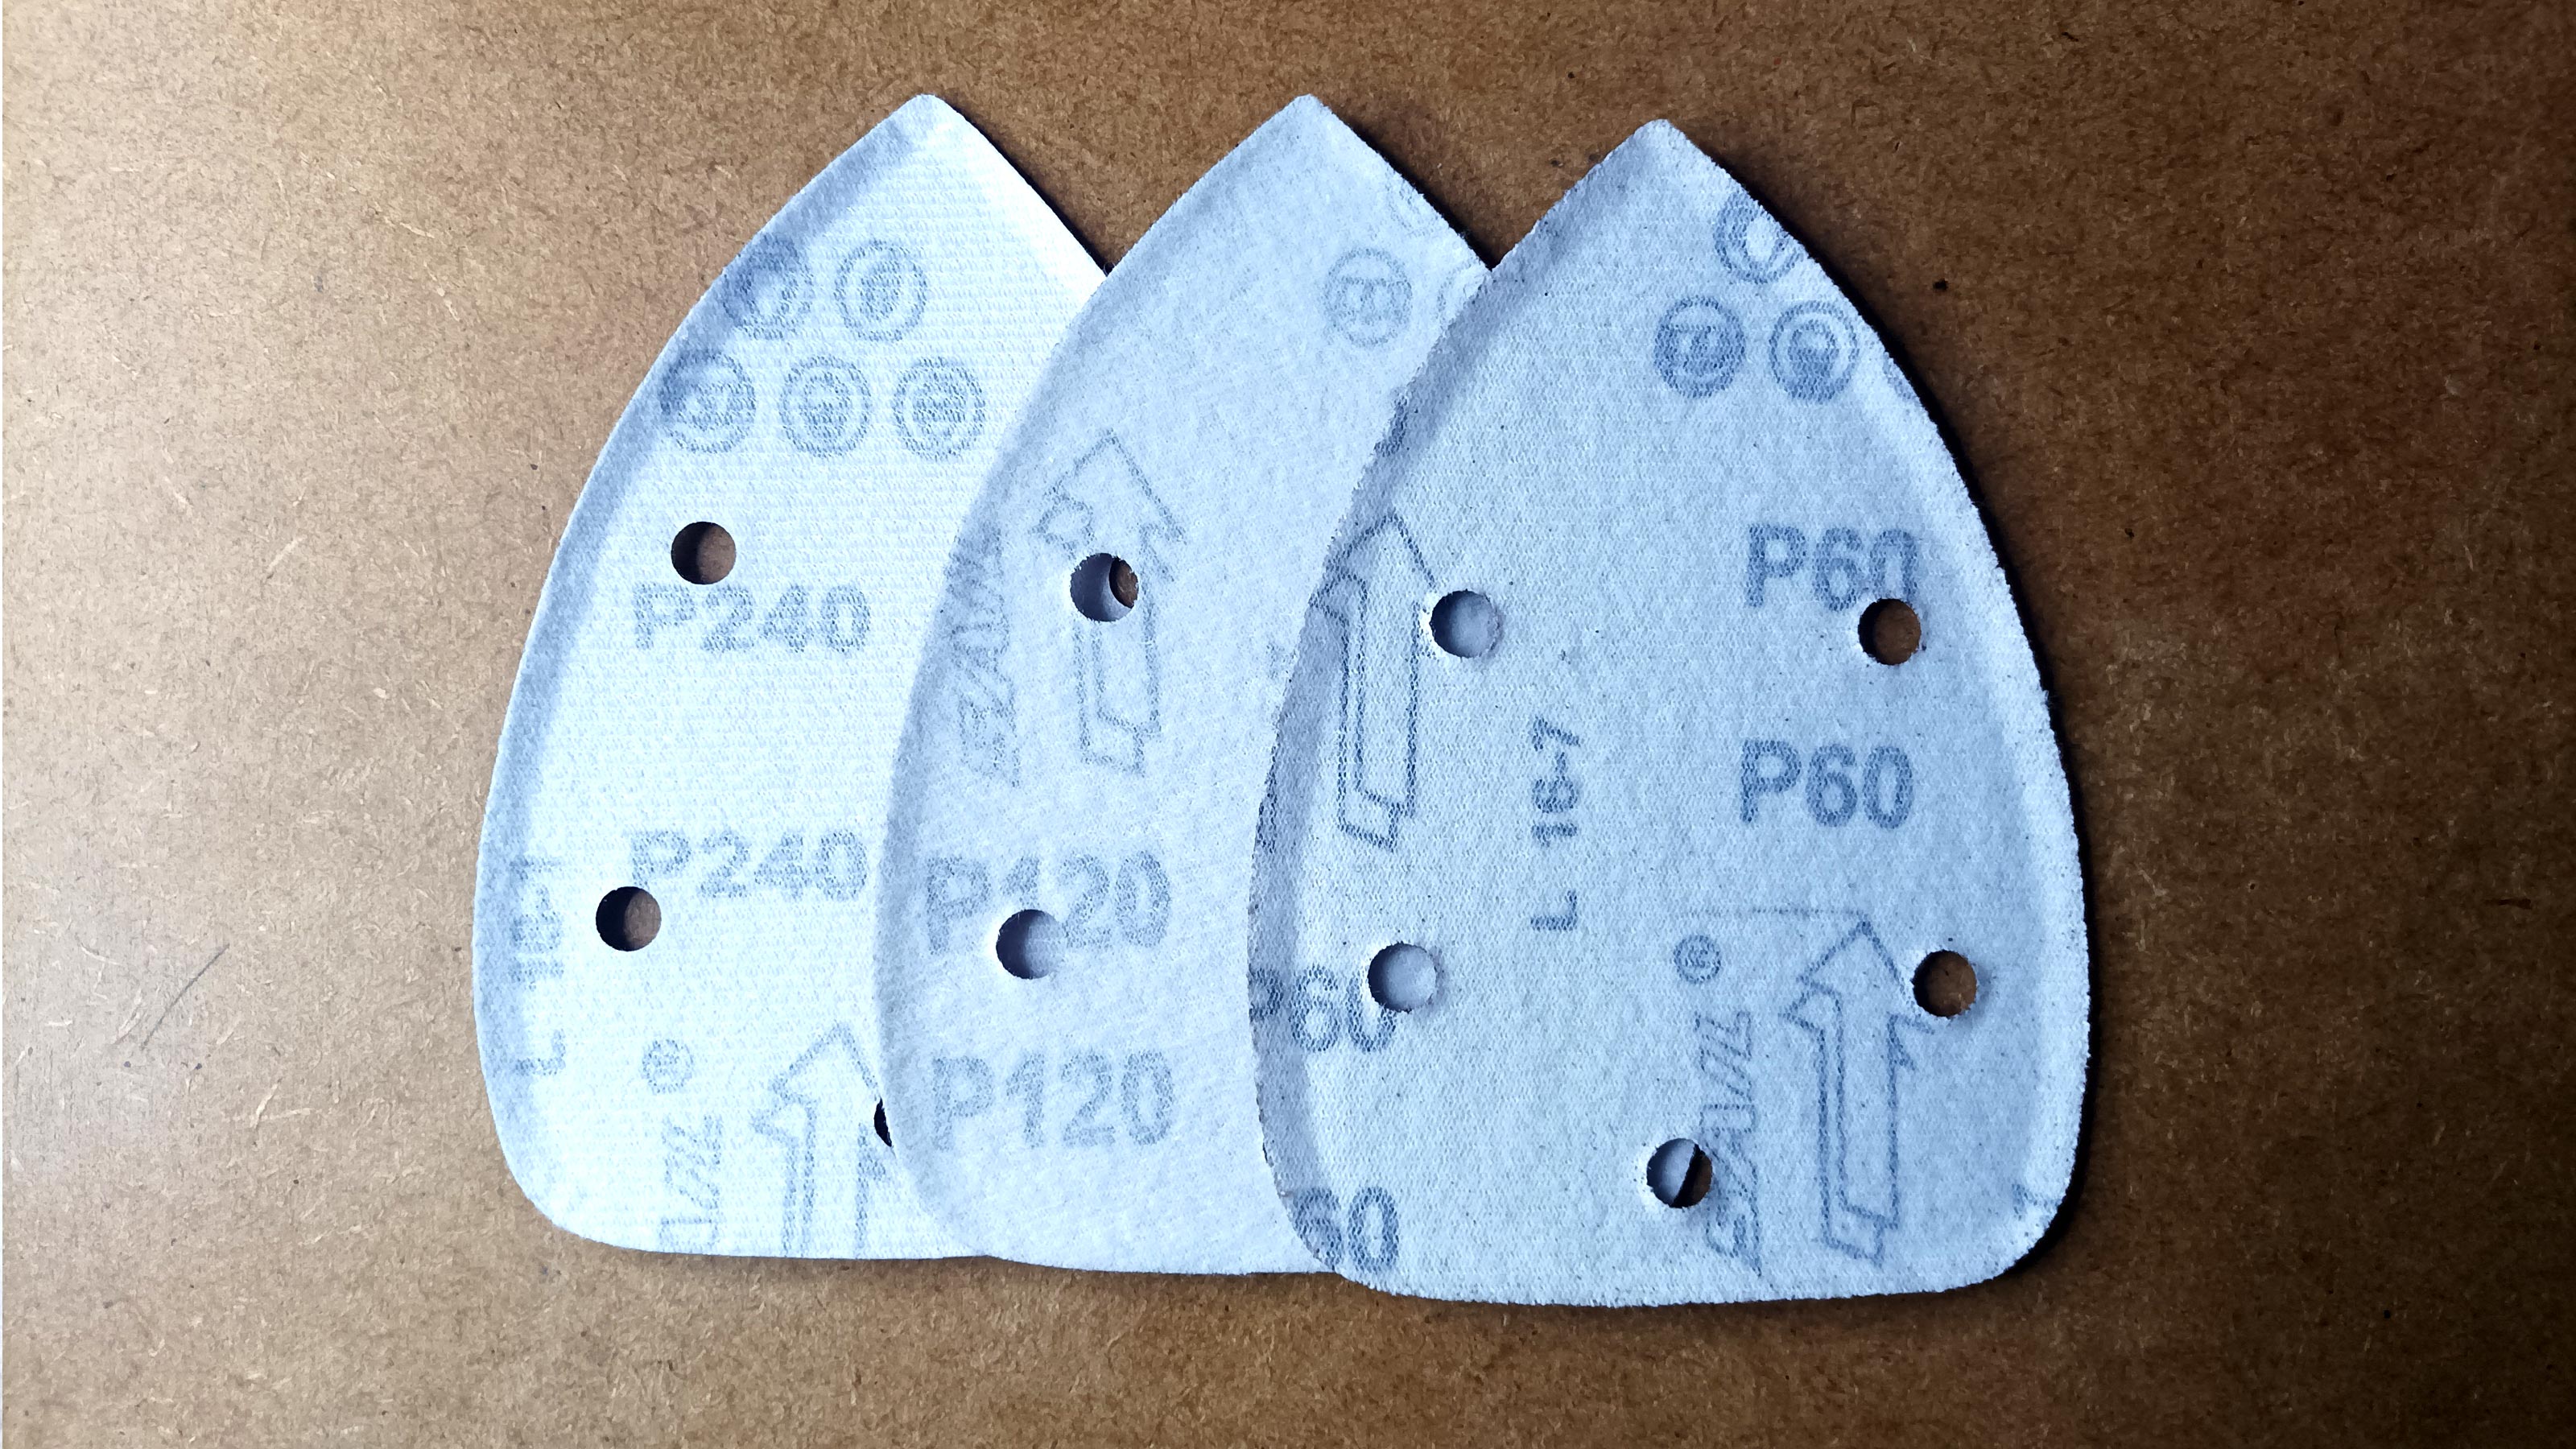
Sandpaper grit in the UK and Europe is graded by FEPA (Federation of European Producers of Abrasives). This is represented on the back of a sheet of sandpaper with the letter P e.g. P180, P60, P240. The scale is based on the diameter of the average particle size in microns.
In the US sandpaper grit is governed by the CAMI (Coated Abrasive Manufacturers Institute). They use numbers only and are not preceded by a letter. The CAMI scale is very similar to the FEPA scale, especially in the more commonly used sandpaper grades and grits such as 60-300.

What sanding tools should I use?
There are a few choices here, but the two main options are hand sanding or power sanding. What you use will depend on the project you are working on. If you have intricate architrave or small sanding jobs such as sanding a door frame or skirting board you want to use a sanding block, like this rubber one for £5.57 on Amazon, or simply wrap the sandpaper around a pierce of waste wood.
If you have large flat surfaces you want to think about using a power sander. A neat palm sander such as the BLACK+DECKER Detail Mouse at Amazon is a good choice for panelled doors and preparing wooden stairs.
The best orbital sanders are a great choice for sanding flat surfaces such as doors or walls. They are also good for removing paint and varnish and get the job done much quicker.
Get the Homebuilding & Renovating Newsletter
Bring your dream home to life with expert advice, how to guides and design inspiration. Sign up for our newsletter and get two free tickets to a Homebuilding & Renovating Show near you.
Steve Jenkins is a freelance content creator with over two decades of experience working in digital and print and was previously the DIY content editor for Homebuilding & Renovating.
He is a keen DIYer with over 20 years of experience in transforming and renovating the many homes he has lived in. He specialises in painting and decorating, but has a wide range of skills gleaned from working in the building trade for around 10 years and spending time at night school learning how to plaster and plumb.
He has fitted kitchens, tiled bathrooms and kitchens, laid many floors, built partition walls, plastered walls, plumbed in bathrooms, worked on loft conversions and much more. And when he's not sure how to tackle a DIY project he has a wide network of friends – including plumbers, gas engineers, tilers, carpenters, painters and decorators, electricians and builders – in the trade to call upon.

