There’s nothing more annoying than a dripping tap, limescale stained chrome or just a plain ugly one that doesn’t match your kitchen design aesthetic. Replacing a kitchen tap is the simple solution and there’s hundreds to choose from to make sure that you get what you want.
Whether you're simply replacing a single tap or designing a kitchen, it’s still important that you choose the right tap. And while it's not a difficult task, there are definitely some steps you need to follow. Here the pros give you the insight and know-how you’ll need.
David Cruz
David has worked in the plumbing industry for over fifteen years. David has worked on countless domestic and commercial projects as a plumbing expert and gas-safe engineer. David also works closely with MyJobQuote to provide expert plumbing knowledge to homeowners, tradespeople and news outlets.
Replacing kitchen tap: Are sizes universal?
No they are not. Before you replace your current kitchen tap you need to check what size pipework you have to make sure you are getting the right replacement. David Cruz, plumbing expert at MyJobQuote shares, “Most household water supplies use a 15mm (0.5-inch BSP - British Standard Pipe) copper pipe, so this is what most modern kitchen taps are designed to work with.”
However, Cruz adds, “Homes with high water pressure may have a wider supply pipe. That’s why some taps come with a 1.5-inch BSP connection.”
What do you need to check before replacing a kitchen tap?
Before you go ahead and purchase a new kitchen tap there are a few things to check before replacing an old kitchen tap. Cruz says, “The first is to check that the tap will work with the hole or holes in your sink.”
He adds, “For two holes you’ll need separate hot and cold taps or a bridge mixer and for a single hole, you’ll need a single-stemmed or monobloc mixer tap.”
To connect the taps they will typically come with either flexible hose connectors (like these Flexible Pipes for Bathroom/Kitchen/Toilet Taps from Amazon) or rigid tails. Flexible hose connectors are usually easier to fit onto your hot and cold water pipes.
Try these kitchen taps to replace your old ones
Bristan Sentinel Monobloc Kitchen Sink Mixer
A traditional design monobloc kitchen sink mixer that comes with a shiny chrome finish. Constructed with an all brass body its suitable for all plumbing systems.
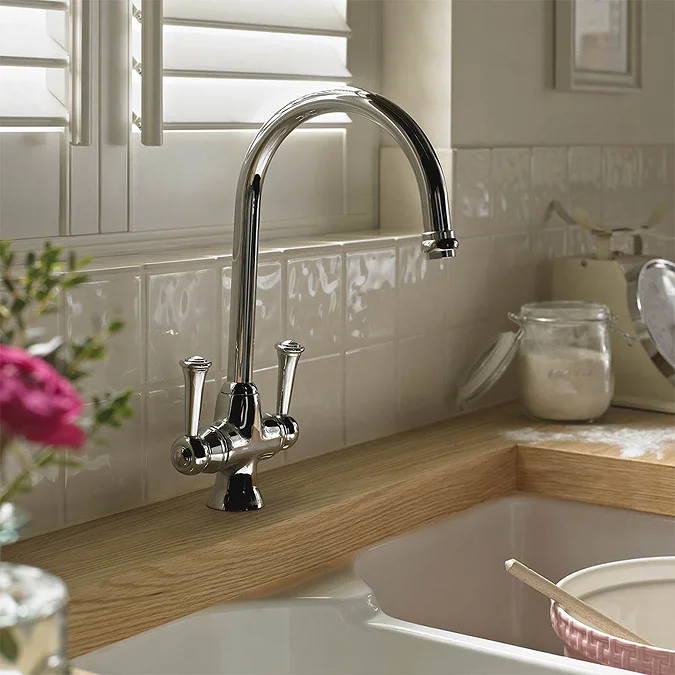
Bower Dual-Lever Traditional Kitchen Tap
A monobloc dual-lever mixer that comes with traditional styling. Incorporates a movable swivel spout lets you direct the stream of water. Ideal if you a double or 1.5 basin.
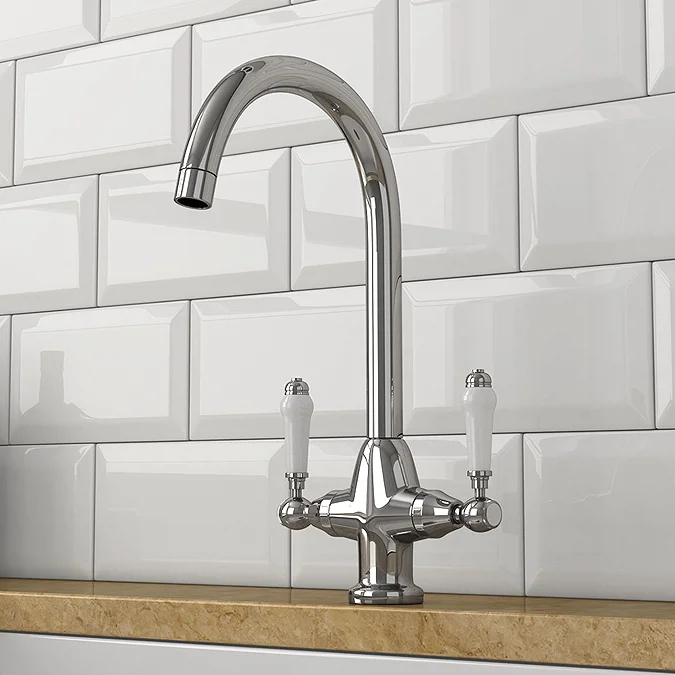
Grohe Ambi Quickfix Kitchen Sink Mixer Tap
A two-handle kitchen sink mixer tap with the levers opening to the front to help protect the wall behind. The swivel spout has full movement left and right.
The first thing to do is turn your water supply off. Cruz says, “You should be able to do this using the isolation valves that are connected to the copper pipes under your sink.” He adds, “If you don’t have isolation valves, use your stop cock to turn the water off. Then, turn your kitchen tap on to run the water off.”
2. Remove tap
You'll need to go under the sink, which isn't always easy. Cruz says, "Use an adjustable wrench to undo the nuts that connect your taps to the water supply pipes. Then locate the retaining nut at the base of your tap and unscrew this to remove the tap. He adds, "You may find a basin wrench helpful if it’s hard to access."
3. Prep tap
Cruz says, “After removing your old tap, clean around the hole in your sink and thread the flexible hoses of your new tap through the hole and position your tap so it’s facing the right way.” He adds, “Ensure the rubber seal is sitting between the hole and the tap base.”
4. Fit replacement tap
You’ll now need to get under the sink and fit the tap. Cruz says, “Go underneath the sink and slot the metal retaining plate over the threaded bar on the base of your tap and tighten the retaining nut.” He adds, “Make sure the tap is still sitting straight and tighten the retaining nut using a basin wrench.”
5. Connect pipes and taps
The next step is to add the tap’s flexible hoses and attach them to your hot and cold water pipes using the connectors on the ends. Cruz says, “Take care to get these the right way around. The hoses are usually marked with blue for cold and red for hot. You can tighten these with an adjustable wrench but take care not to over-tighten them.”
The final step is to turn the water supply back on and check for leaks. Cruz says, “To do this take a slotted screwdriver and give the isolation valves half a turn.” The slot should be in the vertical position to let the water through.
One final tip Cruz says, “It’s best to take your old tap to your local recycling centre where it can be processed and the materials reused.”
FAQs
Jess Thomas
Jess Thomas is a well-recognised expert in the drainage and plumbing industry. Jess continually provides valuable insights on a wide range of industry topics, and is dedicated to helping homeowners find effective solutions to their drainage problems.
What is the difference between a lost cost and high cost tap?
Budget is often a key consideration when looking to replace taps as the cost can vary greatly. But does spending big mean you are getting a good deal. Jess Thomas, MD of Drainage Central shares his thoughts, “Lower cost taps are more prone to wear and tear related issues, lower quality control and may not have as diverse a range of options compared to higher priced products.”
He adds, “High cost taps usually have more range when it comes to style, finishes and colour, and are often more resilient than their cheaper counterparts.”
But lower cost taps will still have a place in any kitchen remodel ideas you might have. However, Thomas says, “Cheaper taps will work just fine when installed, they may not last as long as more expensive taps.” He adds, perhaps not unsurprisingly, “They are likely to show signs of wear and tear much faster”
When looking to replace a tap we recommend that you look to spend as much of your budget as possible on kitchen taps. If you intend to stay in your home then definitely spend as much as you can afford. But if you are doing a short term remodel you may want to look at budget to mid-price range taps.
What type of tap is best for a kitchen?
There are a lot of choices when it comes to replacing a kitchen tap. Boiling water taps, pillar taps, wall mounted taps, monobloc taps and filter taps are just some of the options available.
But it's not just the tap you need to consider, you should also think about the finish as Thomas shares, “Chrome works well with most kitchen styles and colours. It is also very durable, resistant to corrosion and tarnishing, as well as being easy to clean.” He adds, “Chrome finishes normally tend to be more affordable than other options.”
But chrome is not the only finish to consider. Thomas adds, “Stainless steel taps are resistant to stains, scratches and fingerprints. Similarly, brushed nickel finish taps are resistant to corrosion but are better at hiding fingerprints and water spots compared to polished finishes."
He adds, "Another option for finishes is brass, but this finish will require regular cleaning and polishing to maintain the lustre, and they are not as resistant to corrosion as other finishes.”
Bring your dream home to life with expert advice, how to guides and design inspiration. Sign up for our newsletter and get two free tickets to a Homebuilding & Renovating Show near you.
Steve Jenkins is a freelance content creator with over two decades of experience working in digital and print and was previously the DIY content editor for Homebuilding & Renovating.
He is a keen DIYer with over 20 years of experience in transforming and renovating the many homes he has lived in. He specialises in painting and decorating, but has a wide range of skills gleaned from working in the building trade for around 10 years and spending time at night school learning how to plaster and plumb.
He has fitted kitchens, tiled bathrooms and kitchens, laid many floors, built partition walls, plastered walls, plumbed in bathrooms, worked on loft conversions and much more. And when he's not sure how to tackle a DIY project he has a wide network of friends – including plumbers, gas engineers, tilers, carpenters, painters and decorators, electricians and builders – in the trade to call upon.