Get the perfect finish when painting wooden doors — plus best paint types
When painting wooden doors you need the right tools, prep and paint for a good looking, long-lasting finish. Here we give you the answers you need

Painting wooden doors can give them a new lease of life with the added bonus of offering protection from knocks and kicks. A smart high or mid-sheen finish is the perfect companion for a contemporary or period home and can be regularly wiped clean to keep it looking its best.
The process of painting wood needs to be right, get it wrong and your lovely looking door will soon be in need of another makeover. Like most paint projects, preparation is key to a professional looking finish. Here we give you the lowdown on what you need to know to make it happen.
Painting wooden doors: The tools you’ll need
To get the best finish on wooden doors you will need to prep properly and invest in good quality tools and paint. Here we give you a list of tools you need to complete the job along with links to a few recommendations.
- Paint brushes
- Rollers
- Roller Tray
- Paint kettle
- Dust sheets
- Primer
- Undercoat
- Trestles/saw horses
- Paint tin opener
- Sander/Sanding block
- Sandpaper - various grits
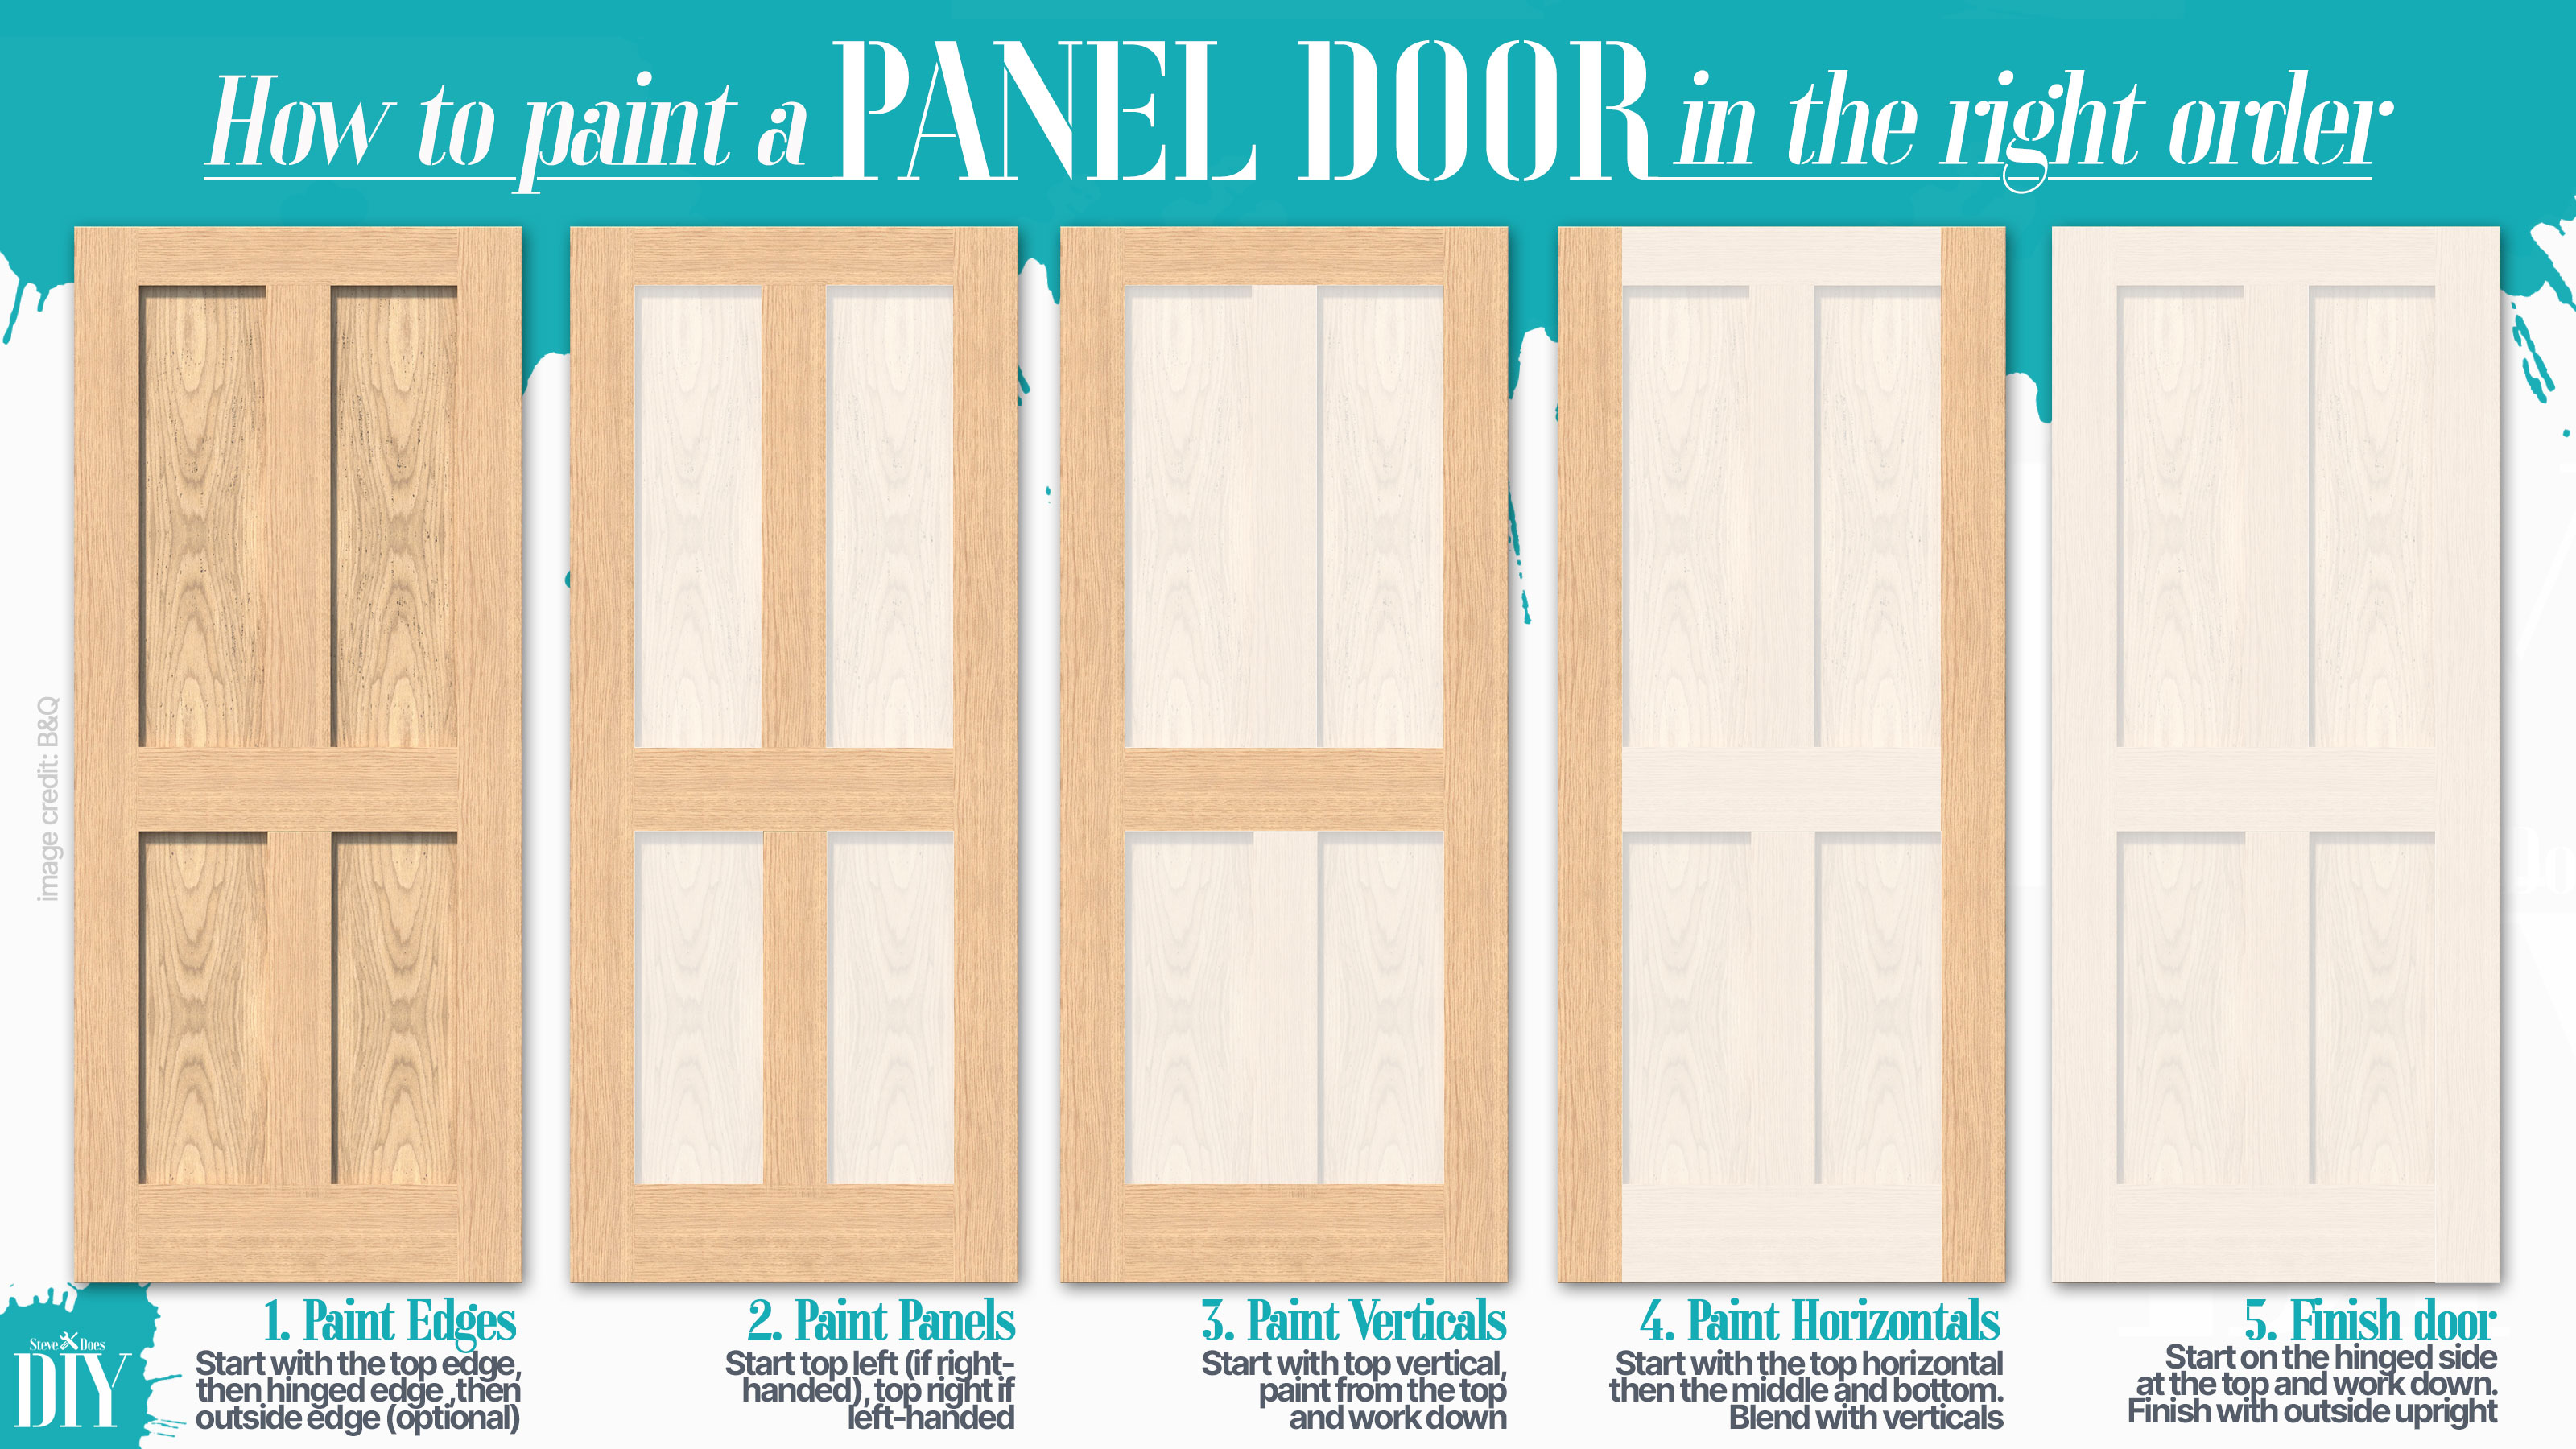
In what order do I paint a wooden door?
This will depend on what type of door you have, but a general rule is that you start with the top and bottom edges followed by both the long edges. Then start at the top and work your way down to the bottom.
Check out our how to paint a panel door guide for more information on painting panelled doors.

How do you prepare a wooden door for painting?
There’s a few steps you need to follow to get a wooden door ready for painting. If you have bought a new door and haven’t hung it yet you should paint before you hang. This gives you access to all edges of the door – such as the bottom – which you don't have when a door is hung in position.
One tip to get the best finish on the hinge edge is to hang the door and then take it down. This allows you to paint the hinge recess, rather than cut out the hinge recess after you have painted. If the door is already in place, look to take down to paint if possible. Remove any door furniture and mask off any glass panels with painters tape like ScotchBlue Multi-Surface Premium Masking Tape from Amazon.
To paint a door you need a couple of trestles like the Evolution Compact Folding Saw Horse from Amazon. You can lay across and paint one side and edges, leave to dry and turn and paint the other side.
But one trick to speed up the process is to put a couple of screws in the centre of the top and bottom edge of the door and place them on each trestle. This allows you to spin the door so you can paint all edges and sides without having to wait for one side to dry. A tip is to add an extra screw in one end to hold in position when painting one side. Then remove the extra screw, flip the door over and replace the screw.
Whether you are working with a new door or a previously painted door you will need to sand to give better adhesion for primers, undercoats and top coats. You can do this by hand or with a sander like the BLACK+DECKER 55 W Detail Mouse Electric Sander from Amazon. Check out our sanding doors guide for an indepth look at the process.
Do I need to prime a wooden door before painting?
Yes and no. If you are painting a new bare wooden door or one where you have had to strip paint off the wood , you need to start out with a decent primer like Zinsser 123 Bulls Eye from Amazon. This is suitable for interior and exterior doors, is quick drying and seals knots to stop any sap seeping through and spoiling the surface.
If you are painting a previously painted door, which hasn’t been sanded back to bare wood, then typically there is no need for a primer, you can start with an undercoat. However, if you are painting a light colour over a dark colour you can start with a coat of primer to help cover the colour.
What kind of paint do you use on a wooden door?
Doors are prone to a lot of wear and tear so you need a hard-wearing and durable paint for the finish, which is why it is very often a choice of satin vs gloss. Gloss has a higher sheen than satin, but it is more reflective so it is more prone to showing up any imperfections. Both are wipe clean, but gloss has a slightly harder wearing finish, so can be washed more often, though there is not much in it.
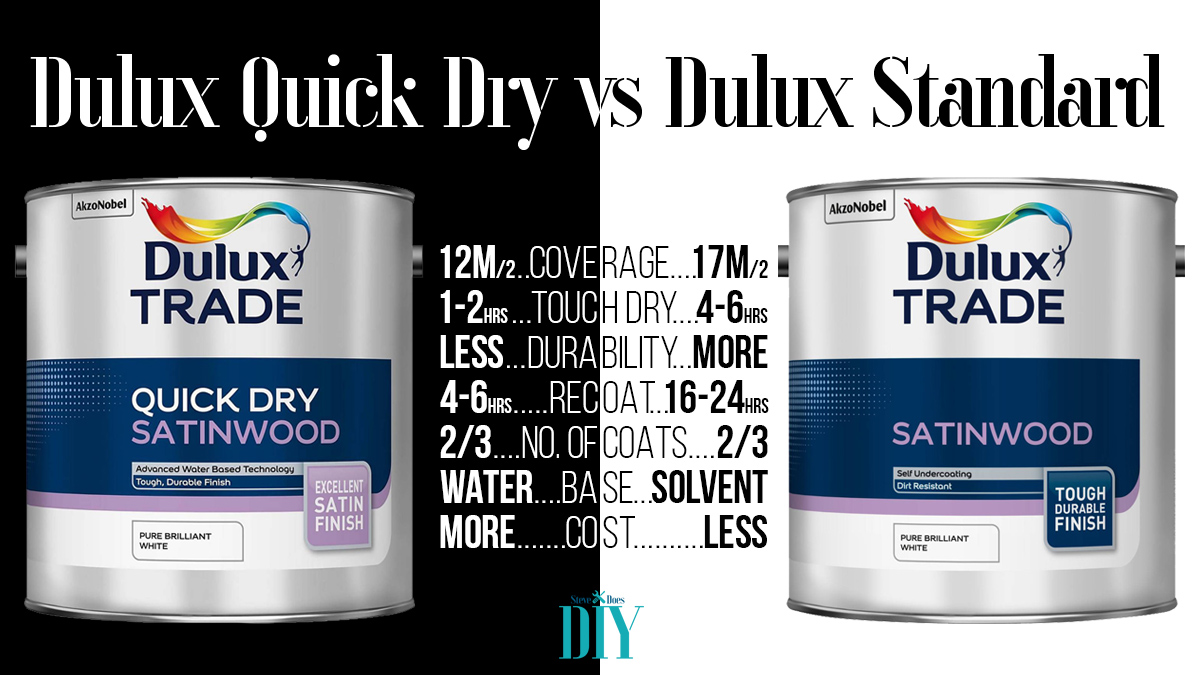
Gloss and satin are both available as water-based or oil-based paints. Water based paints such as Dulux Trade Quick Drying Satinwood from Amazon dry quicker than oil based paints, are ready to recoat sooner, are more environmentally-friendly and it's easier to clean brushes and rollers. While oil based paints take longer to dry and harden, they have a more durable finish and offer greater coverage.

How long will a wooden door take to dry?
This depends on what paint you use and how you apply the paint. Water-based paints dry quicker than oil based paints, but how long can differ from brand to brand. But as a general rule expect water-based primer/undercoat/satin/gloss to be touch dry within an hour and ready to recoat in around four hours.
Oil based paints take longer to dry due to their make up. They are typically touch dry within three to four hours and ready to recoat in 16-24 hours.
To get the best finish follow the manufacturer's recommendation on drying times. Applying a new coat before the previous coat has dried properly will weaken the structure of the paint making it more susceptible to damage.
It is a good idea to leave the paint to cure (harden) for at least 24 hours before you rehang a door. Check out our how long does paint take to dry article for a closer look at drying times for different paints.
Get the Homebuilding & Renovating Newsletter
Bring your dream home to life with expert advice, how to guides and design inspiration. Sign up for our newsletter and get two free tickets to a Homebuilding & Renovating Show near you.
Steve Jenkins is a freelance content creator with over two decades of experience working in digital and print and was previously the DIY content editor for Homebuilding & Renovating.
He is a keen DIYer with over 20 years of experience in transforming and renovating the many homes he has lived in. He specialises in painting and decorating, but has a wide range of skills gleaned from working in the building trade for around 10 years and spending time at night school learning how to plaster and plumb.
He has fitted kitchens, tiled bathrooms and kitchens, laid many floors, built partition walls, plastered walls, plumbed in bathrooms, worked on loft conversions and much more. And when he's not sure how to tackle a DIY project he has a wide network of friends – including plumbers, gas engineers, tilers, carpenters, painters and decorators, electricians and builders – in the trade to call upon.

