Bring your dream home to life with expert advice, how to guides and design inspiration. Sign up for our newsletter and get two free tickets to a Homebuilding & Renovating Show near you.
You are now subscribed
Your newsletter sign-up was successful
You don’t need to be a genius to realise that some types of roof are not ideally suited for conversion into living space. In fact, a surprisingly large number of properties have ‘the wrong sort of loft’ for one reason or another.
Of these, probably the most challenging are buildings with shallow pitched roofs, because standard space-making solutions such as adding huge box dormers won’t compensate for a chronic lack of headroom. Even where a loft appears reasonably spacious prior to conversion, the available headroom will normally have shrunk by at least 300mm by the time you’ve added a new floor structure and insulated the rafters too.
How Much Will a Non-Standard Loft Conversion Cost?
The good news is, there’s nearly always a solution. But inevitably, complexity equates to higher cost — compared to the sort of cavernous loft that only needs a couple of skylights, a couple of layers of insulation and a beefed-up floor structure.
A straightforward project of this type could probably be carried out for as little as £15,000 (less if you’re getting stuck in with some DIY), although a typical large dormer roof extension with a new double bedroom and en suite is likely to set you back around £35,000–£45,000.
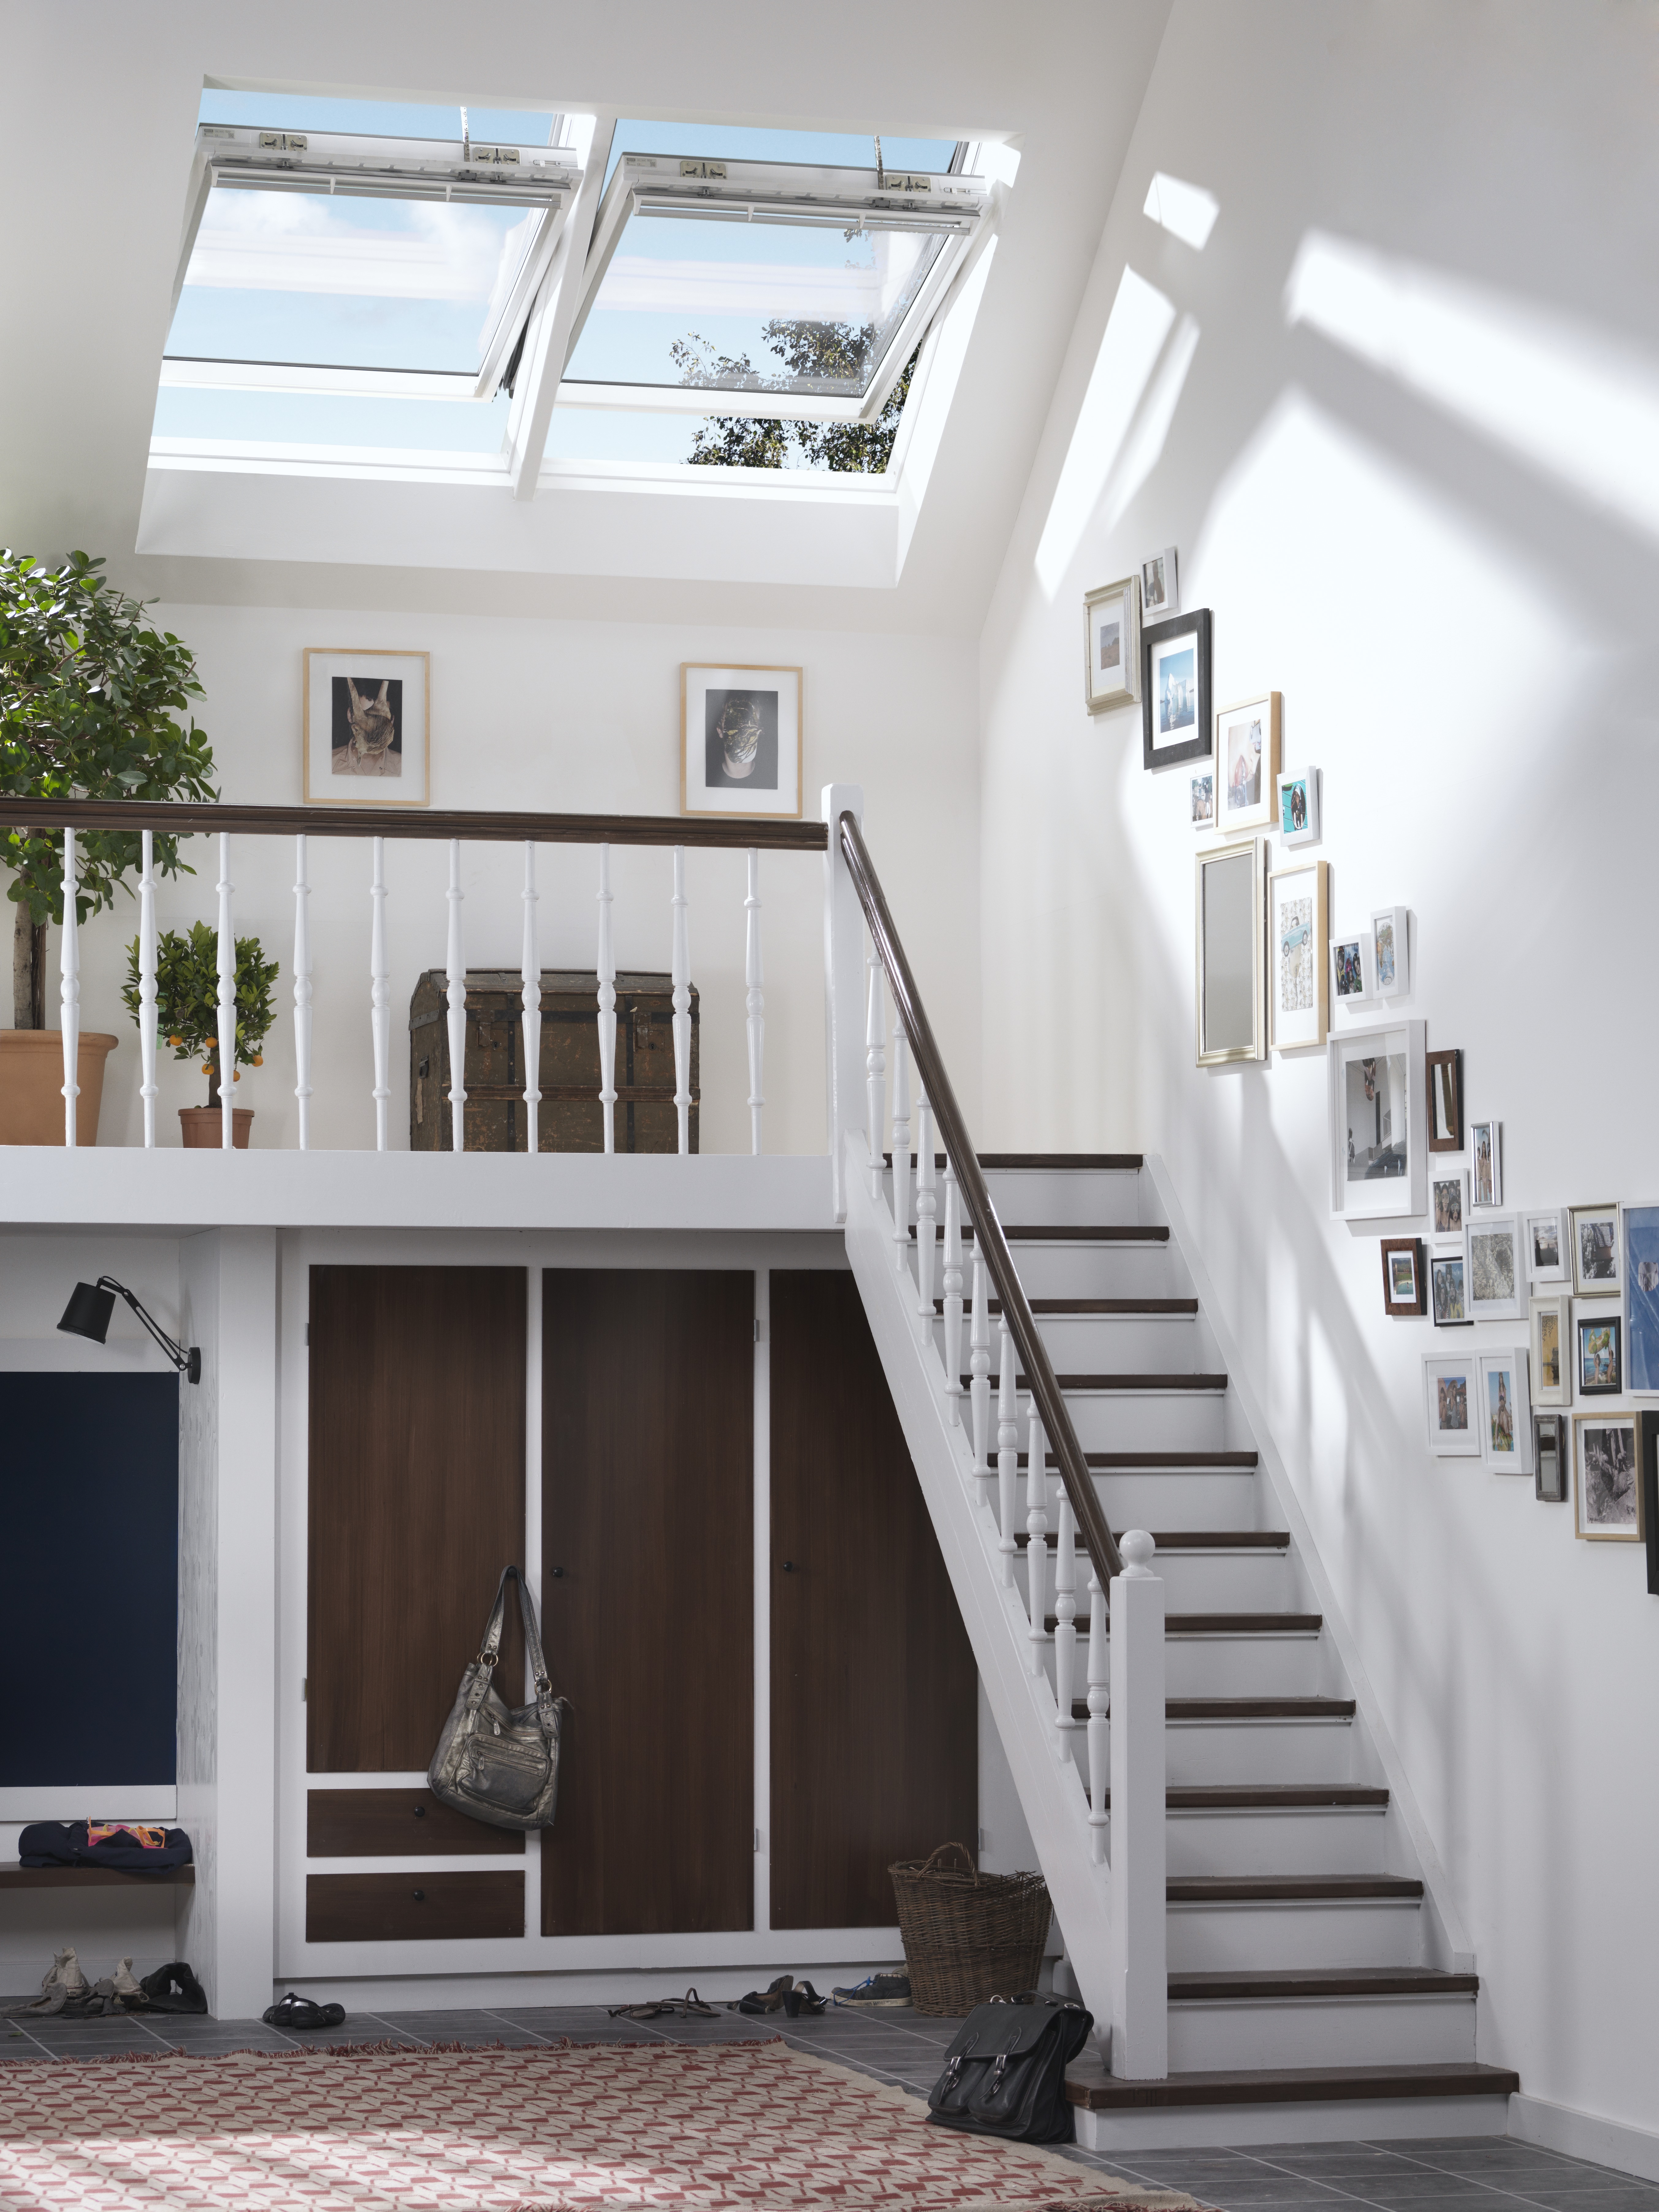
Removal and Rebuild of Roof
remove the existing roof structure and replace it with a larger one. ‘Room-in-roof’ trusses can be craned into place to form the shell of a ready-made new loft room, with the insulation placed above the rafters for maximum thermal efficiency. The main problem with ‘raising the roof’ is that it requires planning permission and there’s a fairly good chance this will be refused — especially for terraced or semi-detached homes.
The ‘removal and rebuild’ method described can also take well over a month to complete, and living in a house with no roof is not much fun in our cold, rainy climate, even when the site is cocooned under a temporary canopy. So it can make sense to go one better and pre-fabricate the entire replacement roof in advance.
Christopher Williams of Moduloft points to the fact that modular replacement systems can be installed and watertight in two days. Because most of the work is factory engineered in advance (including the electrics, plumbing, windows and doors), the whole job can be completed in a fortnight, although roof tiling is normally done on site.
Bring your dream home to life with expert advice, how to guides and design inspiration. Sign up for our newsletter and get two free tickets to a Homebuilding & Renovating Show near you.
Ready-made loft rooms typically work out at around £1,000/m² floor area, often costing upwards of £55,000, although economies of scale make this a more cost-effective solution for larger lofts.
Headroom from Below
Instead of going to all the expense and trouble of raising the height of the roof, a less drastic solution involves borrowing ‘spare’ headroom from the rooms below. In many older properties ceiling heights are surprisingly generous, and can easily accommodate a loss of height and still leave ample headroom of 2.2m.
This method differs from conventional loft conversions where the existing ceiling joists are retained and new floor joists (typically 200mm deep) run alongside, supported on steel beams inserted at right angles above ceiling level.
To capitalise on the unused space down below, the new joists can instead be fitted beneath the existing ceiling level, with additional support from ‘long legged’ joist hangers extended beneath the steels. Once the new floor is in place the old ceiling can be cut away, freeing up at least 200mm of space. The extra work involved should add no more than about 10 per cent to the total cost of the project.
Trussed Rafters Loft Conversion
Most roofs built from the late 1960s onwards are of prefabricated trussed rafter construction, with distinctive W-shaped webbing. Although once regarded as ‘hard to convert’ on account of their relatively slender roof timbers (typically only about 30 x 70mm), many lofts of this type have been successfully converted.
The key is to ‘preserve the triangulation’ ensuring that the opposing roof slopes are fully supported and tied together at the base (e.g. with new floor joists) and near the apex with new collars. Also, it’s essential that the new structure is fully in place before cutting any of the trusses. The rafters may also need to be strengthened by doubling them up with new ones fixed alongside, or with sheets of orientated strand board (OSB) for windbracing.
Telescopic Joists
Most loft conversions employ at least one pair of steel beams to support the new floor structure and the roof slopes at purlin level, and sometimes also at ridge level, e.g. where you’re adding a large dormer. However, manoeuvring long, heavy steels into place at high level can be enormously difficult, necessitating the use of shorter 2m lengths bolted together in situ. Even then, it’s pretty hefty work because steel beams can weigh as much as 100kg per metre.
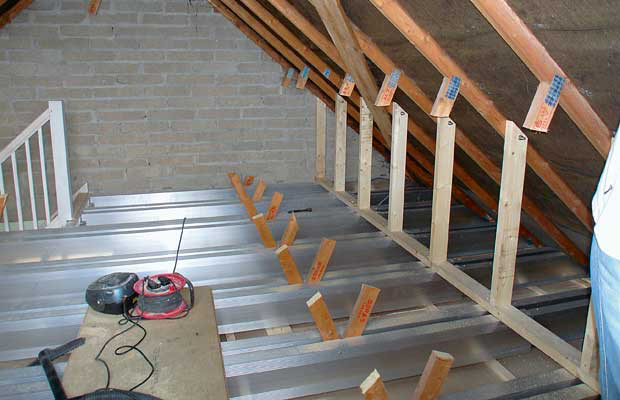
In instances where access is restricted, TeleBeams can provide an ingenious solution. These are extendable lightweight aluminium beams that are slid into place alongside the existing floor joists. Costs are reduced because you only need to remove the lower three rows of tiles on one side of the house, so there’s no need to hire a crane to install heavy steel beams. Better still, it’s often possible to install them from inside with potentially big savings on scaffolding.
The beams are telescopic and adjust to the width of the building, spanning from outside wall to outside wall. As well as forming the new floor structure, they also provide support to the roof rafters via vertical stud walls near the edges of the room. It typically costs around £4,000 for a set of 10 TeleBeam trusses — sufficient for loft conversion of a small semi. This will often work out cheaper than using conventional steels once you factor in savings on labour, access and plant hire etc.
The system has ‘National Type Approval’ so structural calculations don’t need to be submitted for Building Regulations, but you may still need a steel beam at ridge level where you have a large dormer.
Making Sure Your Loft Conversion Complies with Building Regulations
All loft conversions need Building Regulations consent. Although primarily this is concerned with matters of safety (structural support, safe access, escape from fire etc.), complying with Part L to meet thermal efficiency U value targets is becoming increasingly important. Consent is also required for works to the electrics, glazing and roof coverings but these can normally be self-certified by approved installers.
Fortunately, when it comes to loft stairs, Part K of the Building Regulations adopts a pragmatic approach. Instead of the normal requirement for headroom of 2m above each stair tread, it is recognised that ceilings to loft stairs may need to slope, e.g. with hipped roofs. So a reduced space of 1.9m above the centre and 1.8m on the lower side can be acceptable as long as you can achieve 2m on the higher side. The position of new steels can sometimes clash with stairs, so the alternative of using telescopic joists may be worth considering.
Where the new accommodation comprises a single habitable room, Building Control may accept less conventional solutions such as alternating tread ‘paddle’ stairs or a fixed ladder with handrails on both sides, or a spiral staircase.
Fire Safety for a Loft Conversion
The primary means of escape is normally via an ‘escape corridor’ leading down to a main exit door. Since the rules changed in 2007 it has no longer been acceptable to rely solely on a ‘means of escape window’ that can be accessed in an emergency from outside.
Fortunately, the existing walls and ceilings in a typical landing, stairs and entrance hall should already provide the necessary 30-minute fire resistance for escape from your loft conversion — doubling as an escape corridor without the need for lining with extra layers of fireboard. But in homes with open plan layouts, a new partition wall may need to be built to create an entrance hall. Fire doors must be fitted to the loft accommodation and to all habitable rooms en route (not required to bathrooms, WCs and utility rooms) although self-closers are no longer required in most cases.
There are possible alternative solutions, such as constructing a new lobby at the base of an enclosed fire-boarded staircase with a choice of escape routes via two fire doors, leading to separate main exits. Building Control can exercise discretion and in some cases may accept interlinked smoke alarms installed in all rooms with no need for fire doors. Inevitably, compliance is more arduous with taller buildings where the new floor is more than 7.5m above external ground level. Here, sprinkler systems and external fire exits may be required.
Internal Support and Period Properties
Many older properties have internal load-bearing ‘spine walls’ of solid masonry construction. It may be possible to utilise this intermediate support for new floor joists running from one main wall to the other, obviating the need for new steel beams. However, to be certain that internal walls are sufficiently robust to cope with extra loadings it’s advisable to appoint a structural engineer to check foundation depths.
Period properties with shallow foundations can sometimes struggle to accommodate major additional loadings. Party walls may only be of single width brick (115mm thick) and not up to the job of supporting new steel beams. Also, ancient timber lintels over window and door openings may have been weakened by beetle or fungal decay. The TeleBeam system has the advantage of spreading loadings over a wider area than steel beams with their very high point loadings.
The ‘nuclear option’ would be to erect a totally independent supporting framework to support the new beams at roof level, with steel stanchions erected on concrete pad foundations excavated in your ground floor rooms. However this could add more than £10,000 plus enormous upheaval, and in most cases simply wouldn’t be cost-effective.
The Tricky Bits of a Loft Conversion
The need for large water tanks in lofts is rapidly becoming a thing of the past, with the advent of mains-fed combination boilers or pressurised unvented hot water systems. However, where water tanks need to be reinstated, they can be placed within new eaves cupboards occupying the ‘dead space’ under the lower roof slopes.
When fitting insulation to the rafters, the Building Regulations require a clear air space of 50mm to be left between the rafters under the tiles. A good flow of air is required from the eaves on one side to the opposite side of the building to safely disperse any moist air. In some cases, additional vents may be required to eaves and ridge tiles. There are no special requirements for room ventilation, just conventional trickle vents on windows and extractor fans in bathrooms.
One of the best materials for sound insulation is mineral wool (in quilt or batt form), which can be stuffed between floor joists or stud work in your loft conversion. Lining walls and ceilings with a double layer of acoustic plasterboard can also be very effective, as can laying a carpet over thick rubber underlay. For best results, consider laying acoustic floor boards to the loft room and constructing a suspended ceiling to the rooms below, stuffed with mineral wool.
Chartered surveyor Ian Rock MRICS is a director is Rightsurvey.co.uk and the author of eight popular Haynes House Manuals, including the Home Extension Manual, the Self Build Manual and Period Property Manual.
Ian is also the founder of Zennor Consultants. In addition to providing house surveys, Zennor Consultants provide professional guidance on property refurbishment and maintenance as well as advising on the design and construction of home extensions and loft conversions, including planning and Building Regulations compliance.
Ian has recently added a 100m2 extension to his home; he designed and project managed the build and completed much of the interior fit-out on a DIY basis.

