Installing a kitchen island: 5 steps from planning to finishing
You only get one chance to install a kitchen island correctly. Get to know the steps that go into this transformative project

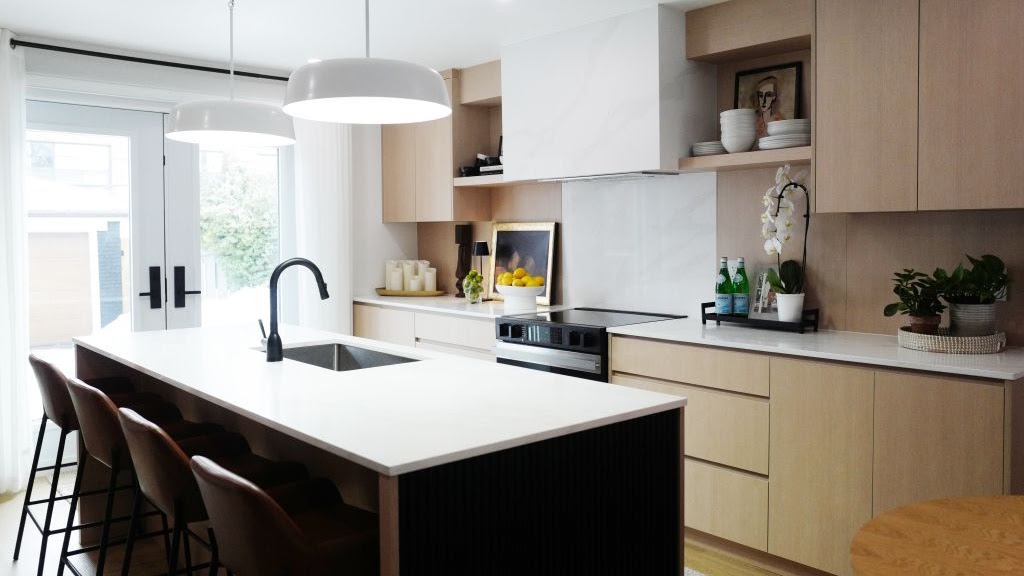
Installing a kitchen island is a milestone for many homeowners – the final flourish that creates a luxurious and livable kitchen.
These desirable kitchen features have been used since at least as early as the 1800s, when European households would often position a worktable in front of a hearth or stove. Today, kitchen islands are a byword for elevated living. They can be practical, too.
“A kitchen island offers versatility beyond a standard worktop-based layout, creating a multifunctional space that encourages social interaction and efficient workflow,” says Gavin Shaw, Managing Director of Laminam UK, a maker of porcelain worktops.
“With additional storage, seating, and workspace, an island can act as the central hub of the kitchen.”
The process of installing a kitchen island can be complicated – especially if your island will require electricity, water or ventilation. In this guide, experts explain the steps that go into a successful installation, from planning and design to installing the feature, connecting utilities and finishing.

Gavin Shaw is MD of Laminam UK, a producer of high-quality ceramic slabs for kitchen worktops and other applications. Shaw has over 20 years’ experience as a company director in the stone surface industry, with expertise across porcelain, quartz and natural stone.
Things to consider before you install a kitchen island
Before you start drawing up specifications for a kitchen island, there are some practicalities to consider. In particular, how will your kitchen accommodate the island?
“You’ll need to plan the layout carefully and make sure there’s adequate space for the island, allowing for at least 90 cm of clearance around all sides to ensure easy movement,” says Clive Holland, a DIY expert and Fix Radio presenter.
“If you’re installing an integrated sink, plumbing will be required, which involves confirming that there is a water supply and drainage system available,” he adds.
“This may involve rerouting pipes or adding new ones, depending on your kitchen’s existing setup, so it’s wise to consult a professional plumber to handle this part of the process.”
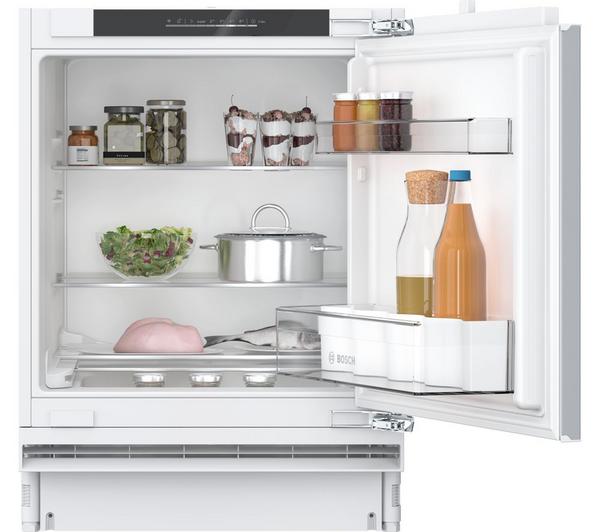
Where a kitchen island is going to house integrated appliances such as an electric oven or fridge, you’ll also need to prepare electrical connections.
“Installing a power supply to these areas will require careful planning, as it may involve adding new wiring or circuits,” says Holland.
“Finally, before installation begins, it’s a good idea to clear the area and make sure there are no obstructions in the way, ensuring the space is safe for both the installer and the materials.”

Clive Holland is the former host of Cowboy Trap on the BBC. Now a broadcaster on Fix Radio, the UK’s only national radio station for builders and tradespeople, Holland is one of the UK’s leading property and DIY experts.
These tools and materials can help you create the perfect kitchen island

Painting your own kitchen island is an accessible way to contribute to its finished look (and potentially save some cost). A good angled brush like this one will help with painting details and edges.
How to install a kitchen island
1. Plan your kitchen island
Whether you’re buying an ‘off the shelf’ kitchen island or having one made bespoke, you should think carefully about its specifications.
“Consider how the island will enhance both the functionality and flow of your kitchen,” says Shaw.
“Think about your space and how the island will be used – whether for food prep, dining, entertaining, or additional storage.”
Defining the intended use of your kitchen island will help you choose its features, from frequently-used countertops and seating to integrated sinks, drawers and appliances.
Size and materials are also key factors to get right.
“A larger island offers more counter space, making it ideal for food preparation or socialising, but it can make a smaller kitchen feel cramped,” says Holland.
“Meanwhile, different materials offer various benefits. For instance, a solid wood island can provide a warm, traditional look, while a marble or granite top might add a touch of luxury and durability.
“If you opt for a cooking space, be mindful of the maintenance requirements of your chosen material, as certain surfaces may be more prone to scratching or staining,” he adds.
2. Make provision for utilities and ventilation
In many kitchens, electrical wiring and plumbing is limited to areas where appliances or a sink have been situated. Depending on how you’re going to use your kitchen island, you might need to extend these utilities to its location.
“It’s crucial to plan for plumbing, electrical, and ventilation requirements, particularly if your island will house a sink, hob, or built-in appliances,” says Shaw.
If the island includes plumbing or electrical components, such as a sink or cooktop, the necessary connections should be made before installation. This may require routing water pipes or adding electrical outlets, so it’s important to consult with professionals to handle these systems correctly.
“Structural integrity is another pre-installation consideration, as larger islands may require additional support,” says Shaw.
“Consulting with a kitchen designer or contractor early in the process ensures a smooth installation.”
3. Install the kitchen island
While a few very confident DIYers install their own kitchen island, it’s likely that you’ll hire a professional installer or provider to complete this step. There is little room for error, as all sides and elements of the island will be on show after installation. This is especially true if your kitchen island will feature a specialist worktop material such as porcelain, quartz or marble.
“When you’re working with these premium materials, professional fabrication and installation are recommended to ensure seamless joins and long-term durability,” Shaw notes.
Installation begins with ensuring the floor is level and removing any potential obstacles. Next, the base can be assembled and secured to the floor, which is often done using wooden blocks and skirting boards. The island can then be attached to this secure base, or built from it in situ.
Typically, a worktop will be fitted on top of the island – but this might come at the end of the following step.
4. Integrate appliances and other features
With the basic structure of the kitchen island built, you can move on to installing any optional features.
“Depending on the design, this could include a countertop, drawers, or shelves,” says Holland.
At this point, you’ll also install any integrated appliances such as a hob or fridge, and a sink (if you’re going to include one).
“All these components should be carefully secured, and any plumbing or electrical connections should be tested to verify they work properly,” says Holland.
“Finally, adding the finishing touches, such as sealing joints or adjusting the height of cabinets, will complete the installation.”

Nick began his time with Harris in 1988, and throughout the decades has worked in various departments. His experience and product understanding informs the evolution of all Harris products, from benchmarking to insight, research and development.
5. Finishing
Some kitchen islands come ‘finished’ from the provider, so you won’t need to finish or paint them. However, you can gain finer control over the final look of the island (and potentially save money) by painting and finishing a ‘raw wood’ kitchen island yourself.
“Painting and finishing your kitchen island once it’s in situ can give your kitchen a fresh, modern look,” says Nick Parsons, Technical Manager at Harris Brushes.
“Start by protecting the surrounding surfaces with dust sheets to avoid any accidental splatters. Sand the kitchen island thoroughly using a product such as Harris Aluminium Oxide Sandpaper (£4.25, B&Q) to ensure a smooth surface for painting. For plastic or laminated finishes, this step is essential to help the primer adhere effectively,” he adds.
Next, clean the sanded surfaces with sugar soap to remove grease, dust, and any lingering dirt.
“Once you have a pristine base, apply an even coat of all-purpose primer using an angled brush (like this one, £4.25, Amazon) for detailed edges and a gloss roller such as the Harris Ultimate Woodwork Gloss Roller (£3.35, Amazon) for the flat sections,” says Parsons.
“Allow the primer to dry completely before giving it a light sanding with fine sandpaper to ensure a flawless topcoat application.
Finally, you can choose a durable topcoat in your preferred finish.
“Apply at least two layers, ensuring even coverage with the same brushes and rollers used for the primer,” says Parson.
“Let each coat dry thoroughly before applying the next. Once the paint is dry, allow it to cure fully for long-lasting durability.
“With care, quality tools, and attention to detail, your kitchen island will become a stunning centrepiece in your home.”
The worktop of your kitchen island might require some finishing too. For example, many wooden worktops benefit from sealing with a product such as Osmo TopOil (£22.40, Amazon).
FAQs
What are the latest trends in kitchen island design?
In contemporary kitchen design, islands are quite literally becoming part of the furniture. As more homes incorporate this useful feature, trends are emerging around their design and construction.
“Recent innovations in kitchen island design focus on sustainability, seamless integration, and ultra-durable materials,” says Shaw.
“For worksurfaces, advances in ultra-thin surfaces, large-format slabs, and innovative finishes, such as textured effects, are allowing homeowners to achieve a truly bespoke aesthetic while maintaining superior performance.”
Holland agrees that materials are a key area of recent progress in kitchen island design.
“One of the latest trends is the use of sustainable materials, such as recycled wood, bamboo, and eco-friendly stone, which provide a stylish and environmentally conscious alternative to traditional options,” he says.
“Quartz and granite countertops are still popular, but now there are more innovative, low-maintenance finishes that resist scratches, stains, and heat, making them ideal for busy kitchens.”
Another recent advance is the integration of smart technology into kitchen islands.
“Features such as integrated wireless charging, touch-activated lighting and built-in cooktops with smart functions are becoming more common” says Holland.
“Additionally, modular islands are on the rise, allowing homeowners to customise their islands with interchangeable components like storage units, sinks, or even seating areas. This flexibility means that kitchen islands can now be tailored to fit both personal needs and the unique layout of any kitchen.”
Are there advantages to commissioning a bespoke kitchen island?
One of the biggest decisions you’ll make during your kitchen island installation project is whether the island will be bespoke or ready-made. Each option has its pros and cons.
Commissioning a bespoke island from a specialist company or joiner will give you fine control over the dimensions, materials and other details of the island. Perhaps most importantly, the bespoke provider can design the island to accommodate any integrated features you desire, from sinks and draining boards to fridges and ovens.
Buying off-the-shelf may limit the possible functionalities of your kitchen island. However, if you want a kitchen island that simply provides space for food prep, seating and storage, then this approach makes it possible to buy a beautifully crafted island at relatively low cost.
Installing a kitchen island is a complex project. For further details that we couldn't quite squeeze into this guide, see our features on non-standard kitchen island shapes (including circular islands) and split-level kitchen islands. No kitchen island is entire of itself, so take a look at our kitchen remodel ideas for room-wide inspiration.
Get the Homebuilding & Renovating Newsletter
Bring your dream home to life with expert advice, how to guides and design inspiration. Sign up for our newsletter and get two free tickets to a Homebuilding & Renovating Show near you.
Pete Wise is a freelance writer and keen DIYer from Leeds. Pete's tool reviews have featured in titles including Homebuilding & Renovating, Ideal Home and The Independent. He also writes features and news articles for publications such as The Guardian, BBC Good Food and T3. When he isn't busy writing, Pete can often be found at libraries, pubs and live music venues. He finds tile-cutting strangely zen.


