How to sharpen hedge trimmer blades quickly and safely in 4 easy steps
Take the time to learn how to sharpen hedge trimmer blades to ensure you make clean, efficient cuts when trimming your hedges and shrubs

Knowing how to sharpen hedge trimmer blades correctly is the best way to restore them to their former glory and give you the clean cut that you used to get when you first bought them. The more you use your hedge trimmer the more they will lose their edge, however well you clean and maintain them.
You can give them a wipe down and an oil to help stop their teeth tearing at your hedge and leaving it exposed to the possibility of disease, but even the best hedge trimmers will eventually need to be sharpened to stop stress on the motor and keep them in good working order.
Our practical guide explains how to do this, plus offers tips on how often you need to sharpen them and what it costs for the pros to take on the job.
Step-by-step guide on how to sharpen hedge trimmer blades
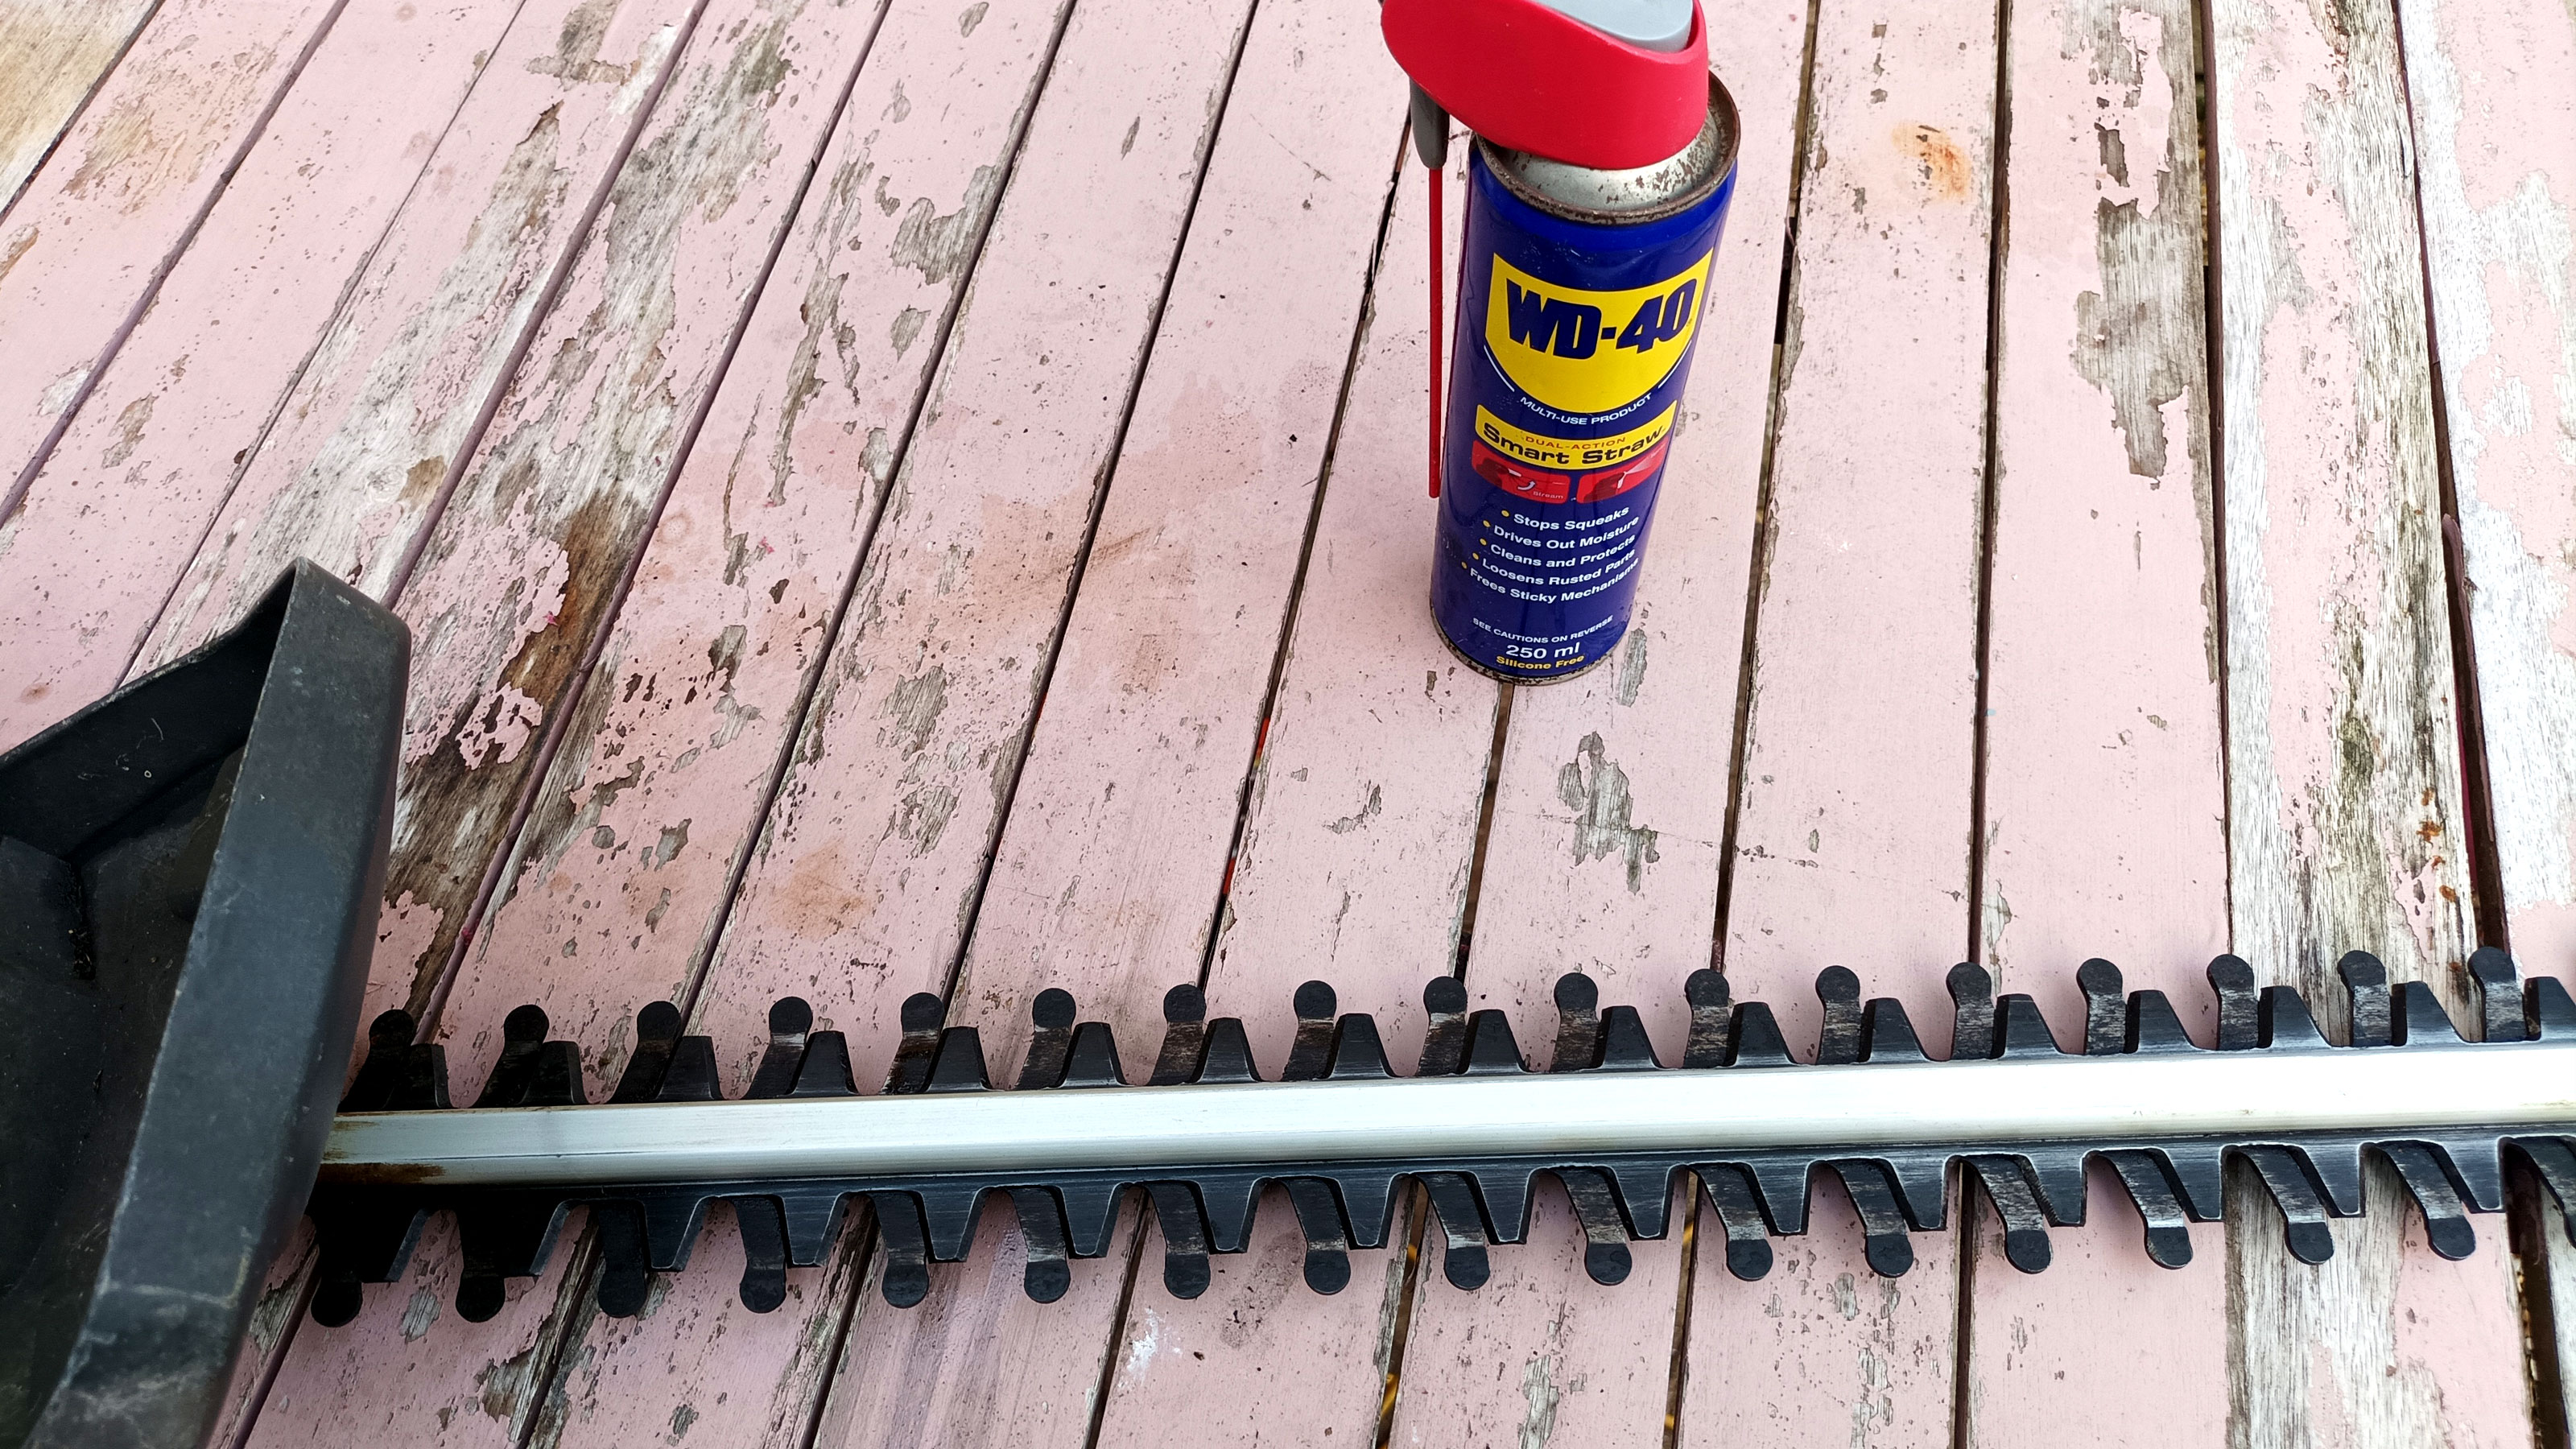
Before you start you will need your chosen sharpening tool, a lubricant like WD-40 from Amazon, a set of sturdy gloves and bar clamps or vice to secure the trimmer blades while sharpening.
1. Clean your blades
Make sure the power is off and you have your sturdy gloves on before you start. The first step is to get rid of as much dirt and sap as possible. There’s several options for doing this. If your blades have little sap or debris on the surface you can wipe down with a damp cloth.
If there is buildup of debris on the surface of the blades, spray liberally with WD-40, leave for a minute to soften a little and switch on the hedge trimmer for 30 seconds to help remove debris. Repeat if necessary. If you are still left with stubborn debris, get a fine grit sandpaper – 180 is good, such as these 3M Pro Grade sanding sheets from Amazon – and gently remove any debris that is still on the blades and wipe clean with a dry cloth.

2. Line up the blades
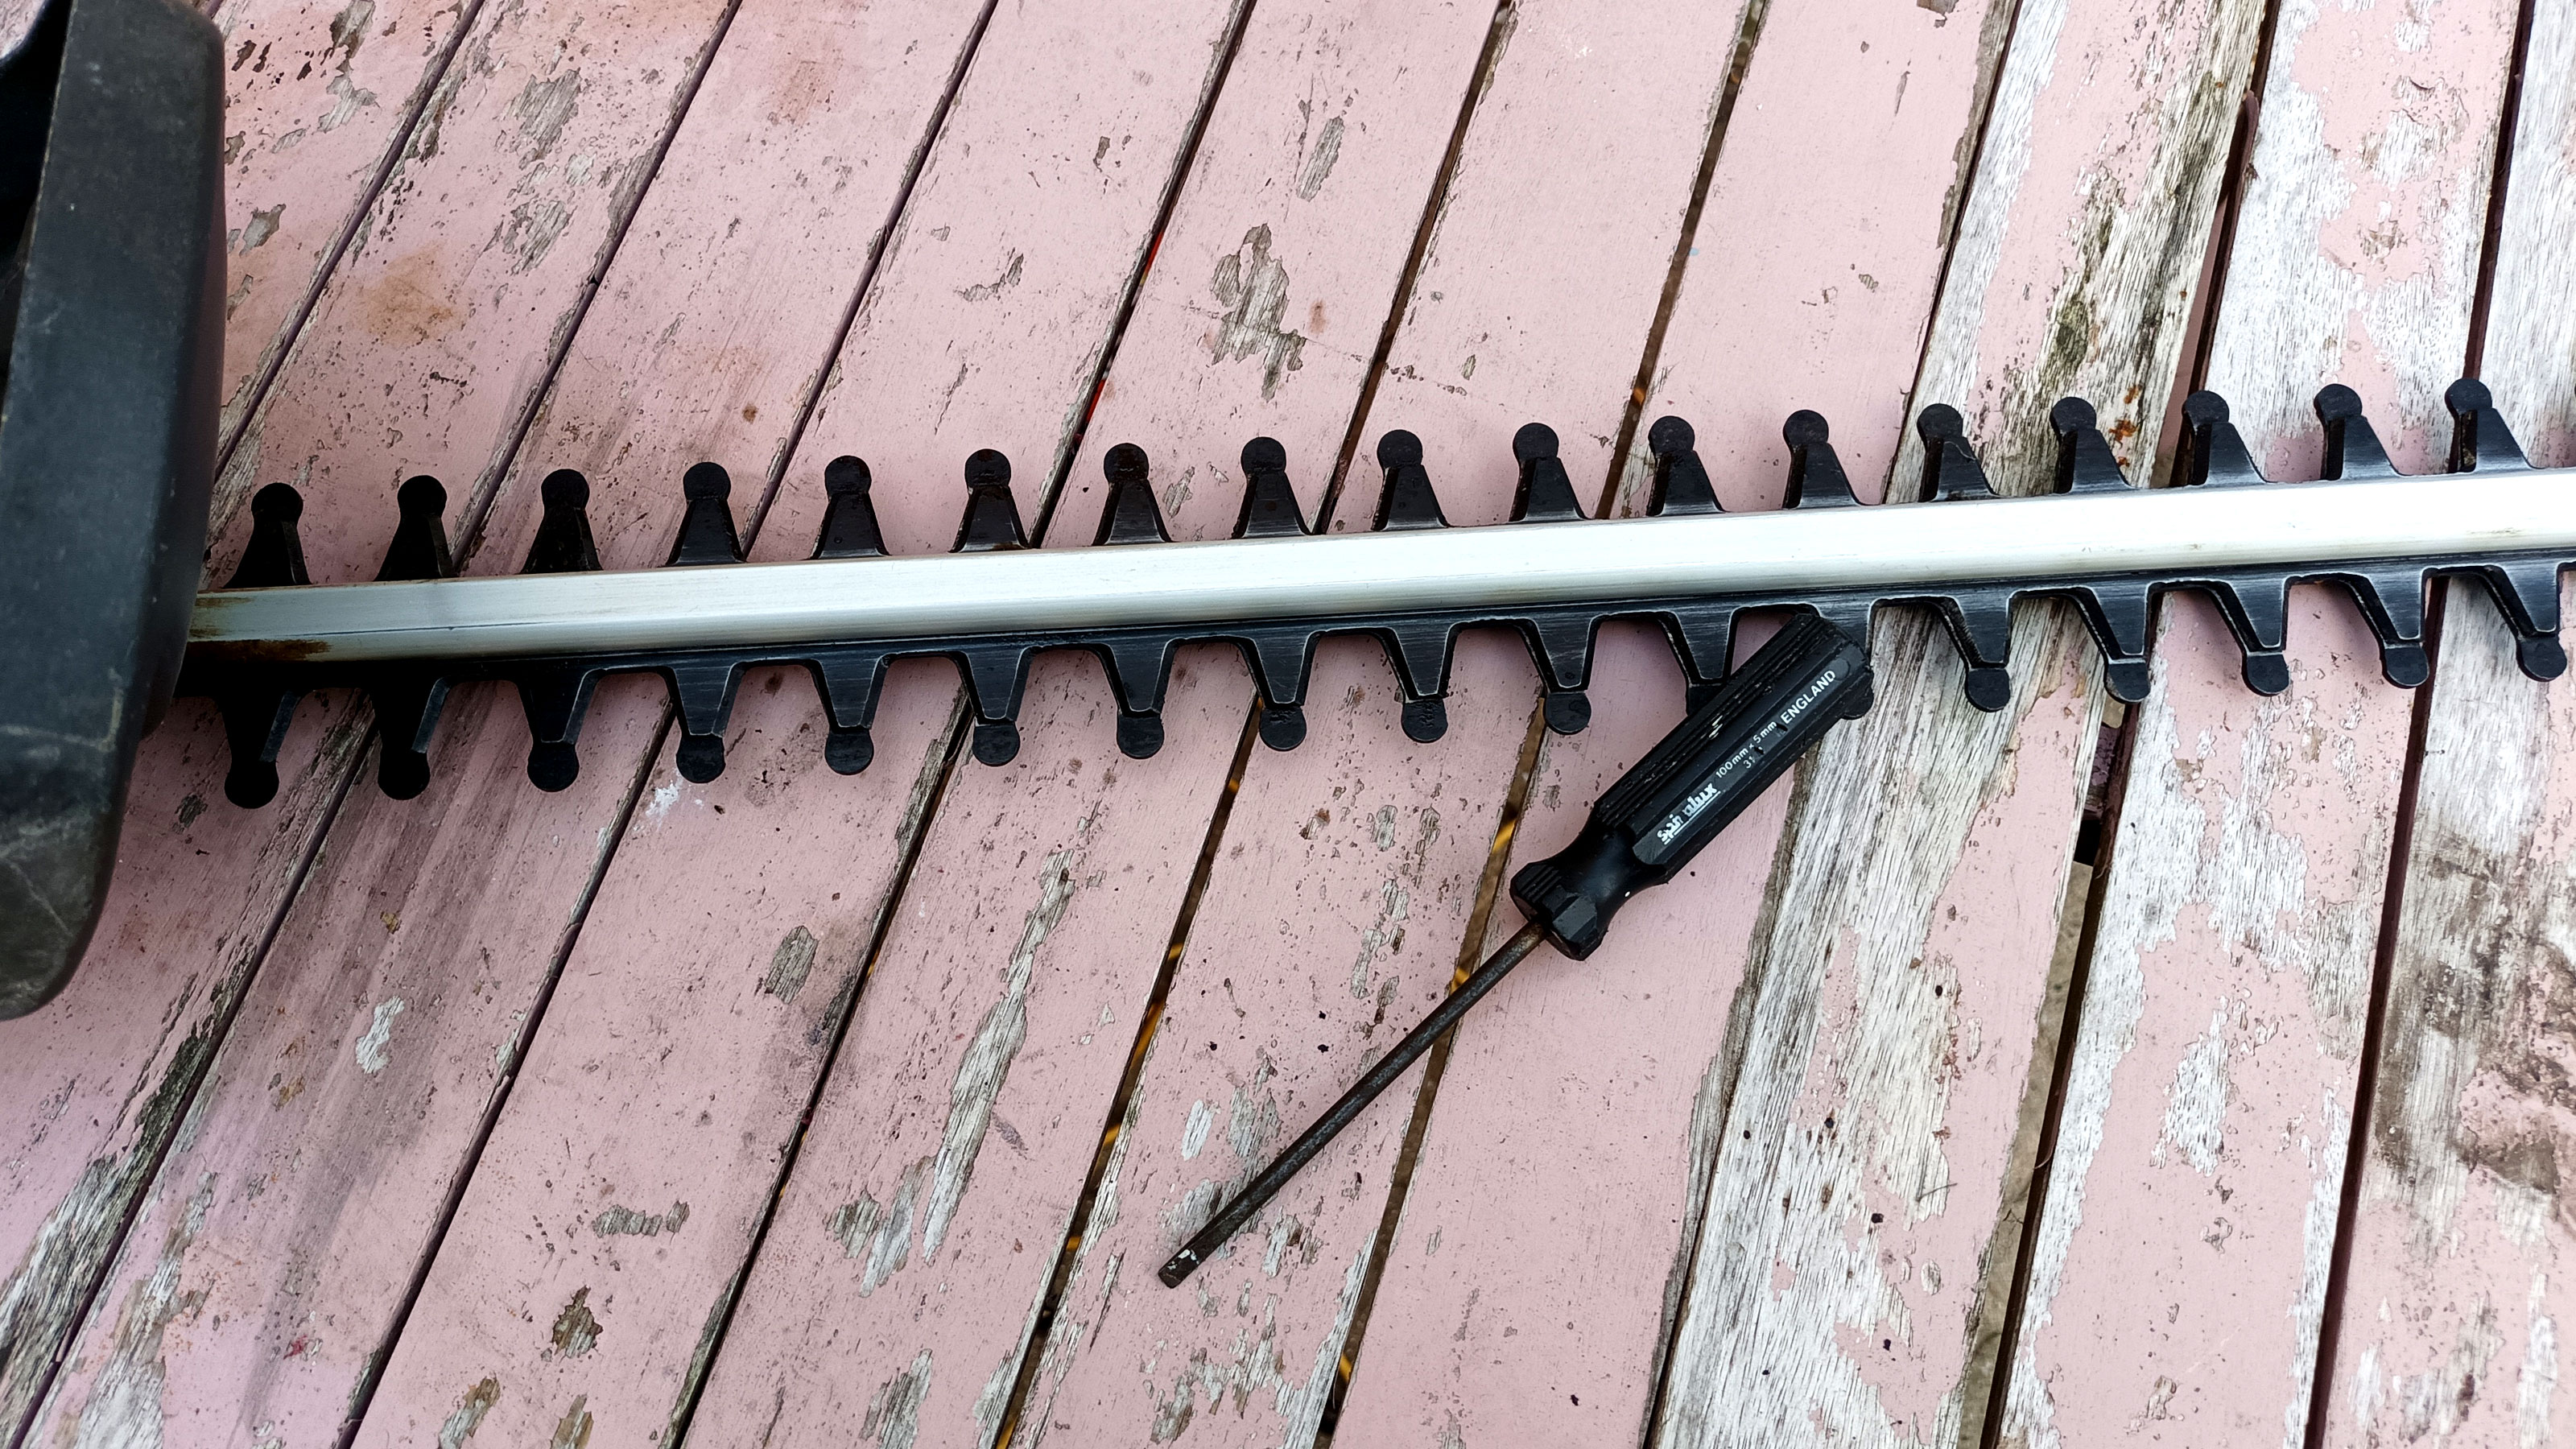
Hedge trimmers use dual action blades, which means one blade sits on top of another. These will need to be lined up to effectively create what looks like one blade so you can sharpen. Switch on and off a few times to see if they quickly align. Alternatively, push the top blade with the handle of a screwdriver until it lines up with the bottom blade. Don’t forget to switch off the power.

3. Secure the hedge trimmer
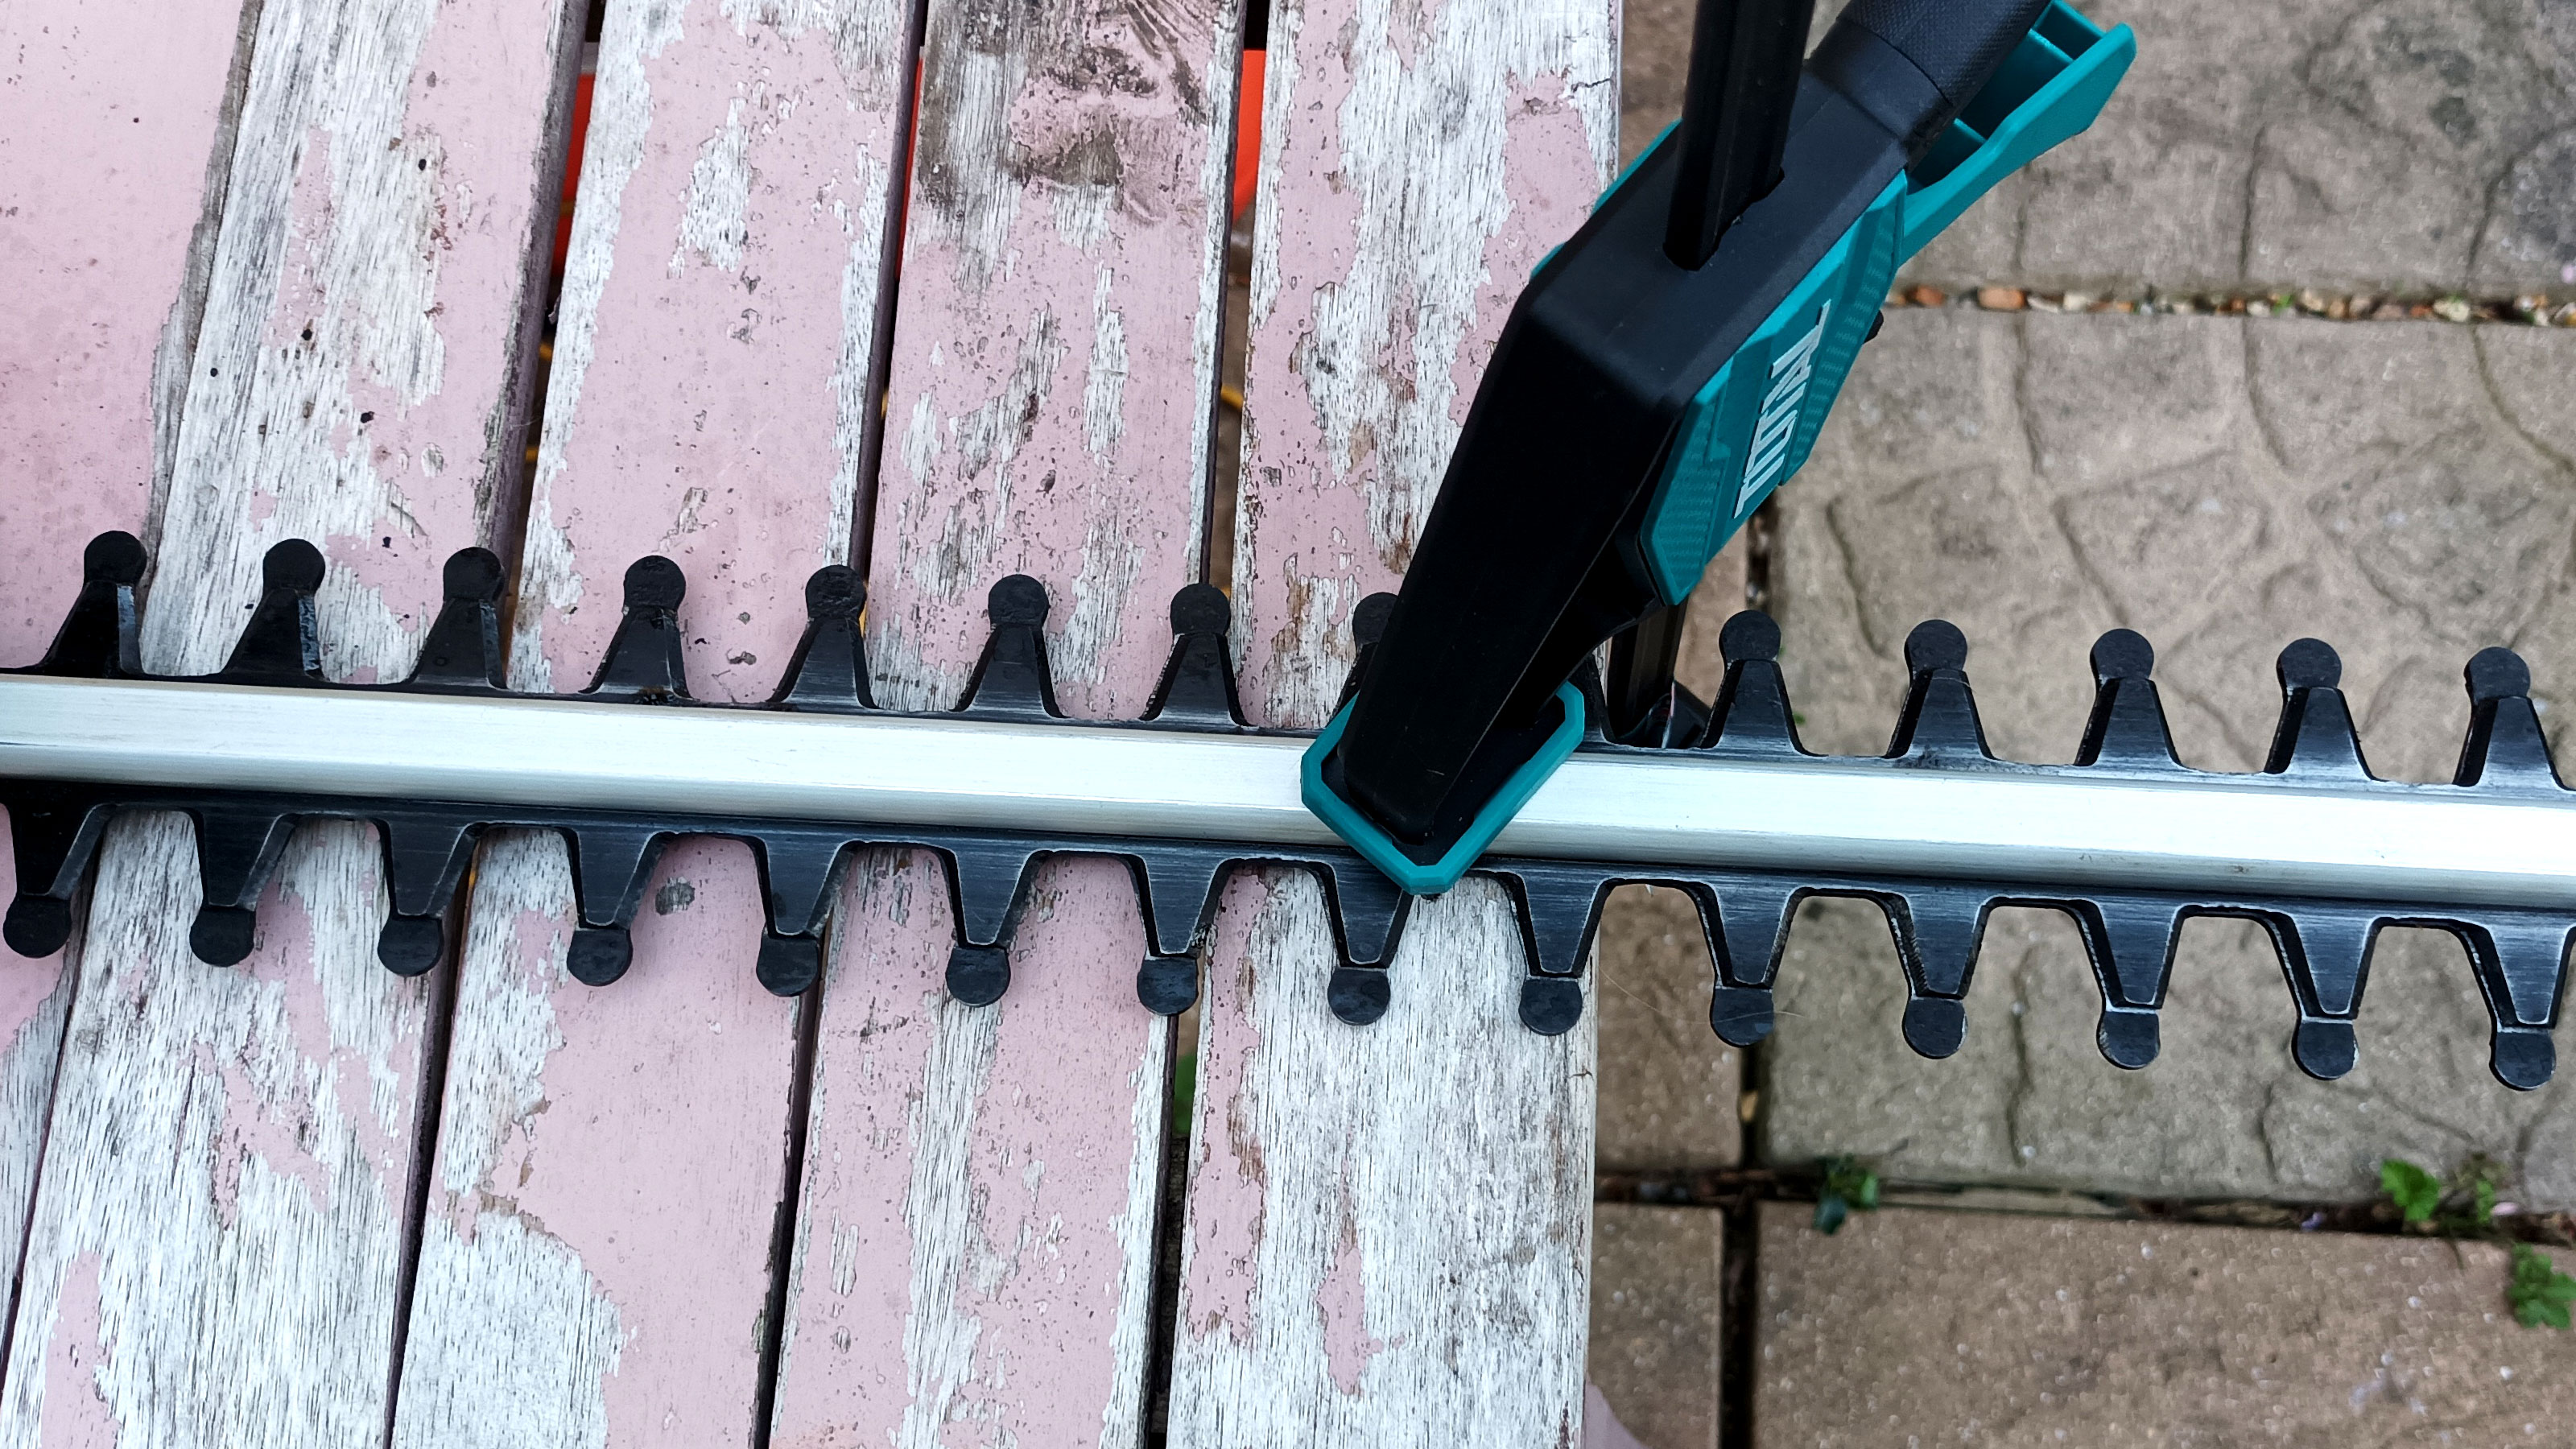
Before you start sharpening the trimmer blade you need to secure the blade and/or trimmer to a secure surface such as a workbench or table. Place the trimmer on the surface and use a clamp or clamps like this WORKPRO Ratchet Bar Clamp Set from Amazon, or a vice if you have one installed to secure it.
Place half the blade over the edge of the table and secure the body and the blade at the edge of the table. After you have sharpened the teeth you can move the trimmer so the rest of the – unsharpened – blade is over the edge of the table edge. This helps stop the blade from flexing too much to make sharpening easier.

4. Sharpen the blade and finish
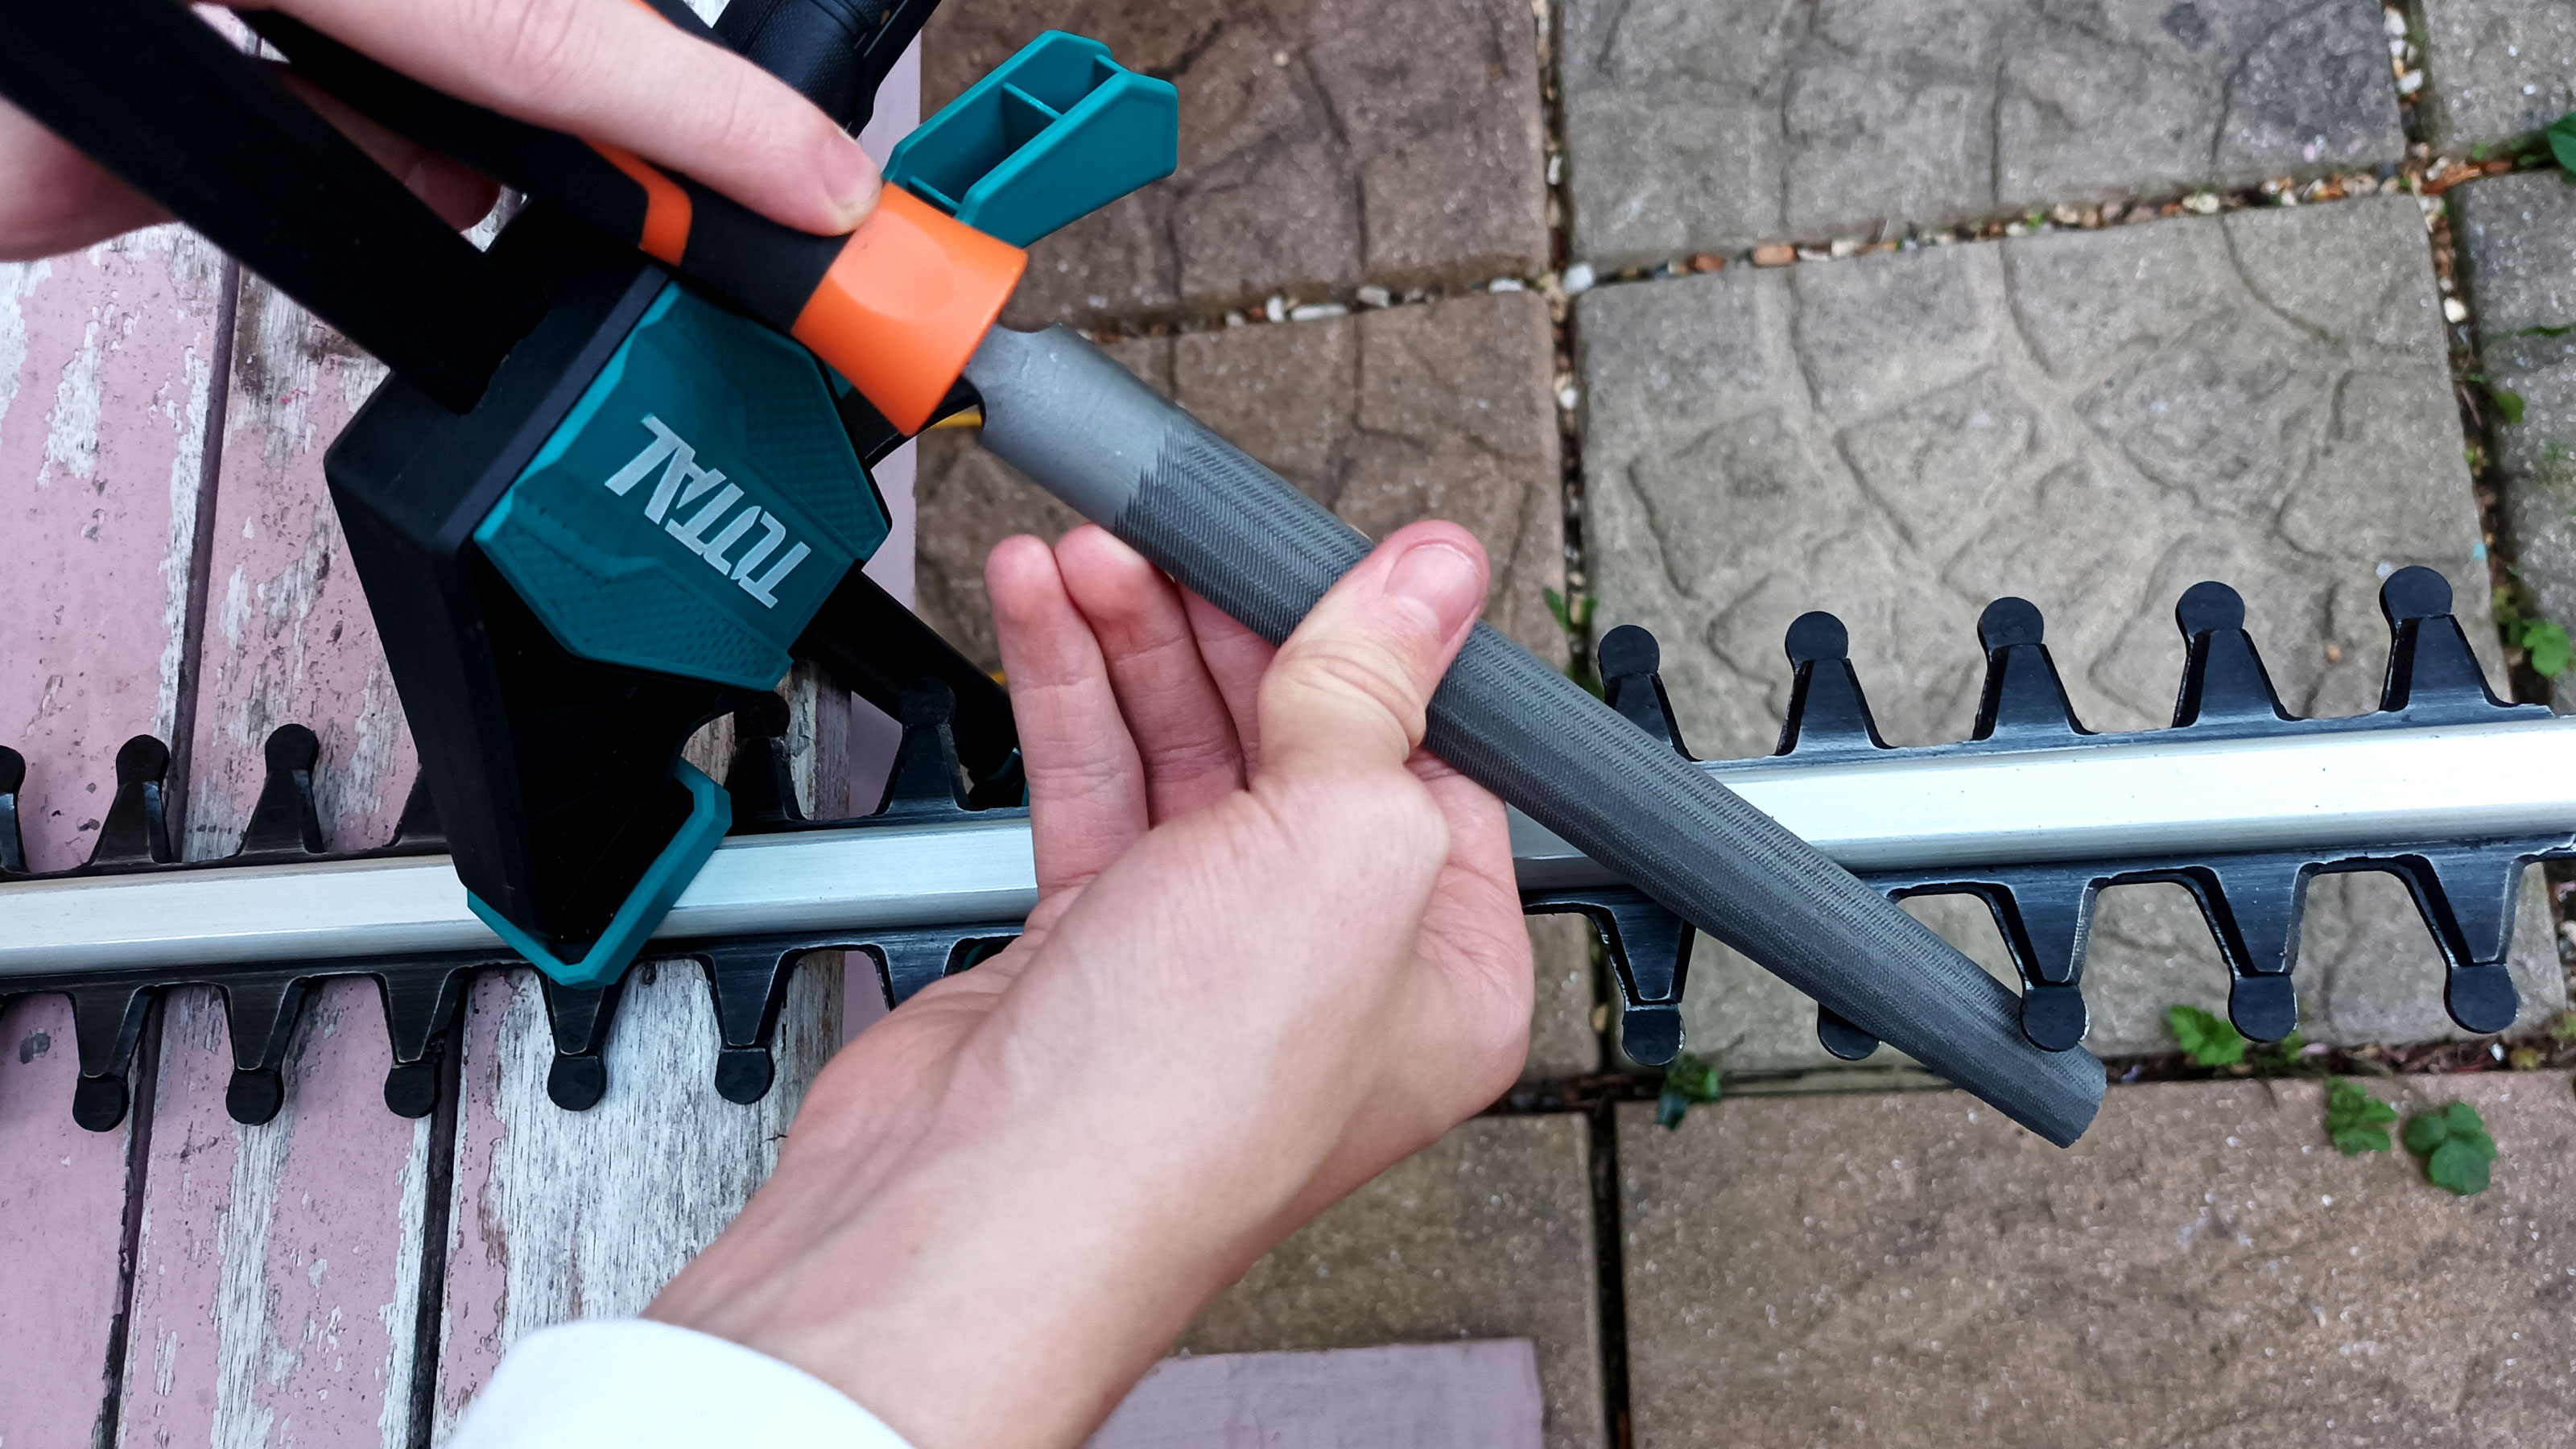
Get your metal file and place the blade so it rests at the same angle as the tooth. Now push down and forward in one downstroke (no need for an upstroke). Repeat this two or three times and check to see if the tooth is sharp. Do a few more strokes if needed. Repeat this process for every tooth on the blade.
Turn over the hedge trimmer and move the bottom blade so the teeth are no longer lined up. This will allow you to see any burr or nicks that need removing to finish the blade. Use the metal file to gently remove any debris. Finally, spray with WD-40 and wipe down with a dry cloth.

FAQs
Is there a tool to sharpen hedge trimmer blades?
There isn’t a specific tool for sharpening hedge trimmer blades, but the popular option is to use a fine metal file like you can find in this Presch File Set from Amazon. Depending on what type of blades your hedge trimmer has you will need a file that is similar in size to the width of the teeth of the blade or slightly smaller.
An alternative is to use a rotary tool like this Dremel 3000 Rotary Tool kit from Amazon. This includes attachments such as a grinding/sharpening stone or sandpaper that can be used for quick sharpening.
How much does it cost to sharpen hedge trimmer blades?
If you don't have the tools needed to sharpen your hedge trimmer blades – or don't want to invest in the necessary tools – or are not confident in doing the job yourself you can pay a professional to do the job.
As always prices will vary for a local service depending on where you live. The size of your blade will also make a difference. The more teeth the blade has the more you will have to pay. And the state of the blade can make a difference to the price. As a guideline expect to pay between £10-15 for a typical hedge trimmer.
How often should you sharpen a hedge trimmer?
It’s difficult to put a timeframe on how often hedge trimmer blades should be sharpened. If your blades are cleaned and maintained properly and regularly they will last longer than blades where debris has been allowed to build up on the blade.
Hedge trimmer manufacturer Stihl suggests every 50 hours – dependent on maintenance. A lot longer than the time frame for sharpening lawn mower blades. But, rather than using a specific period of time a better option is to look out for the signs that a blade is struggling to do its job. The most obvious of these are the cuts. If it's tearing at branches and leaving a frayed cut the blade needs sharpening.
It's also worth noting that if branches are getting stuck between the blades causing your hedge trimmer to jam and stop, then you will need to get the spacers replaced. Sharpening will help to a certain degree, but won't solve the problem.
Get the Homebuilding & Renovating Newsletter
Bring your dream home to life with expert advice, how to guides and design inspiration. Sign up for our newsletter and get two free tickets to a Homebuilding & Renovating Show near you.
Steve Jenkins is a freelance content creator with over two decades of experience working in digital and print and was previously the DIY content editor for Homebuilding & Renovating.
He is a keen DIYer with over 20 years of experience in transforming and renovating the many homes he has lived in. He specialises in painting and decorating, but has a wide range of skills gleaned from working in the building trade for around 10 years and spending time at night school learning how to plaster and plumb.
He has fitted kitchens, tiled bathrooms and kitchens, laid many floors, built partition walls, plastered walls, plumbed in bathrooms, worked on loft conversions and much more. And when he's not sure how to tackle a DIY project he has a wide network of friends – including plumbers, gas engineers, tilers, carpenters, painters and decorators, electricians and builders – in the trade to call upon.

