How to sharpen a chainsaw in four must follow steps
Check out our expert guide on how to sharpen a chainsaw to prolong the life of the chain and create clean, sharp cuts that mean less effort for you

Knowing how to sharpen a chainsaw is an essential skill to keep it working effectively and consistently. Like any tool if you don’t look after it properly, it won't work as well and won’t last as long.
You can engage a professional sharpening service to do the job, but with the right know how any DIYer can tackle the job. You might already have the tools to sharpen garden shears safely but these won’t work on a chainsaw. Here, in our expert guide, we explain which are the right tools to use to sharpen a chainsaw as well as explaining how to do it and the steps you need to take to keep your chainsaw in prime working order.
How to sharpen a chainsaw: An expert step-by-step guide

Maintaining a chainsaw chain is essential for effective working cuts. Here Matt Kent, Landscaping Category Manager at Toolstation gives you a step-by-step guide on how its done.
“Whether you’re cutting wood, limbing and pruning, landscaping or even carving and sculpting, you’ll need a chainsaw. However, over time you may notice that you struggle to cut with the same ease as before, which could mean your chainsaw blade needs sharpening." reveals Kent.
He continues, “Sharpening your chainsaw is a simple task but can be daunting, so it’s important to prepare and use the correct tools to stay safe. Having a sharp chain is essential for keeping your saw working efficiently for years to come. A blunt chainsaw can easily bite into and get caught on wood, leading to kickback that may cause injury or result in the chain snapping.”
1. Safety first
“Before you begin, put on safety goggles and work gloves to protect your eyes and hands. It's also essential to wear appropriate safety clothing to protect yourself from any debris. To sharpen a chainsaw, you'll need a few tools: a round file, a flat file, a file guide (or a depth gauge), and a vice.
“Alternatively, you could use a chainsaw chain sharpener which is designed to sharpen any 5/32” chainsaw [sharpeners can be picked up easily at Toolstation as well as buying online at B&Q Tradepoint]. Check your manufacturer's manual to ensure your sharpener or file is the correct diameter for your saw.”
2. Secure the chainsaw
“Firstly, make sure you give the chain a thorough clean using mineral spirits or a degreasing fluid to remove any dirt or debris. Find a sturdy work surface or a vice to secure the chainsaw in place. This will prevent any accidental movements to help keep you safe while sharpening.
Make sure the chainsaw is turned off and the chain brake is engaged to keep the chain from moving. It’s important to ensure the power supply, whether fuel, battery or mains power, is completely cut off before beginning.”
3. Sharpening the chainsaw cutting teeth
“Next, identify the cutting teeth on the chainsaw chain. These teeth have a curved shape and are positioned alternately. Determine the size of the file you need based on the chainsaw manufacturer's recommendations. It's usually indicated on the chain itself, or in the chainsaw's manual.
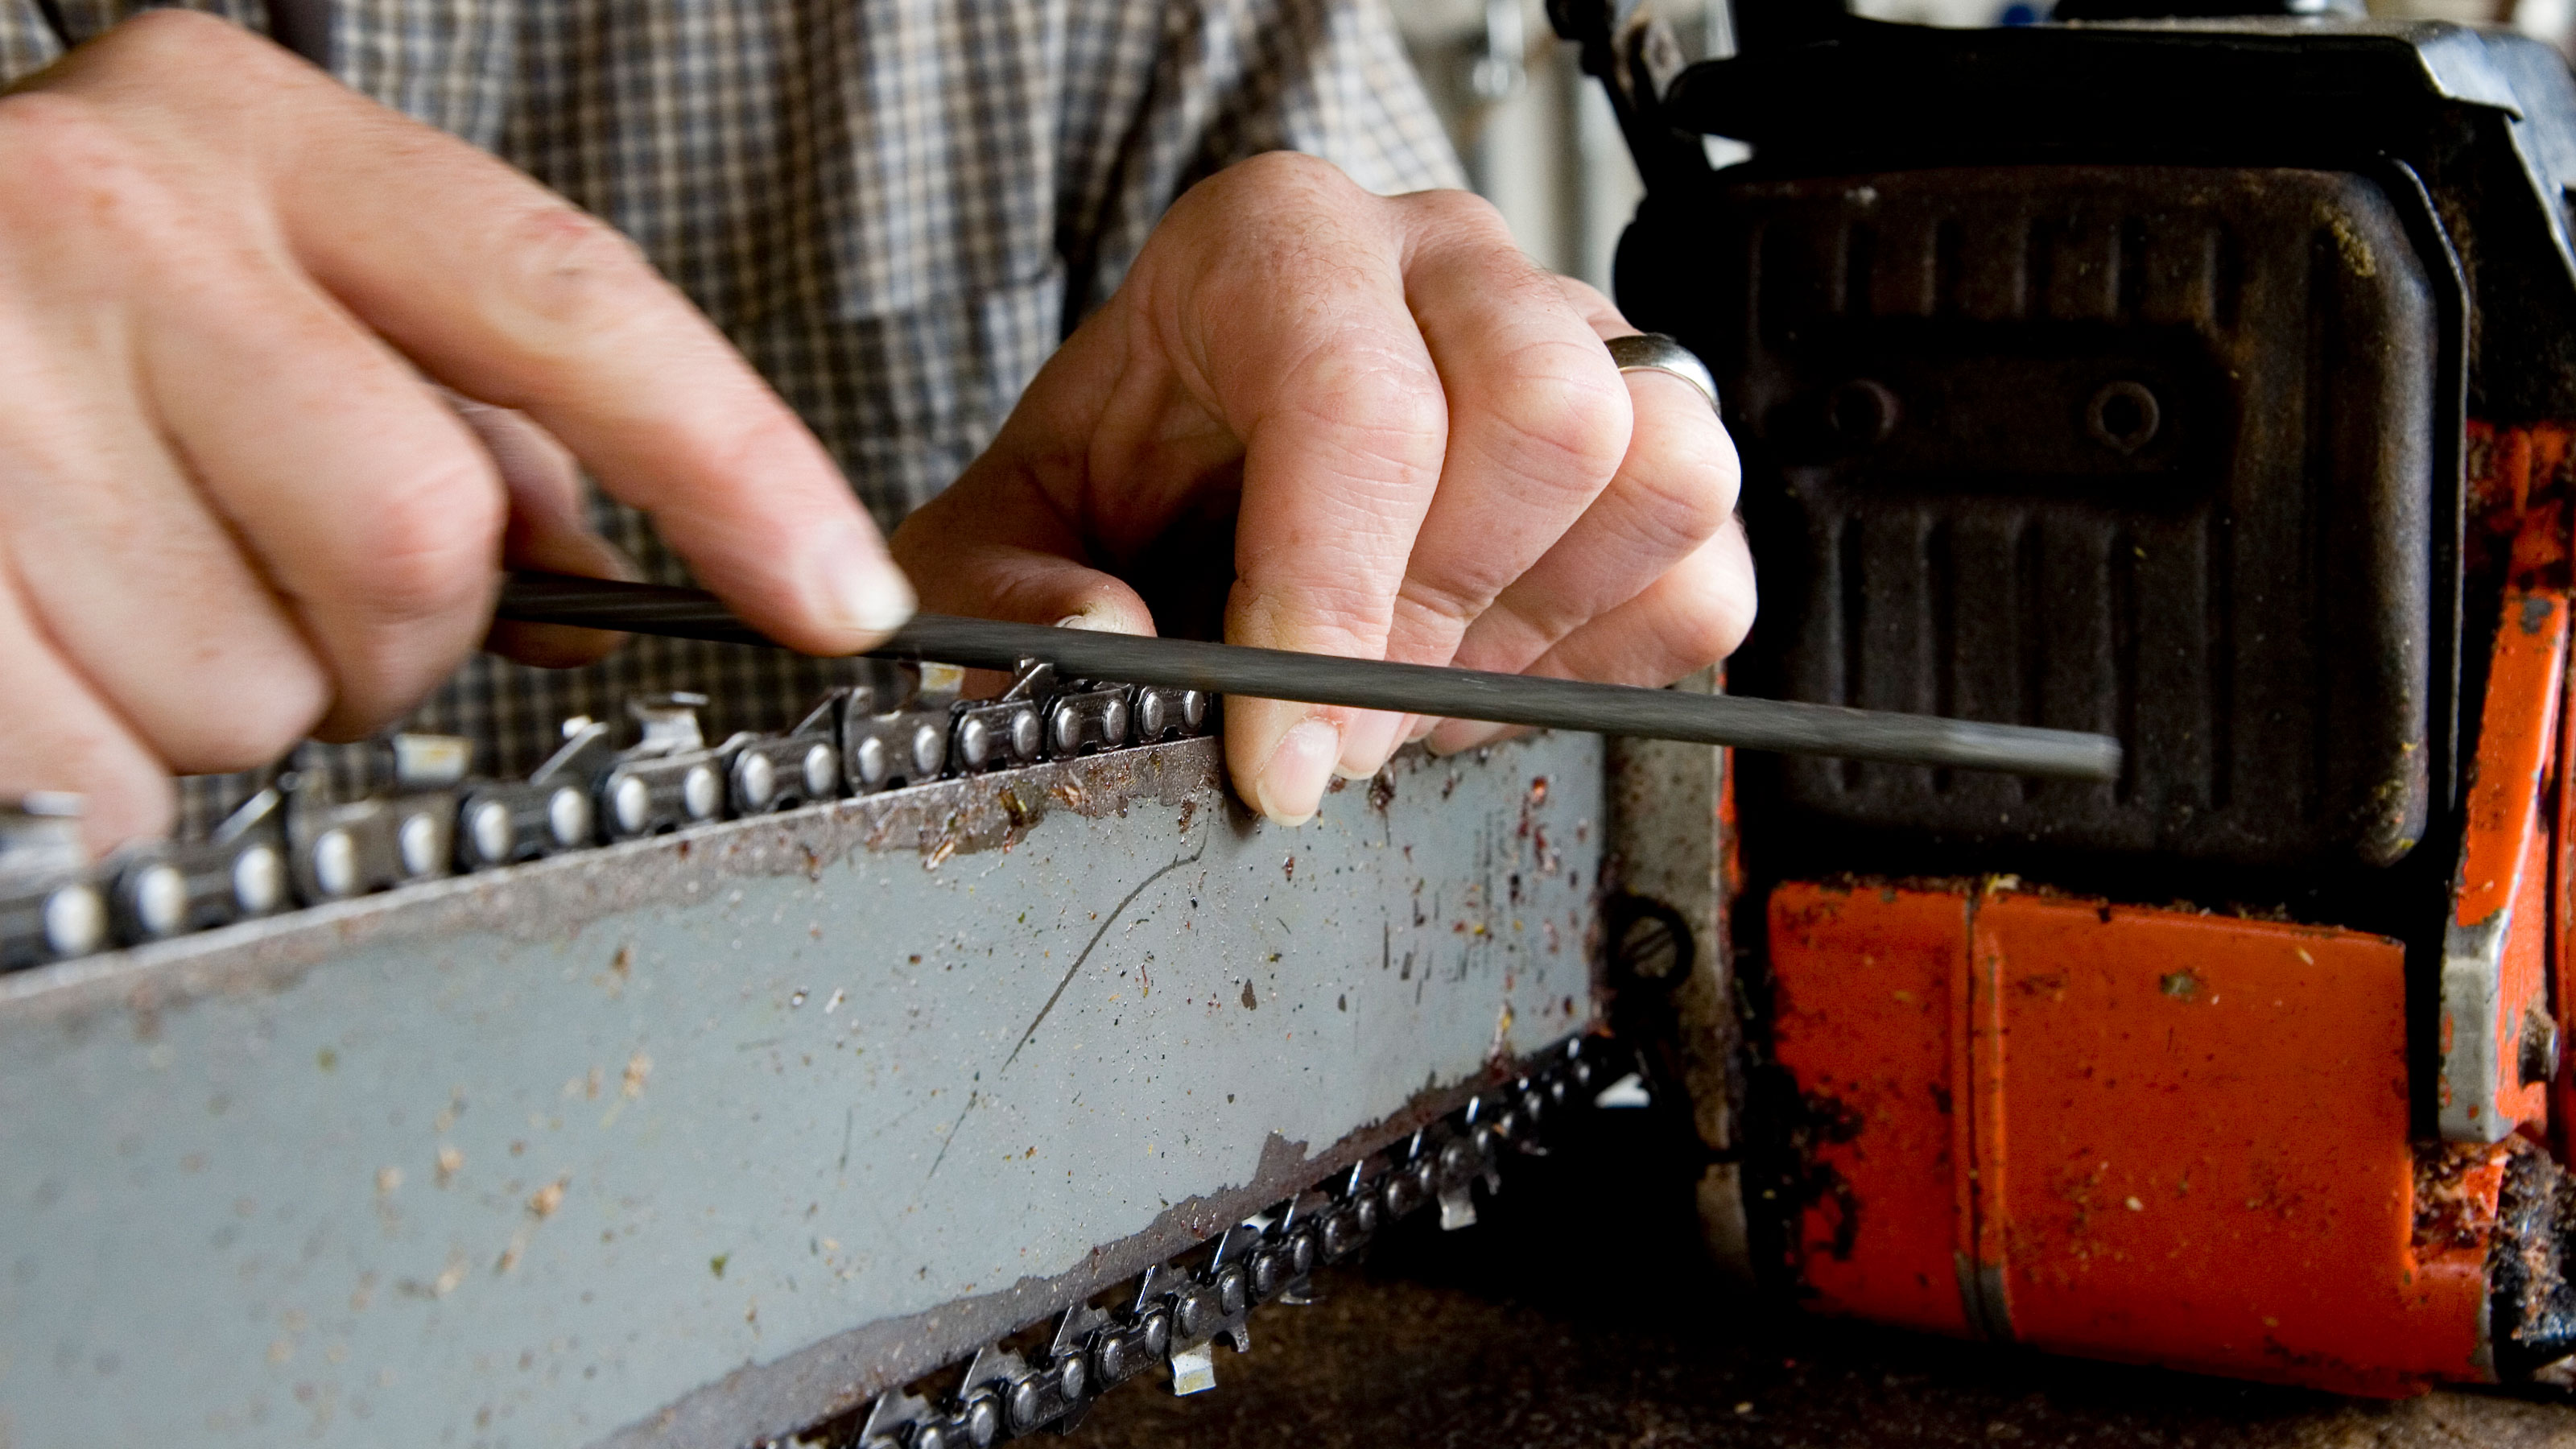
“Then use the file guide to set the correct file angle. The angle will vary depending on the manufacturer and the type of chainsaw. Common angles range from 25 to 35 degrees. Use the round file to file in a forward stroke along the tooth, maintaining the angle and applying light pressure. Repeat this process for each cutting tooth, ensuring they are filed evenly.”
4. Adjust depth gauges
“The depth gauges control how deep the cutting teeth bite into the wood. They should be adjusted regularly to ensure safe and efficient cutting. Use the flat file and the file guide to file down the depth gauges that are higher than the cutting teeth. Only file them down slightly, enough to maintain the correct distance from the cutting teeth.
“After you have sharpened and adjusted the cutting teeth and depth gauges, release the chain brake and rotate the chain. Repeat the filing and depth gauge adjustment process for the opposite side of the chain.
“Once you've sharpened both sides of the chain, release the chainsaw from the clamp or vice. Check the tension of the chain and adjust if necessary, according to the manufacturer's instructions.”
“It’s important to note that chainsaw maintenance should only be attempted if you feel confident enough to do so. If not, you should seek a professional who can help you instead.”

How often should you sharpen a chainsaw?
This will depend very much on how often it is used and how you use it. If you are an occasional user – maybe you use it to cut up logs for your log burner – then sharpening once a year might be all you need.
But if you are a regular and prolonged user then your chainsaw chain will need sharpening a lot more often. As a general guide a blade typically lasts for 3-4 hours of regular use before it will need attention.
Signs that your chainsaw needs sharpening include the need to apply pressure to get it to start cutting, it produces fine dust when crosscutting and vibrates more than normal.
Is it worth sharpening a chainsaw chain?
Yes is the easy answer, especially if your chainsaw is relatively new. A new chain should last at least a year and a lot longer if you are an occasional user and you maintain it regularly. The simple fact is, if you don’t look after your chainsaw chain it won’t last as long and won’t work as effectively.
Regular sharpening isn’t expensive, you should expect to pay around £10 each time for a professional sharpening. Alternatively, you can purchase the tools you need and do the job yourself. You can buy kits like the OREGON Chain Sharpening and Bar Maintenance Kit from Amazon relatively inexpensively. We recommend that you look at sharpening your chainsaw chain rather than replacing, especially if the cutting bits are just dull.
When it comes to buying a new chain, they are relatively inexpensive. They will cost more than a single sharpening, but you can get a new chainsaw chain from £15-£20. This will differ depending on brand and size, but the cost of replacing a chain means that you can look at replacing it on a regular basis. You can easily find new chainsaw chains online on sites such as B&Q Tradepoint.
Is it easy to replace a chainsaw chain?
It is relatively simple and will differ slightly from brand to brand, but the process is similar. The covered end of the chainsaw will have a side plate, held in place by a couple of bolts. First, you will need to undo these to expose the chain. If your chainsaw has its brake under the side plate, unlock before removing.
Now you will be able to move the bar – the bit that the chain goes round – to loosen the chain. Put gloves on and remove the chain. Get the new chain and place around the bar and chain sprocket, ensuring that the teeth are sat inside the guide on the bar and the cutting edge is pointing forwards. Replace the side plate and lightly tighten the nuts. Finally, adjust the chain tensioner so the chain is just lifting off the bar, check the chain is moving around the bar OK and tighten the nuts fully.
Bosch Power for all UniversalChain18 Cordless Chainsaw | £206 from B&Q Tradepoint
Stabilising tip protector with gripping teeth grips the wood, ensuring a clean undercut and minimizing branch damage
Erbauer ECSP51 500mm Petrol Chainsaw |WAS £199 NOW £149
Superior anti-vibration system allows you to work more comfortably and for longer periods of time
Get the Homebuilding & Renovating Newsletter
Bring your dream home to life with expert advice, how to guides and design inspiration. Sign up for our newsletter and get two free tickets to a Homebuilding & Renovating Show near you.
Steve Jenkins is a freelance content creator with over two decades of experience working in digital and print and was previously the DIY content editor for Homebuilding & Renovating.
He is a keen DIYer with over 20 years of experience in transforming and renovating the many homes he has lived in. He specialises in painting and decorating, but has a wide range of skills gleaned from working in the building trade for around 10 years and spending time at night school learning how to plaster and plumb.
He has fitted kitchens, tiled bathrooms and kitchens, laid many floors, built partition walls, plastered walls, plumbed in bathrooms, worked on loft conversions and much more. And when he's not sure how to tackle a DIY project he has a wide network of friends – including plumbers, gas engineers, tilers, carpenters, painters and decorators, electricians and builders – in the trade to call upon.


