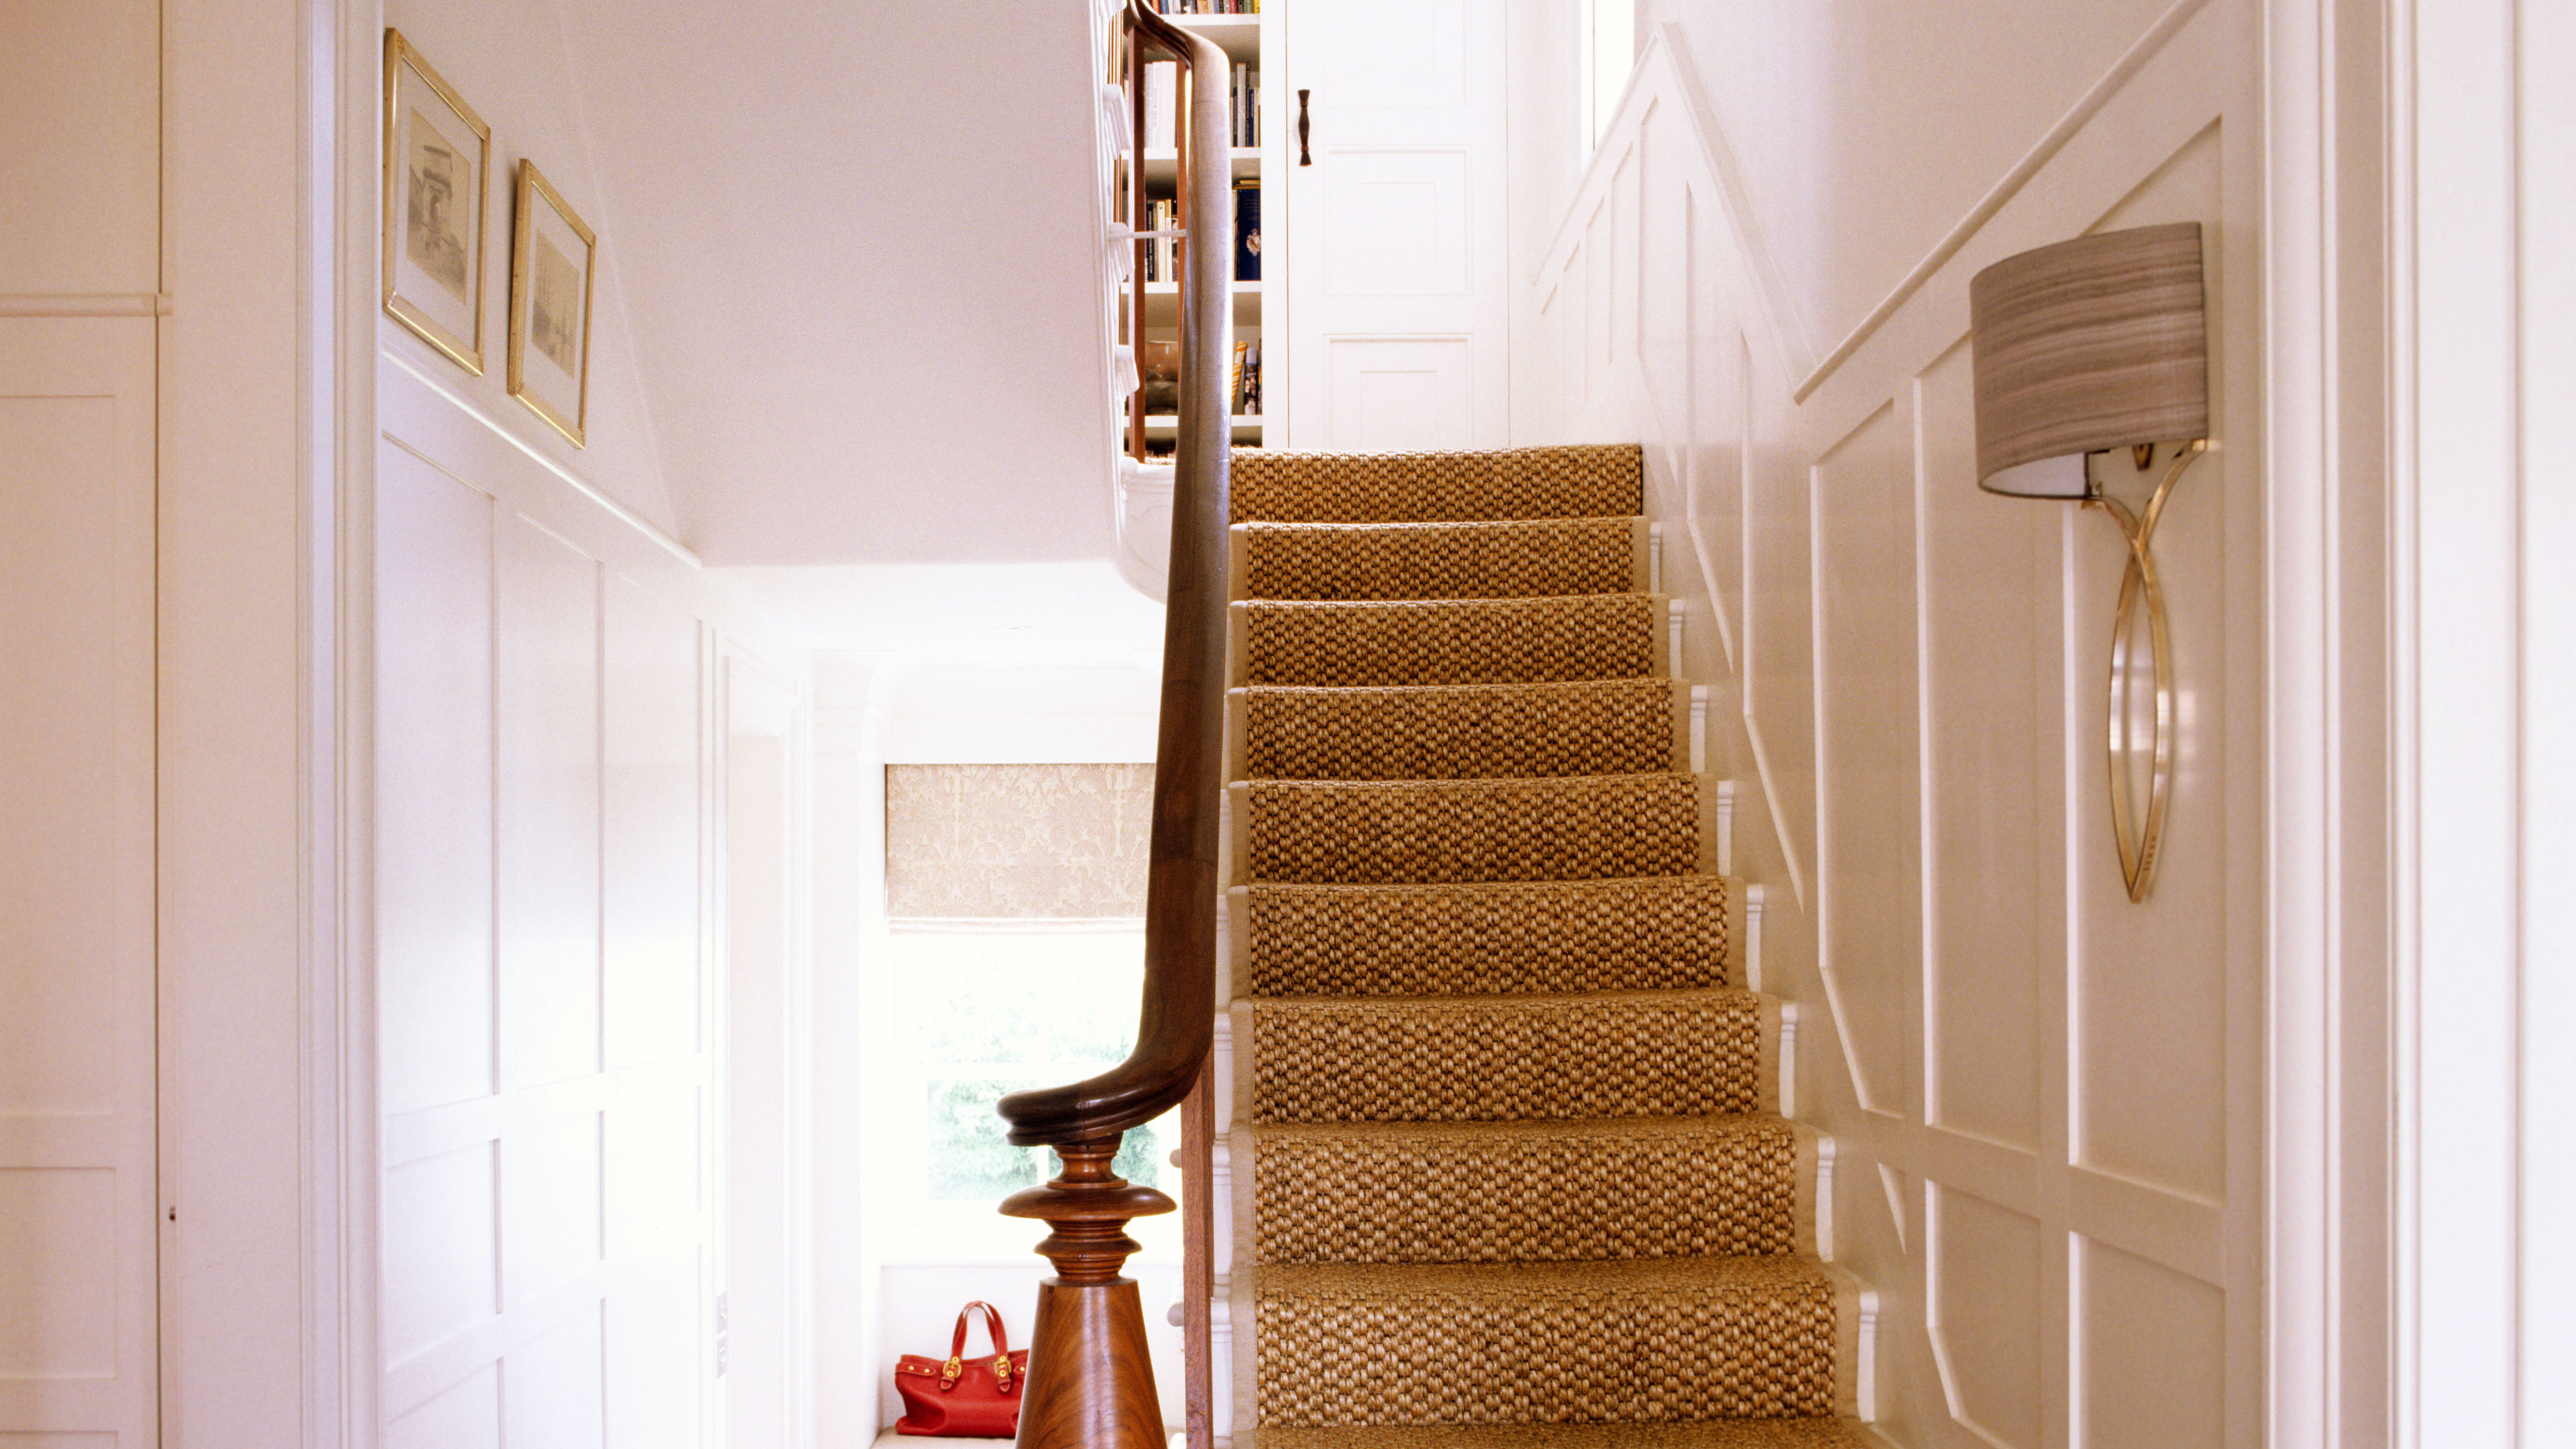
How to panel stairs and transform your hallway in four quick steps
Find out how to panel stairs yourself and add a touch of elegance and style to your hallway without spending big

Want to know how to panel stairs? There's an art to it and several options. Here we reveal the cost effective solution that still oozes class and can be tackled by any competent DIYer.
All you need is a little imagination before you jump in as LLCompany founder Jessica Davis explains, “Begin by envisioning your desired panelling style, be it the clean lines of a shaker design, the charm of decorative bead moulding, or the sophistication of vertical wainscoting. Once your vision is clear, meticulous planning is key.”
Follow our guide and discover how to bring your vision to life, what tools you’ll need and how you can go one step further by adding your own DIY wall panelling to transform your hallway.
How to panel stairs: what you’ll need
Alongside your chosen mouldings – and panels if using them – you will need a few tools to make sure that you get a good looking finish as Jessica Davis, founder of LLCompany reveals, “Once you have your wall mouldings, you will also need a tape measure, spirit level, a mitre box, and a fresh bladed saw. When you begin fitting you will need adhesive for the installation, caulk, or filler to finish along the edges where the moulding meets the wall, and in the mitred corners. Finally, you will need clean cloth for tidying up, followed by a paintbrush and your desired colour paint for a flawless finish.”

Jessica is the founder of LLCompany, and with 19 years in the design industry, she leads the charge in creating an online haven for interior renovation essentials. With a keen design sensibility, she carefully curates a collection that redefines interior spaces and homes, offering a one-stop-shop for those seeking both style and substance.
Panel your stairs in four easy to follow steps
Make sure you have all the materials and tools you are going to use gathered together. Don’t worry about your paint and paint tools. You won’t need these until the panelling has been installed. And you don’t have to paint straight away. You can leave until convenient to paint.
1. Measure up and mark
Get a spirit level and mark straight up from where the side of the stairs (this is known as the wall string) and the skirting board at the bottom meet. Draw a line up to 100cm (in this case were are placing the dado rail at 100cm). Then head to the top of the stairs and do the same at the top of the stairs where the wall string meets the skirting board.
Next you need to draw a line from the two top points you have just marked out. You can measure up 100cm every three or four treads, mark and then join up with a straight edge. Or use string and drawing pins and mark every metre along the string and get a straight edge to draw a straight line from bottom point to the top point.
2. Cut and attach moulding
Now you need to introduce your moulding to create a dado rail. You’ll need an angle finder like this Trend 7 inch Digital Angle Finder Ruler from Amazon to get the right cuts. Match up the angle finder with your pencil marks and note the angle and half for your cuts. For example, if the angle is 130 degrees your cut will need to be 65%.
Now mark the angles on your moulding and cut with your saw. A mitre saw like this Makita LS0714N/1 190mm Slide Compound Mitre Saw from Amazon is a good choice as you can set the angle on the saw. Now attach the moulding to the wall with wood glue and/or small nails.

3. Calculate panel measurements
Now measure the horizontal length from the top of the stairs to the bottom of the stairs. Extend your vertical line from the bottom of the stairs to get an accurate measurement.
Decide how many panels you want, three or four is a typical choice on standard stairs. Now decide on the gap you want, a 100mm is a good choice for 100cm high panelling.
Now work out where the verticals for the panels are going to go. Take the overall horizontal measurement you took earlier and take away the gaps. If you’re having four panels there will be three gaps. So if your overall horizontal measurement was 3000mm, take off the gaps – 300mm – and divide by the number of panels e.g 3000mm - 300mm = 2700mm / 4 = 675mm. This is the size of each panel.
Now mark the measurements along the vertical and using a spirit level mark where the vertical of the panels are going to go. Finally mark the angles, these are the same as the gaps – 100mm – for uniformity. A simple way to do this is to get a piece of scrap wood that is 100mm deep. Place against the underneath of the dado rail, place a pencil on the outside edge and run up the wall. Do the same for the bottom.
4. Cut, fix and paint
You will now have a pencil outline of where the moulding needs to go. Work on one panel at a time and remember to measure on the right side of the line – so you have the 100mm gap all round. You can start on any side.
Measure the length and use the angle finder to get the angle and half to get the cutting angle. Cut and fix to the wall. Repeat until all mouldings are added for every panel. Leave to dry for 24 hours, fill if needed and paint.
FAQs
What is the cheapest way to panel a wall?
There’s a few options for panelling your stairs. For example, if you have newly plastered walls you can add moulding – like this Smooth Natural Pine Astragal Moulding from B&Q – directly to the wall as Davis suggests, “Embrace a budget-friendly project by opting for simple delicate wall mouldings with a bead detail. This will allow you to still achieve a beautiful finish by creating your panels by cutting and mitring the moulding into frames.” She continues, “Use a mitre box and handsaw and any DIY enthusiast can install the panelling easily and quickly!”
You can get a wooden mitre box for around £10. But if you don’t have a saw you can get a mitre box and saw combo like this Stanley Saw Storage Mitre Box With Saw from Amazon. They are great for ensuring that you get consistent angles.
Make sure to check out our Painting new plaster guide for tips on working with new plaster.
Where do I start panelling?
The common starting point is the bottom of the stairs. This allows you to measure and mark up if you are only panelling the stairs, but it also allows you to expand the panelling along the hallway wall if desired.
After measuring up Davis reveals her tips for getting a good finish, “To refine your design, use masking tape on the walls to indicate the panelling's height and layout. This simple yet effective technique allows you to visualise the transformation before committing to the installation. She also suggests ordering extra, “When you are ready to purchase your materials, make sure to order 10% more than your calculations to account for any cutting mishaps.”
How high should panelling be?
The choice is yours, but to get authentic looking panelling you need to stick to the traditional choice as Davis explains, “For a classic wainscoting panelling look, install your panelling about one-third of the wall's total height. This timeless proportion adds elegance without overwhelming. However, it does really depend on your space proportions and the design of your stairs, but most panelling will be between 80cm – 100cm high.”
Do you remove skirting before panelling?
This depends on how you decide to panel your stairs and hallway. If simply adding moulding directly to the wall, you can leave the skirting board in place. But you may want a different skirting board idea to replace the current skirting board and match your moulding.
If you are installing panels first we recommend that you remove the skirting board to get a professional looking finish. You can add new skirting board on top of the panels before adding your moulding and painting.
Can you use MDF for panelling?
Using MDF for panelling is a cost-effective solution for panelling. You can buy sheets like this 18mm MDF Board from B&Q and other local hardware stores, and they usually deliver. It is easy to cut, it's environmentally friendly and it's easy to paint. Follow our How to paint MDF to get a good looking, long lasting finish.
Get the Homebuilding & Renovating Newsletter
Bring your dream home to life with expert advice, how to guides and design inspiration. Sign up for our newsletter and get two free tickets to a Homebuilding & Renovating Show near you.
Steve Jenkins is a freelance content creator with over two decades of experience working in digital and print and was previously the DIY content editor for Homebuilding & Renovating.
He is a keen DIYer with over 20 years of experience in transforming and renovating the many homes he has lived in. He specialises in painting and decorating, but has a wide range of skills gleaned from working in the building trade for around 10 years and spending time at night school learning how to plaster and plumb.
He has fitted kitchens, tiled bathrooms and kitchens, laid many floors, built partition walls, plastered walls, plumbed in bathrooms, worked on loft conversions and much more. And when he's not sure how to tackle a DIY project he has a wide network of friends – including plumbers, gas engineers, tilers, carpenters, painters and decorators, electricians and builders – in the trade to call upon.

