Learning how to paint behind a radiator gives you the satisfaction of knowing that you’ve done a good job. You can look at your radiators knowing that the wall behind is the same colour as the rest of the wall.
When painting a room, you can take the easy way out and use a brush to paint as far as you can reach. This works well when refreshing a wall with the same colour, such as white on white. But if you want a pro finish, you need to go the whole way. Here you’ll find expert advice to help get the job done, the right way.
Nick Parsons
Nick began his time with Harris in 1988, and throughout the decades has worked in various departments. His experience and product understanding inform the evolution of all Harris products, from benchmarking to insight, research and development.
The tools you'll need for painting behind a radiator
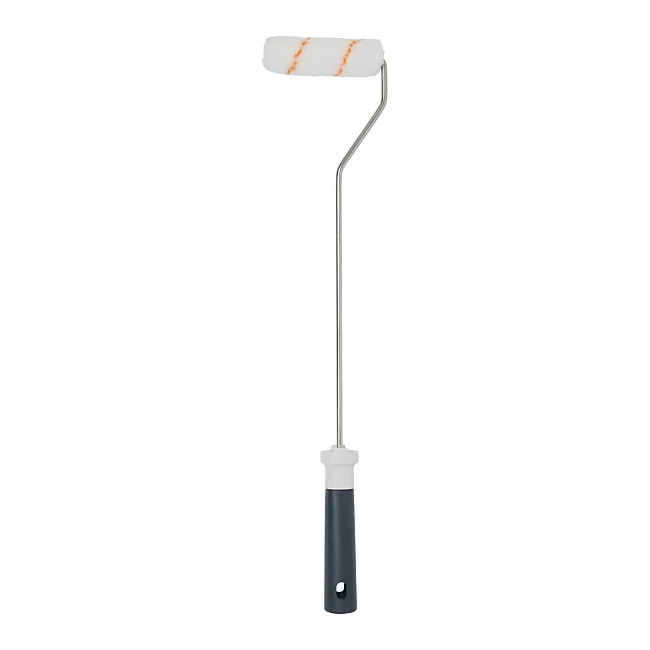
This long reach roller has a 100mm roller frame, a 100mm roller sleeve, and an ergonomic handle, making it ideal to reach behind radiators.
Plastic Drop Cloth for Painting
A large 3mm plastic drop cloth measuring 9 ft x 12 ft, making it ideal for covering furniture and floors. Made from polyethene, it is waterproof and non-slip.
RollingDog Radiator Paint Brush
This 3-piece paint brush set comes with 25mm, 38mm, and 50mm bent ferrule brushes. Its long handle boasts a thin design to help get the head behind radiators.
How to paint behind a radiator without removing it
1. Prepare the area
Before you start, Nick Parsons, Technical Manager at Harris, says, “It’s essential to start by turning off the heating and allowing the radiator to cool completely.” He adds, “Once cooled, open a window to ensure proper ventilation before attempting any preparation or paintwork.”
The next step is to protect the surrounding area. Parsons says, “Begin by removing all furniture and obstructions from the space.” He adds, “Next, lay down a dust sheet and secure it in place with masking tape to prevent slipping and protect your flooring from any paint spills or damage.”
Now clean and prep behind the radiator. Parsons says, “Make sure the wall surface is clean and ready to paint.” He adds, “Use a damp microfibre cloth to wipe away any dust or cobwebs that may have collected behind the radiator. If the wall has any rough patches or flaky paint, give it a light sanding."
A radiator will typically be one to two inches from the wall, so paint as far as you can reach with your standard paintbrush. Wiggle the brush down into the gap - top and sides - and pull it along to cover the area. Repeat until finished.
Jess Steele, Heating design expert at Best Heating, suggests using a specialist brush to paint the rest of the wall behind a radiator. “For closer control, opt for a precision finish by using an extended-reach cutting-in brush with a shaped head or a longer, thin-handled brush with a short, angled head.” These are ideal for cast-iron style radiators.
3. Finish with a roller
To paint behind a radiator, you will need a long-handled mini roller. Steele says, “A long-armed roller will make it much easier to squeeze into narrow or awkward crevices and tight spaces.”
Apply the paint to the roller - be careful not to overload it - and start from above the radiator and roll down in smooth strokes inside the two radiator brackets. Next, work in from the sides up to the radiator bracket. Let the paint dry and repeat.
Steele offers a final tip, “If you have designer radiators – or any radiators – that do not project far from the wall, cover a flat pad with paint and slide it behind the radiator.”
Jess Steele
Jess Steele is BestHeating’s leading heating design expert, bringing over seven years of industry experience. As a specialist in luxury radiators, she has a deep understanding of the latest interior trends and more importantly, how to blend style with functionality.
A long-handled radiator brush can be used to paint the wall on a cast-iron style radiator, but a roller is typically a better option for modern radiators (Image credit: Getty Images)
An easy way to remember which direction you need to tighten/loosen a radiator valve is the old adage ‘righty-tighty/lefty-loosey’. Turning clockwise - righty-tighty - tightens while turning anti-clockwise - lefty-loosey - loosens a valve thread.
The first step to removing a radiator is to isolate the radiator by switching off both radiator valves. This will stop any water from coming through the pipes.
It's important to note that different valves work slightly differently - you may be able to switch off the valves using the cap, but if not you will need a large adjustable spanner to turn off the valve. Turn clockwise to turn off.
2. Prepare the area
Place a bowl under the radiator valve. If you are removing a large radiator then use a large bowl/container and have a second ready in case you need it.
Place a towel around the valve to catch any splashes, and to protect carpets you can put down plastic or waterproof sheeting. Cover an area of at least 1m from the radiator, and cover an area to place the radiator once removed.
You'll need to cover an area to place the radiator once you've removed it (Image credit: Getty Images)
3. Drain the radiator
Undo the large nut on one side of the radiator that attaches to the valve. Next, and this is important, use a pair of grips to keep the radiator valve steady and use an adjustable spanner to undo the nut. Do this slowly. The water will then drain into the bowl.
4. Remove the radiator
Once the water stops coming out, undo the nut at the other end of the radiator. Remember to place a bowl under the valve and use the grips to steady it.
Next, lift the radiator off the wall and tip up into the bowl to remove any remaining water. Once empty, turn the radiator upside down and store. Place tape over the radiator valve thread to stop any dust/dirt paint from getting into the pipes.
5. Replace the radiator
After you have finished painting the radiator, you will need to place it back.
First, remove the tape and wipe the inside of the valve clean with a clean cloth. Then, add a little jointing compound inside the valve thread with your finger, place the radiator back on the wall, tighten the nuts, and switch the valves back on.
Next, open the bleed valve – commonly positioned at the top right – until water starts to dribble out. You may need to repressurise your boiler afterwards.
When painting behind a radiator, there’s a good chance that you’ll be painting over wallpaper and painting wooden doors to complete the decoration of a room. When you’ve finished decorating, make sure to check out our how to clean paint brushes guide to get them ready for your paint project.
Get the Homebuilding & Renovating Newsletter
Bring your dream home to life with expert advice, how to guides and design inspiration. Sign up for our newsletter and get two free tickets to a Homebuilding & Renovating Show near you.
Steve Jenkins is a freelance content creator with over two decades of experience working in digital and print and was previously the DIY content editor for Homebuilding & Renovating.
He is a keen DIYer with over 20 years of experience in transforming and renovating the many homes he has lived in. He specialises in painting and decorating, but has a wide range of skills gleaned from working in the building trade for around 10 years and spending time at night school learning how to plaster and plumb.
He has fitted kitchens, tiled bathrooms and kitchens, laid many floors, built partition walls, plastered walls, plumbed in bathrooms, worked on loft conversions and much more. And when he's not sure how to tackle a DIY project he has a wide network of friends – including plumbers, gas engineers, tilers, carpenters, painters and decorators, electricians and builders – in the trade to call upon.