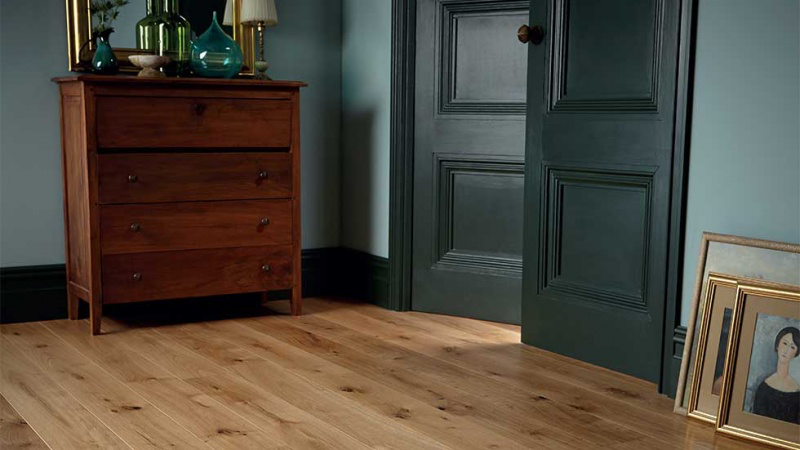
How to Lay Solid Wood Flooring
Timeless and low-maintenance — what’s not to like about a solid timber flooring? Even better, laying one can be a DIY job. Natasha Brinsmead explains how

Laying a solid wood floor is a job that can quite feasibly be carried out on a DIYbasis, but obviously not everyone has the time or inclination to do this. If you want to get someone else to lay it for you, you’ll need to ask either a builder or local carpenter or joiner to do the work. Some suppliers can also recommend specialist floor fitters.
When your flooring arrives, you must let it acclimatise to the room before it is laid. Some types of flooring should be left in their packaging while they acclimatise, but others need to be removed, so ask your supplier for details. The supplier will also be able to tell you how long you need to leave them — some only require 24 hours, others may need longer.
When you are laying a solid timber floor, it is best to lay it using a fixed method, as opposed to ‘floating’ (commonly used for engineered boards). This is because solid wood flooring has a higher tendency towards movement and needs to be fixed to the subfloor to avoid problems in the future. You can fix it to concrete, to the floor joists or to an existing timber floor.
If fixing to concrete:
- ensure the concrete is sound and level. If it’s not, then screwing a chipboard or plywood subbase on top, then nailing or gluing the new wood floor to it, is the best way forward.
- If you are fixing the floor directly to the concrete, gluing it down is the way to go. You might also take a look at some of the self-adhesive membranes out there, but beware, they are incredibly sticky and once the wood is stuck to the membrane, it is near-impossible to remove.
If you are fixing solid wood flooring to existing timber:
- nailing will be the best option. Although it is good to lay the new board at a 90° angle to the old, it is not imperative. That said, this is essential if you are nailing directly to the joists.
- Because you are likely to be fixing your solid wood boards to the subfloor, underlay is not usually used, but there are slatted underlays you can buy for the purpose, with pre-cut slots that allow the floor to be glued directly to the subfloor (try Acoustalay Slatted Glue Through Underlay, available from Screwfix).
Before beginning work, skirting boards should ideally be removed to achieve the neatest finish. Some homeowners do, however, choose to leave skirting in place and use quadrant beading to cover the gap between the floor and skirting — although the finish is rarely quite a polished.
Most solid wood flooring comes with tongue-and-groove edges and can be either glued or secret nailed, but before you begin, remember you will need to leave an expansion gap around the walls of around 15mm to allow for movement. You can pick up plastic spacers to do the job for you.
Depending on the size of your room, it should take around two to three days to lay wood flooring, although it has to be said that laying a fixed solid floor is a more time-consuming task than installing engineered wood. The results, however, speak for themselves.
Step-by-Step
1. Acclimatise the boards and decide which direction you are going to lay them in. If you are fixing them directly on to the floor joists, they will have to run at a 90° angle to them. Remove any inward-opening doors.
2. Remove the skirting boards using a crowbar (place a wooden or cork block between the wall and crowbar to avoid damage.
3. Vacuum and clean the subfloor and, if using, cut and fit underlay.
4. Position plastic spacers along the longest and straightest wall.
5. Fix the first row of boards — if the boards have tongue-and-groove edges, ensure the groove is facing the wall and start from a corner. Nail or glue depending on how you have decided to fix the boards and remember that the expansion gap will need to run around the edges of the entire room, including at the ends of the boards.
6. Lay the second row starting with the section cut off the board at the end of the last row you laid. Stagger the end joints of the adjacent rows by around 30cm. You can buy fitting tools to push the ends of the boards together. Work your way across the room, tightening each joint with an edge block.
7. When you get to pipes, mark the position on the board that is being laid around it, drill a hole about 5mm larger than the diameter of the pipe, and make two saw cuts running from the edge of the board to the sides of the hole. Fit the board into position and glue the off-cut piece of wood back into place behind the pipe.
8. When you get to the final row, you will probably have to cut along the length of the boards. Measure the gap between the boards and the wall, deduct 15mm and saw the boards to fit. Fix the joints and force into place.
9. Refit the skirting, or fit new.
Our Estimate
Two to three Days
Cost: DIY or £300–500 (labour)
Engineered Timber Flooring
Many people these days opt for an engineered timber as opposed to solid. It is more stable than solid timber and therefore far less prone to movement. It is made up of a layer of solid wood, bonded to several layers of softwood and comes with tongue-and-groove edges that can be clicked together without the need for nailing or gluing.
It can be laid as a floating floor, over your existing floor (timber, concrete, tiles — you name it) and is designed to be used with an underlay. The better the product, the thicker the solid wood layer on top — which is particularly important if it needs sanding to repair any patches at some point.
Get the Homebuilding & Renovating Newsletter
Bring your dream home to life with expert advice, how to guides and design inspiration. Sign up for our newsletter and get two free tickets to a Homebuilding & Renovating Show near you.
Natasha was Homebuilding & Renovating’s Associate Content Editor and was a member of the Homebuilding team for over two decades. In her role on Homebuilding & Renovating she imparted her knowledge on a wide range of renovation topics, from window condensation to renovating bathrooms, to removing walls and adding an extension. She continues to write for Homebuilding on these topics, and more. An experienced journalist and renovation expert, she also writes for a number of other homes titles, including Homes & Gardens and Ideal Homes. Over the years Natasha has renovated and carried out a side extension to a Victorian terrace. She is currently living in the rural Edwardian cottage she renovated and extended on a largely DIY basis, living on site for the duration of the project.

