How to Lay a Paving Circle
Ensure your outside spaces look just as good as those inside by installing your own feature patio with our simple step-by-step guide
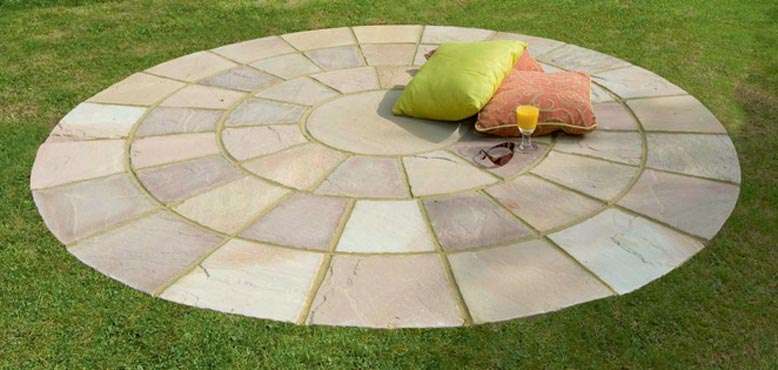
A paving circle is a unique way of adding a patio area to your garden. You can use it to create an al fresco dining are or display an array of potted plants. Follow the step-by-step guide below to install your own paving circle.
This paving circle was made using Brett Landscaping’s Natural Stone Circle.
(MORE: Patio Design Ideas)
Tools and Materials You Will Need
- Paving stones
- Building sand
- Washed sharp sand
- Cement
- DTp Type 1 sub-base
- Spade
- Rake
- Broom
- Rubber mallet
- Spirit level
- String line
- Tape measure
- Pointing trowel
- Cement mixer (not essential)
- Compactor (preferably mechanical)
- Wheelbarrow
- Gloves and protective glasses and footwear
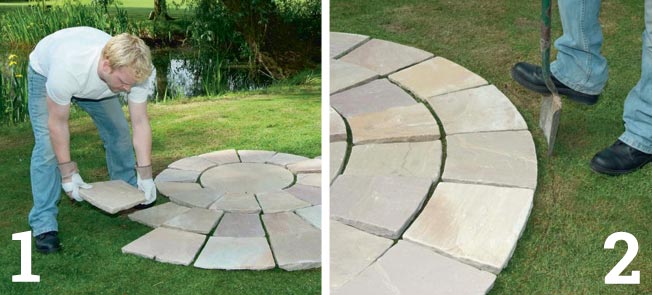
1. Lay the circle flags out in a position you are happy with, leaving a 10-15mm jointing gap between each flag.
2. Dig a line around the circle approximately 50mm bigger than the edge.
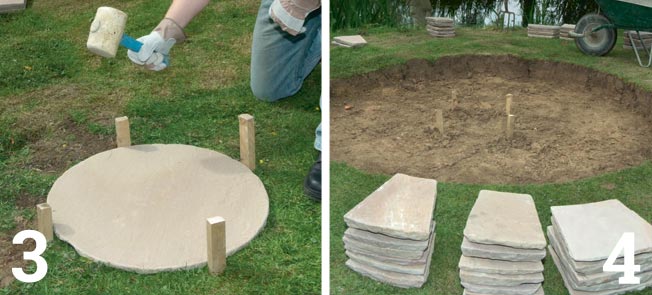
3. Put all but the centre flag to one side and mark around it closely with pegs driven deep into the ground before removing the centre flag.
4. Clear all vegetation, remove topsoil and level the ground at a suitable depth. This depth will need to allow for the sub-base, sand-cement and paving (detailed overleaf). If the circle is next to the house, the finished patio surface must be at least 150mm below the level of any damp-proof course. It is important to include a 1:80 (25mm over 2m) fall as a drainage slope away from buildings, sheds or fences.
5. To ensure that the paving remains solid and stable, it needs to be laid on a firm and level sub-base which will provide a stable foundation. For patio areas, we recommend a DTp Type 1 granular sub-base laid to approximately 100mm and compacted well to a minimum of 75mm.
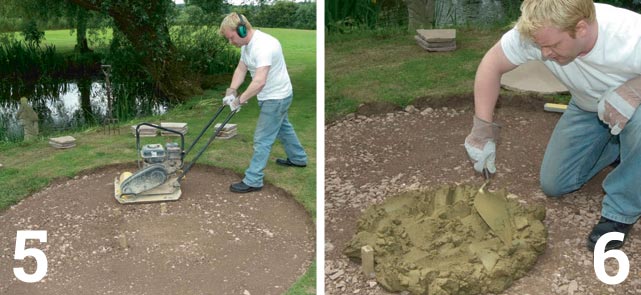
6. Prepare a mortar mix of one part cement to six parts’ building sand; this needs to be laid at least 25mm deep.
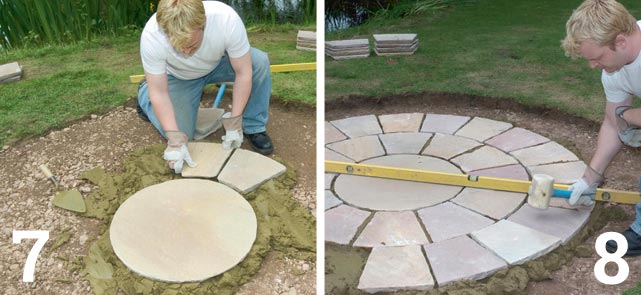
7. Starting at the centre, lay each concentric circle in turn, tapping down with the rubber mallet and checking with a spirit level (8), remembering to maintain the drainage slope.
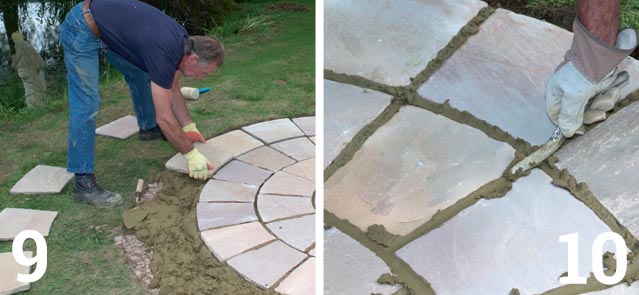
9. Natural stone paving should be laid with the greater surface face up and the cut edge (the chamfer) diminishing towards the ground. A nominal joint of 10mm on most paving is recommended.
10. Once the paving is laid, leave the mortar to set and do not use the area for at least 24 hours. Cover if rain is forecast. To finish the patio, joints should be pointed on a dry day. This is done using an almost dry mortar mix of one part cement to four parts’ washed sharp sand. Ensure this is thoroughly mixed and trowelled into the joints, smoothed over and pointed with a pointing tool. Clean mortar spillages immediately.
Get the Homebuilding & Renovating Newsletter
Bring your dream home to life with expert advice, how to guides and design inspiration. Sign up for our newsletter and get two free tickets to a Homebuilding & Renovating Show near you.
Ben is a writer and a keen DIYer, and has undertaken a multiple of tasks from installing loft insulation, tiling, painting windows to fitting garden fences and reviving period fireplaces. He has also converted his loft on a DIY basis.
