How to Grout Tiles: Learn To Prepare, Mix and Apply
Want to know how to grout tiles? Our DIY expert gives the lowdown on the tools and techniques you'll need to know to get a long lasting pro looking finish
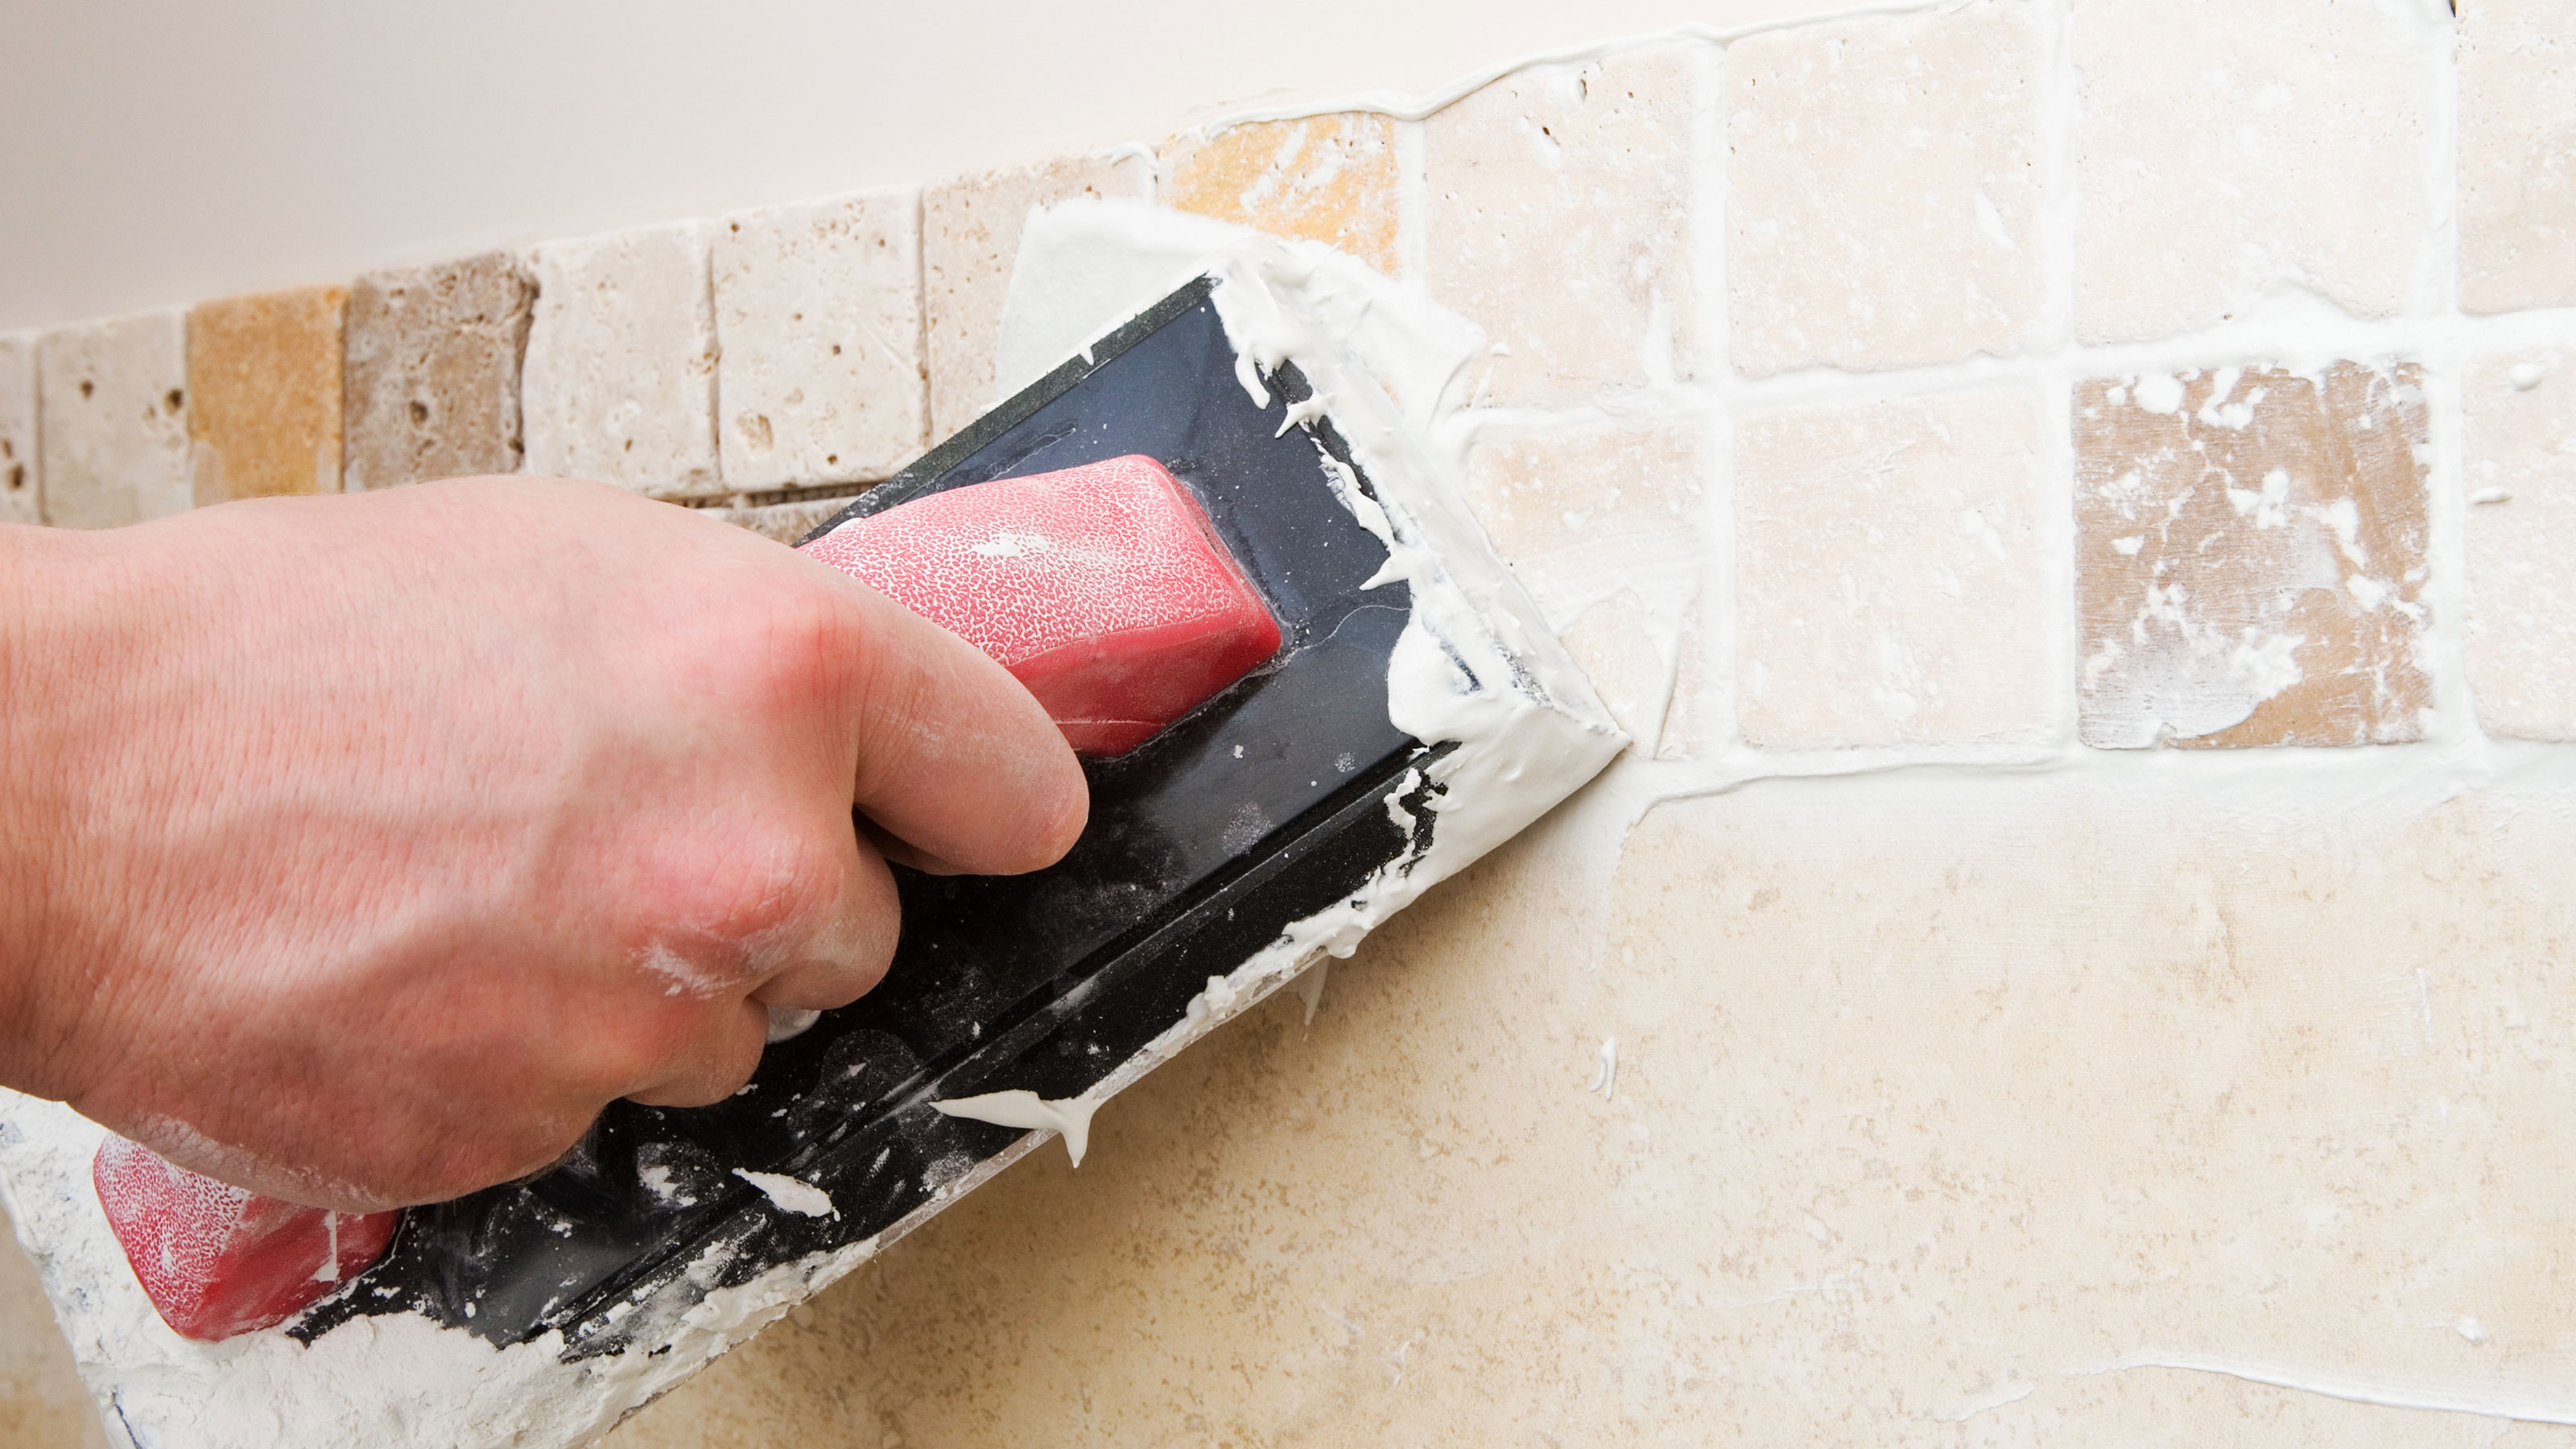
Learning how to grout tiles is a skill that is perfect for budding DIYers and it only requires a few tools to get started.
Applying grout is an essential element of tiling, whether you are grouting newly laid tiles or re-grouting to transform your bathroom or kitchen design. This is because it prevents water ingress and stops tiles from touching and cracking.
Follow this step-by-step guide to grouting tiles and discover everything you need to know to get a professional grade finish.
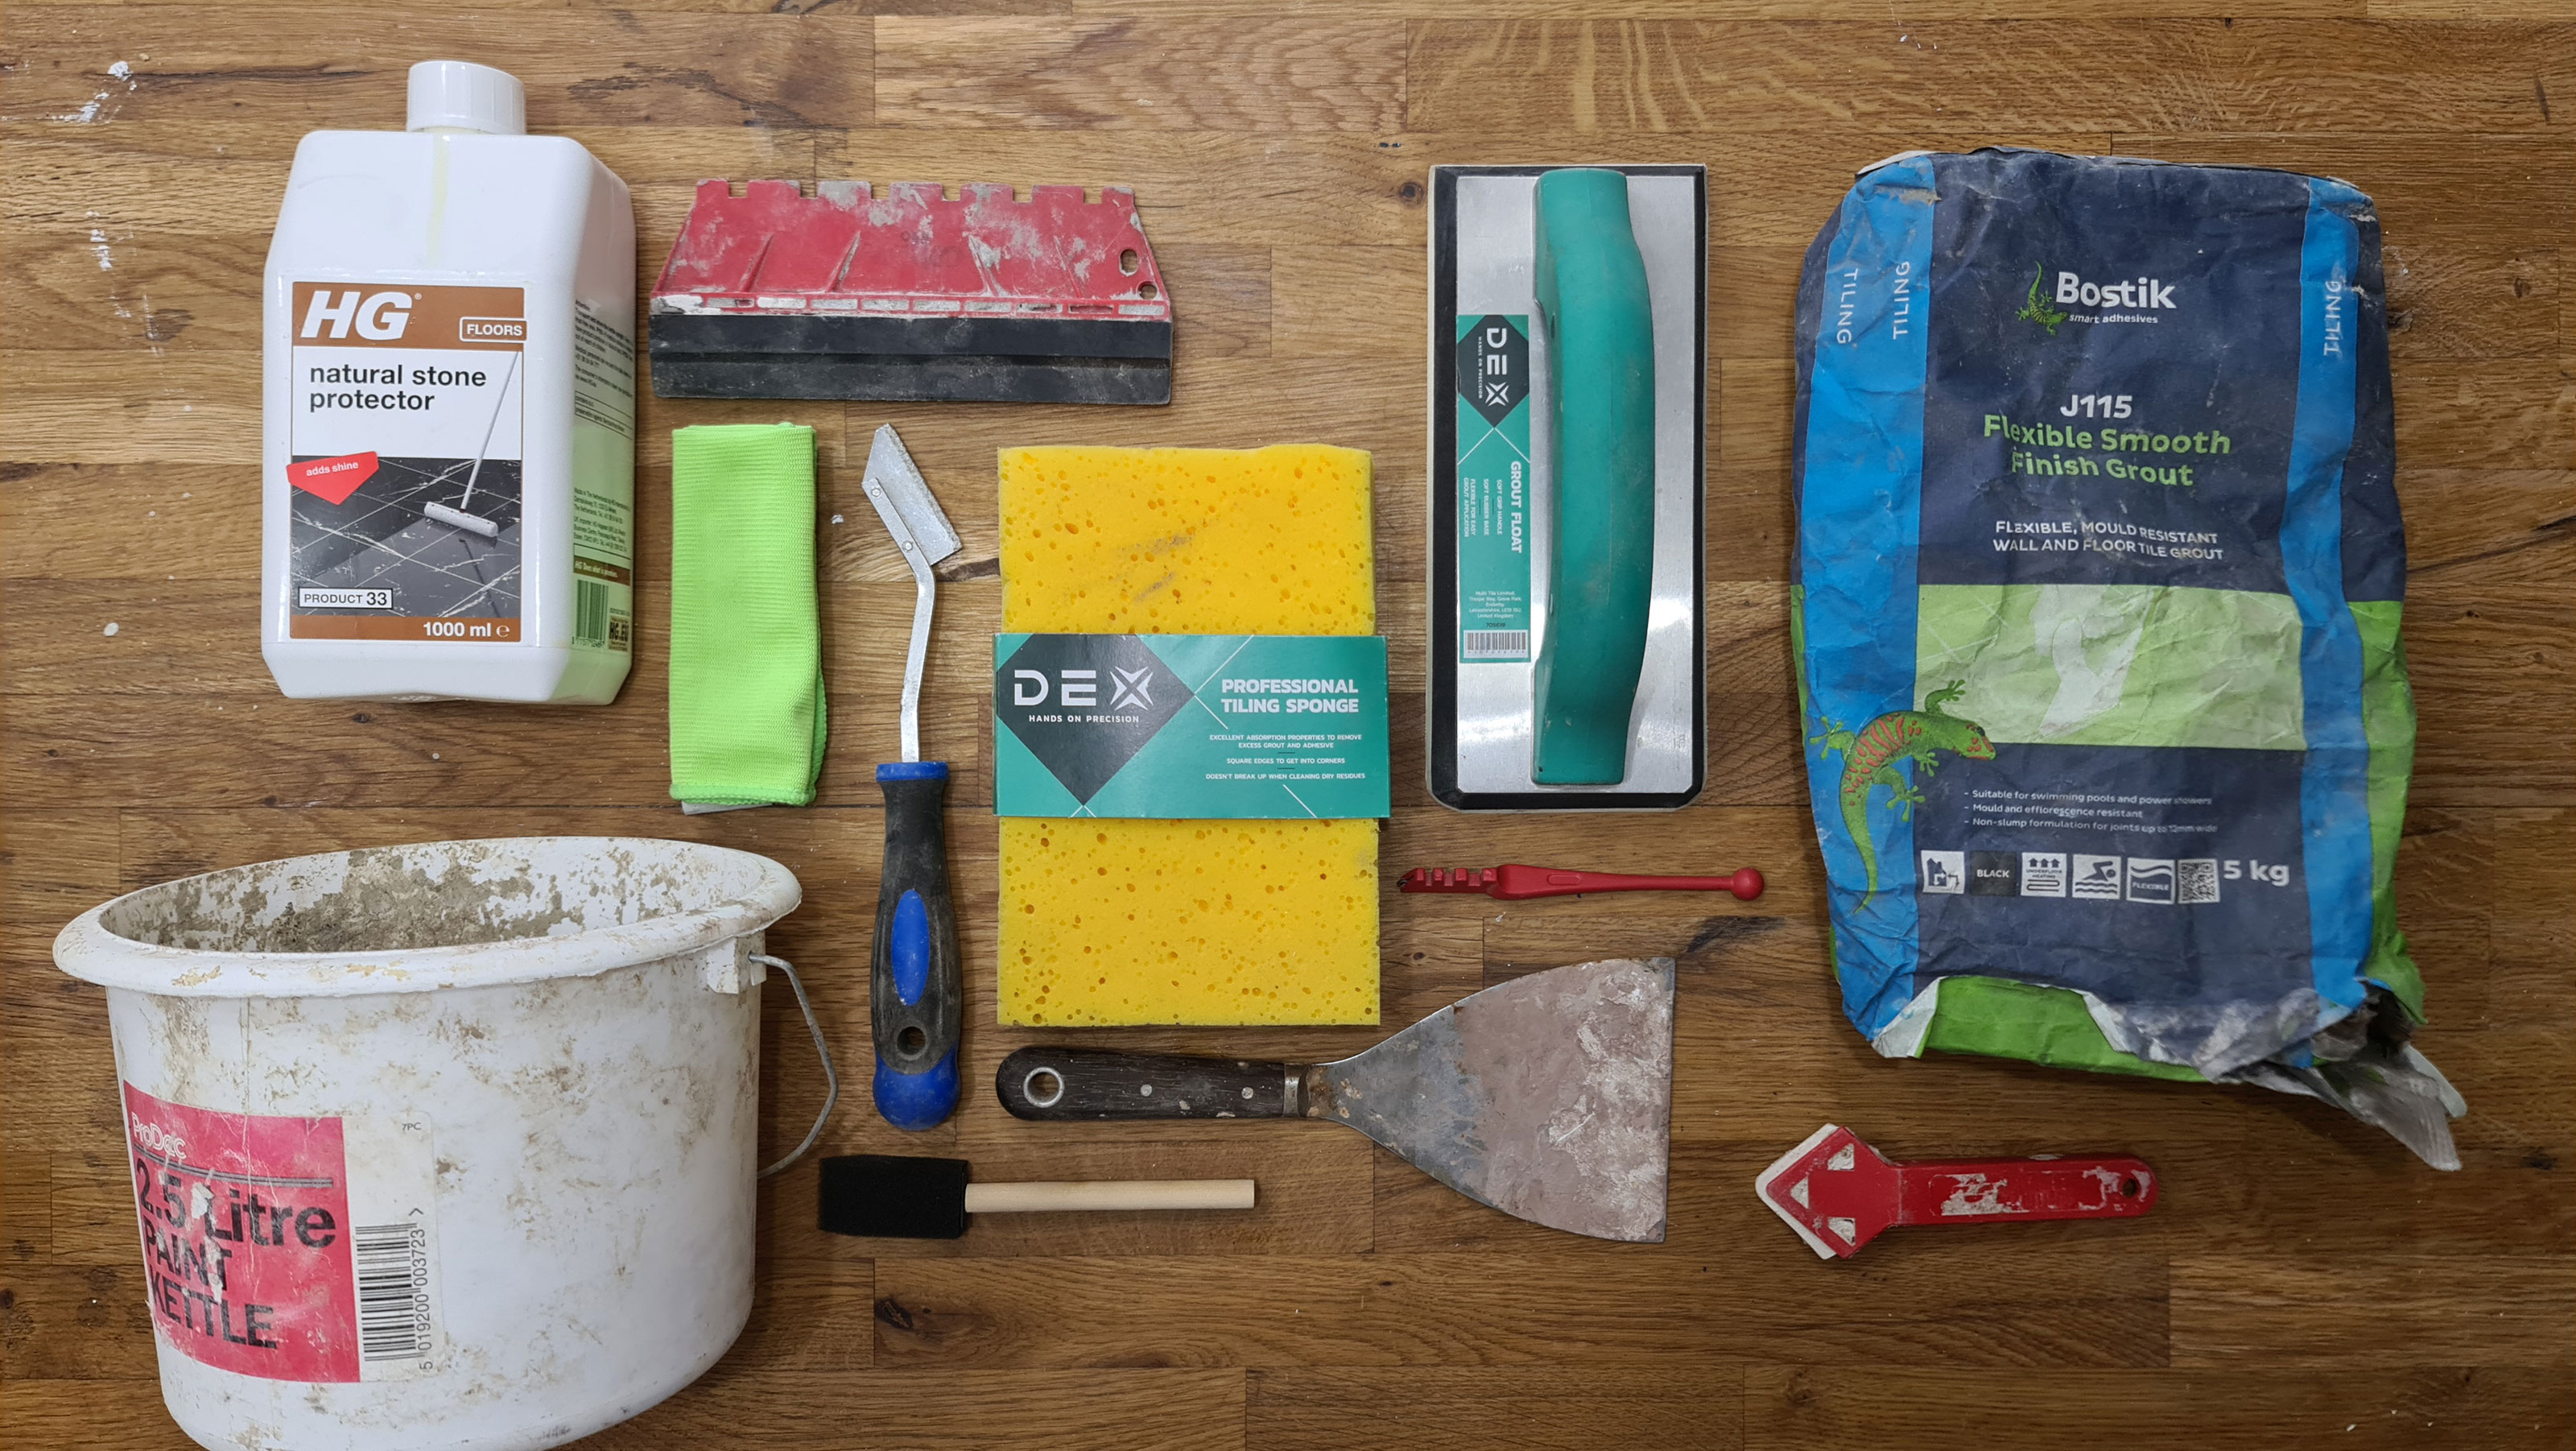
How to Grout Tiles: The Tools You'll Need
Follow these lists of the tools and materials you'll need to grout tiles effectively.
Tools
- Grout float/spreader
- Grout ball finishing tool
- Sponge
- Cloth
- Grout rake
- Sponge brush or roller
- Bucket
- Scraper
Materials
- Grout
- Grout sealant
Step 1: Preparation
If you have natural stone tiles like slate you will need to seal your tiles too and can use an all-in-one tile and grout sealant.
The most common type of grout available, and the easiest to use, is a cement-based grout which is porous and requires sealing to prevent water ingress. Think of it like the surface of a pumice stone with holes that can catch dirt and take up water.
Another type is Epoxy grout, which does not require sealing, but is usually much more expensive and trickier to apply. But both work well whatever way you have been cutting tiles.
Both premixed grout, such as UniBond's Ultra Force Wall Tile Grout , and powdered grout typically comes in a white or grey colour to match or compliment tiles. However, it’s also possible to get black or bright colours for a contrasting, more impactful look.
Before you start, protect your surfaces and hardware such as taps to stop stray compound from drying on or discolouring your surfaces.
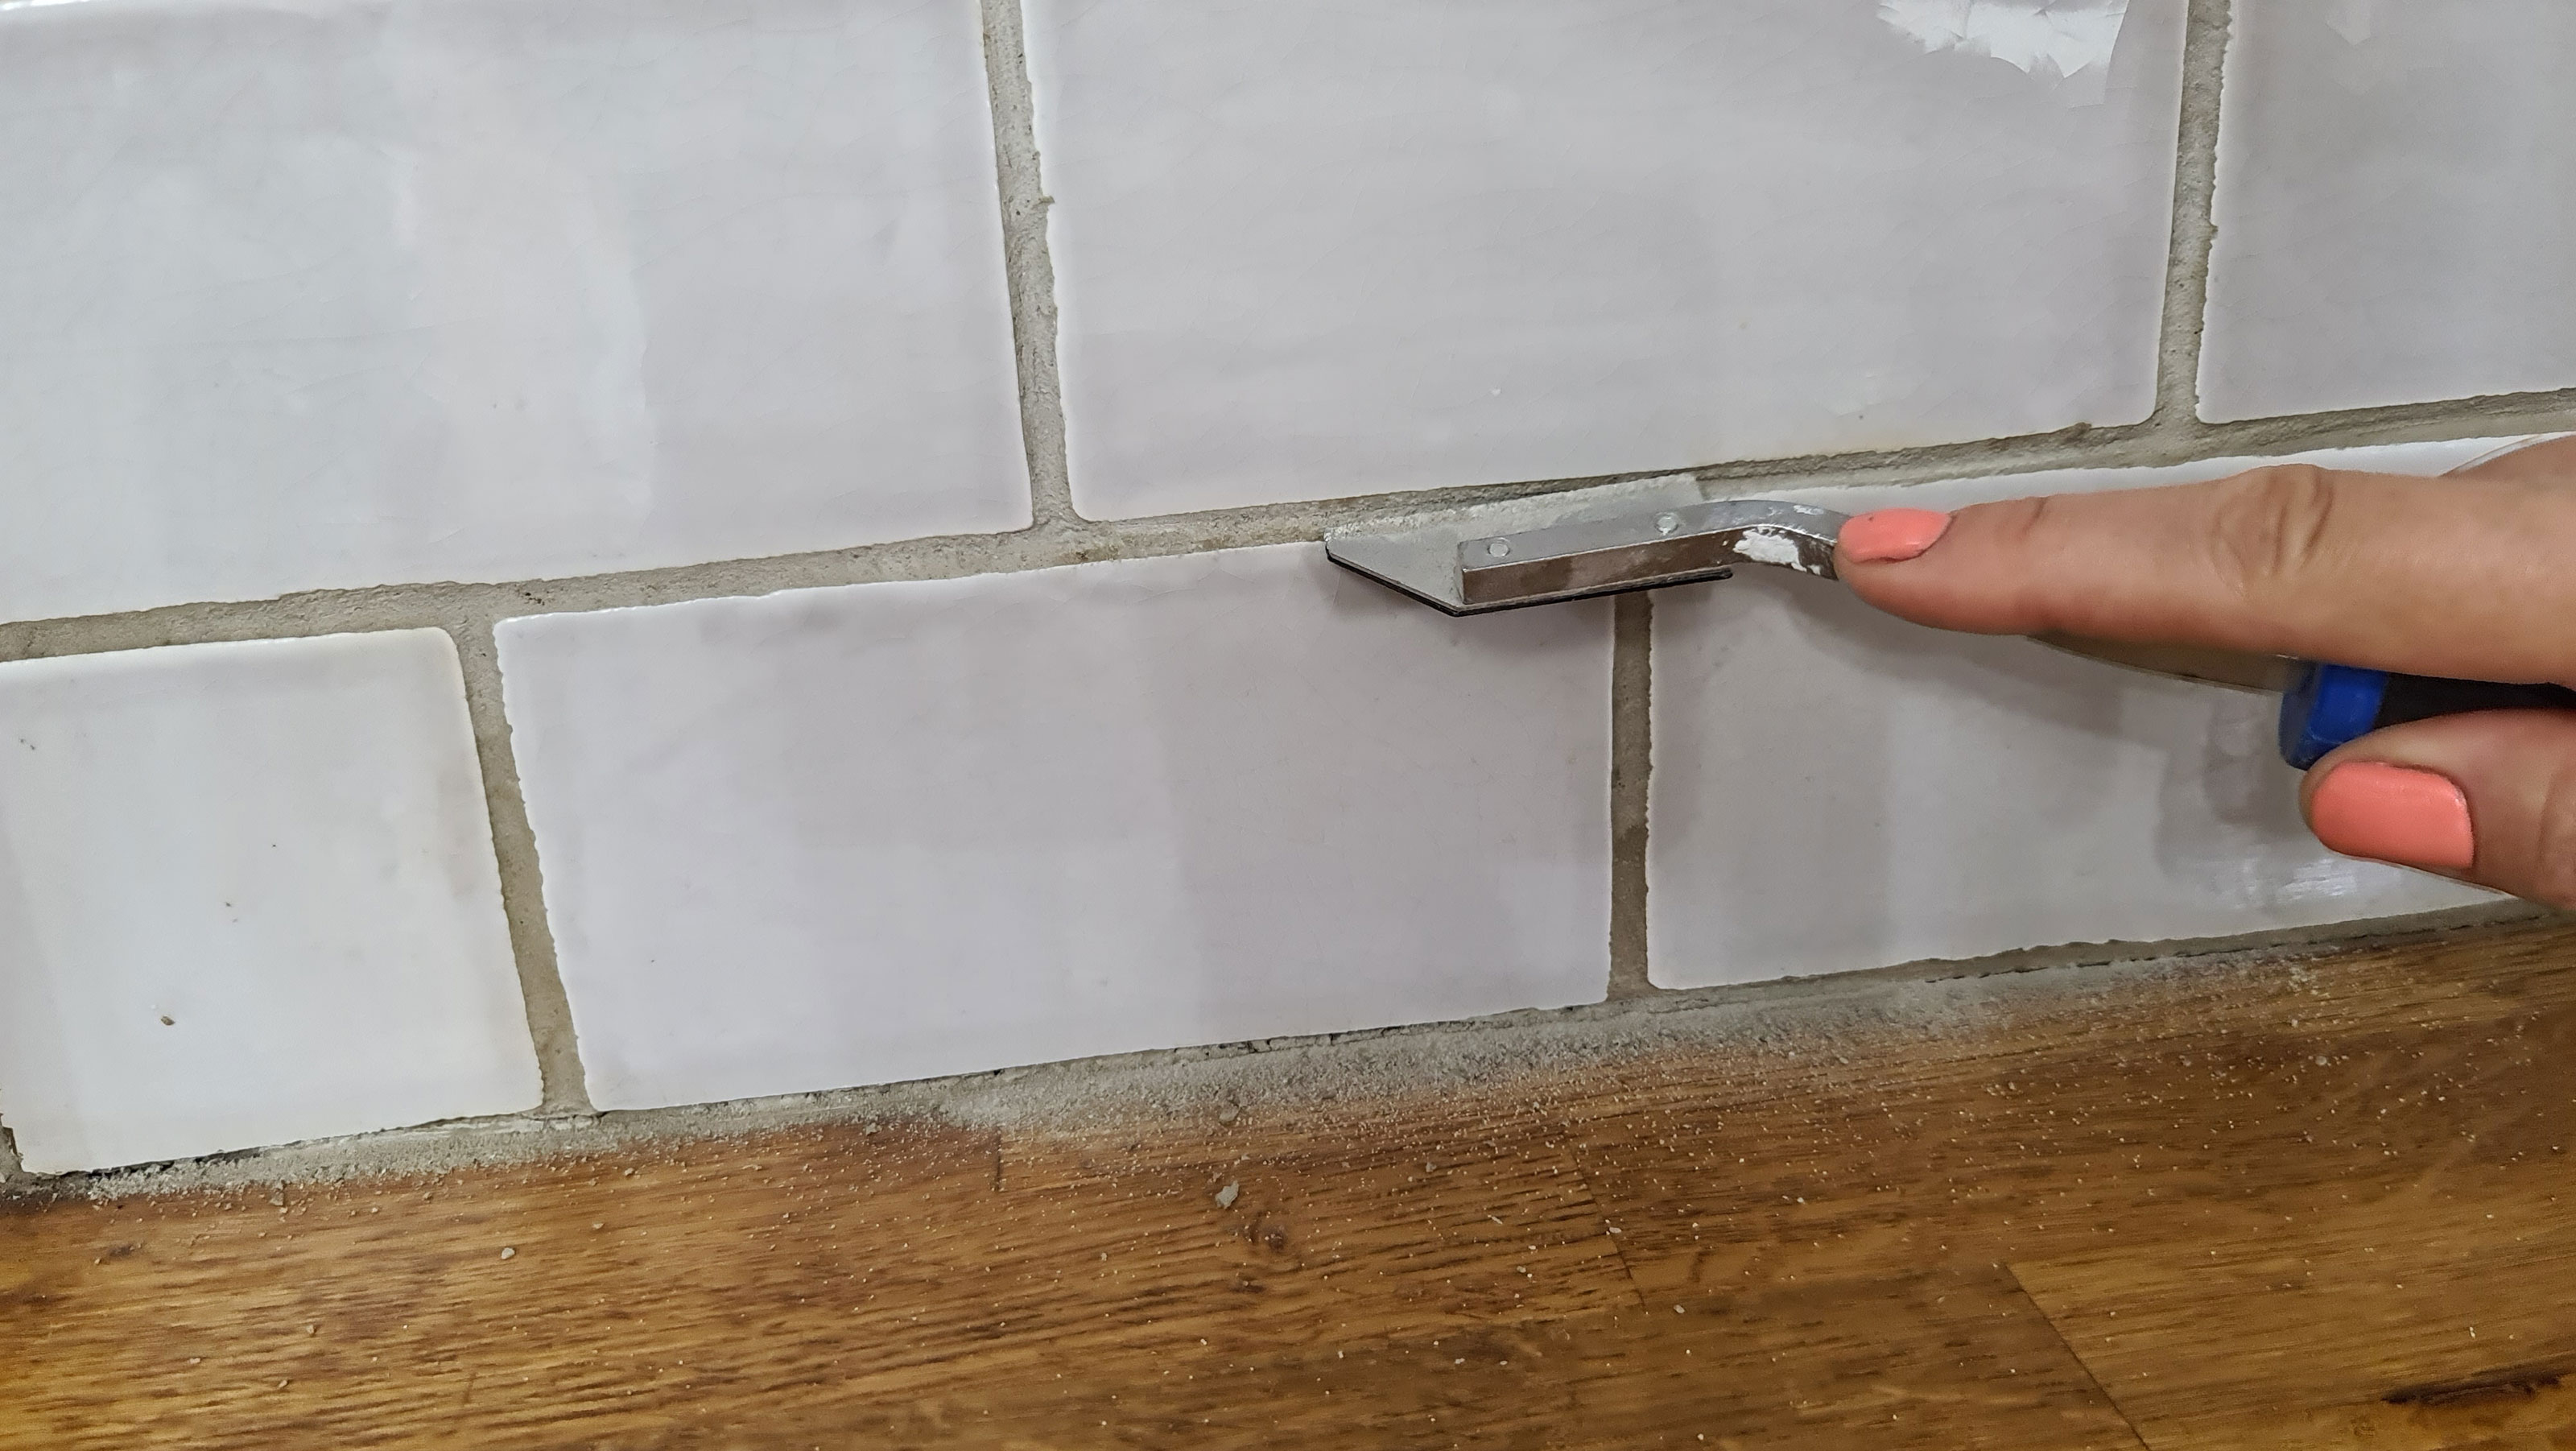
If you are re-grouting you’ll want to scrape out the old grout using a manual grout rake such as this one from Amazon, or an electric version. Be careful as you work to ensure you don’t slip and damage the tile face or cause chips.
Step 2: Mixing the Grout
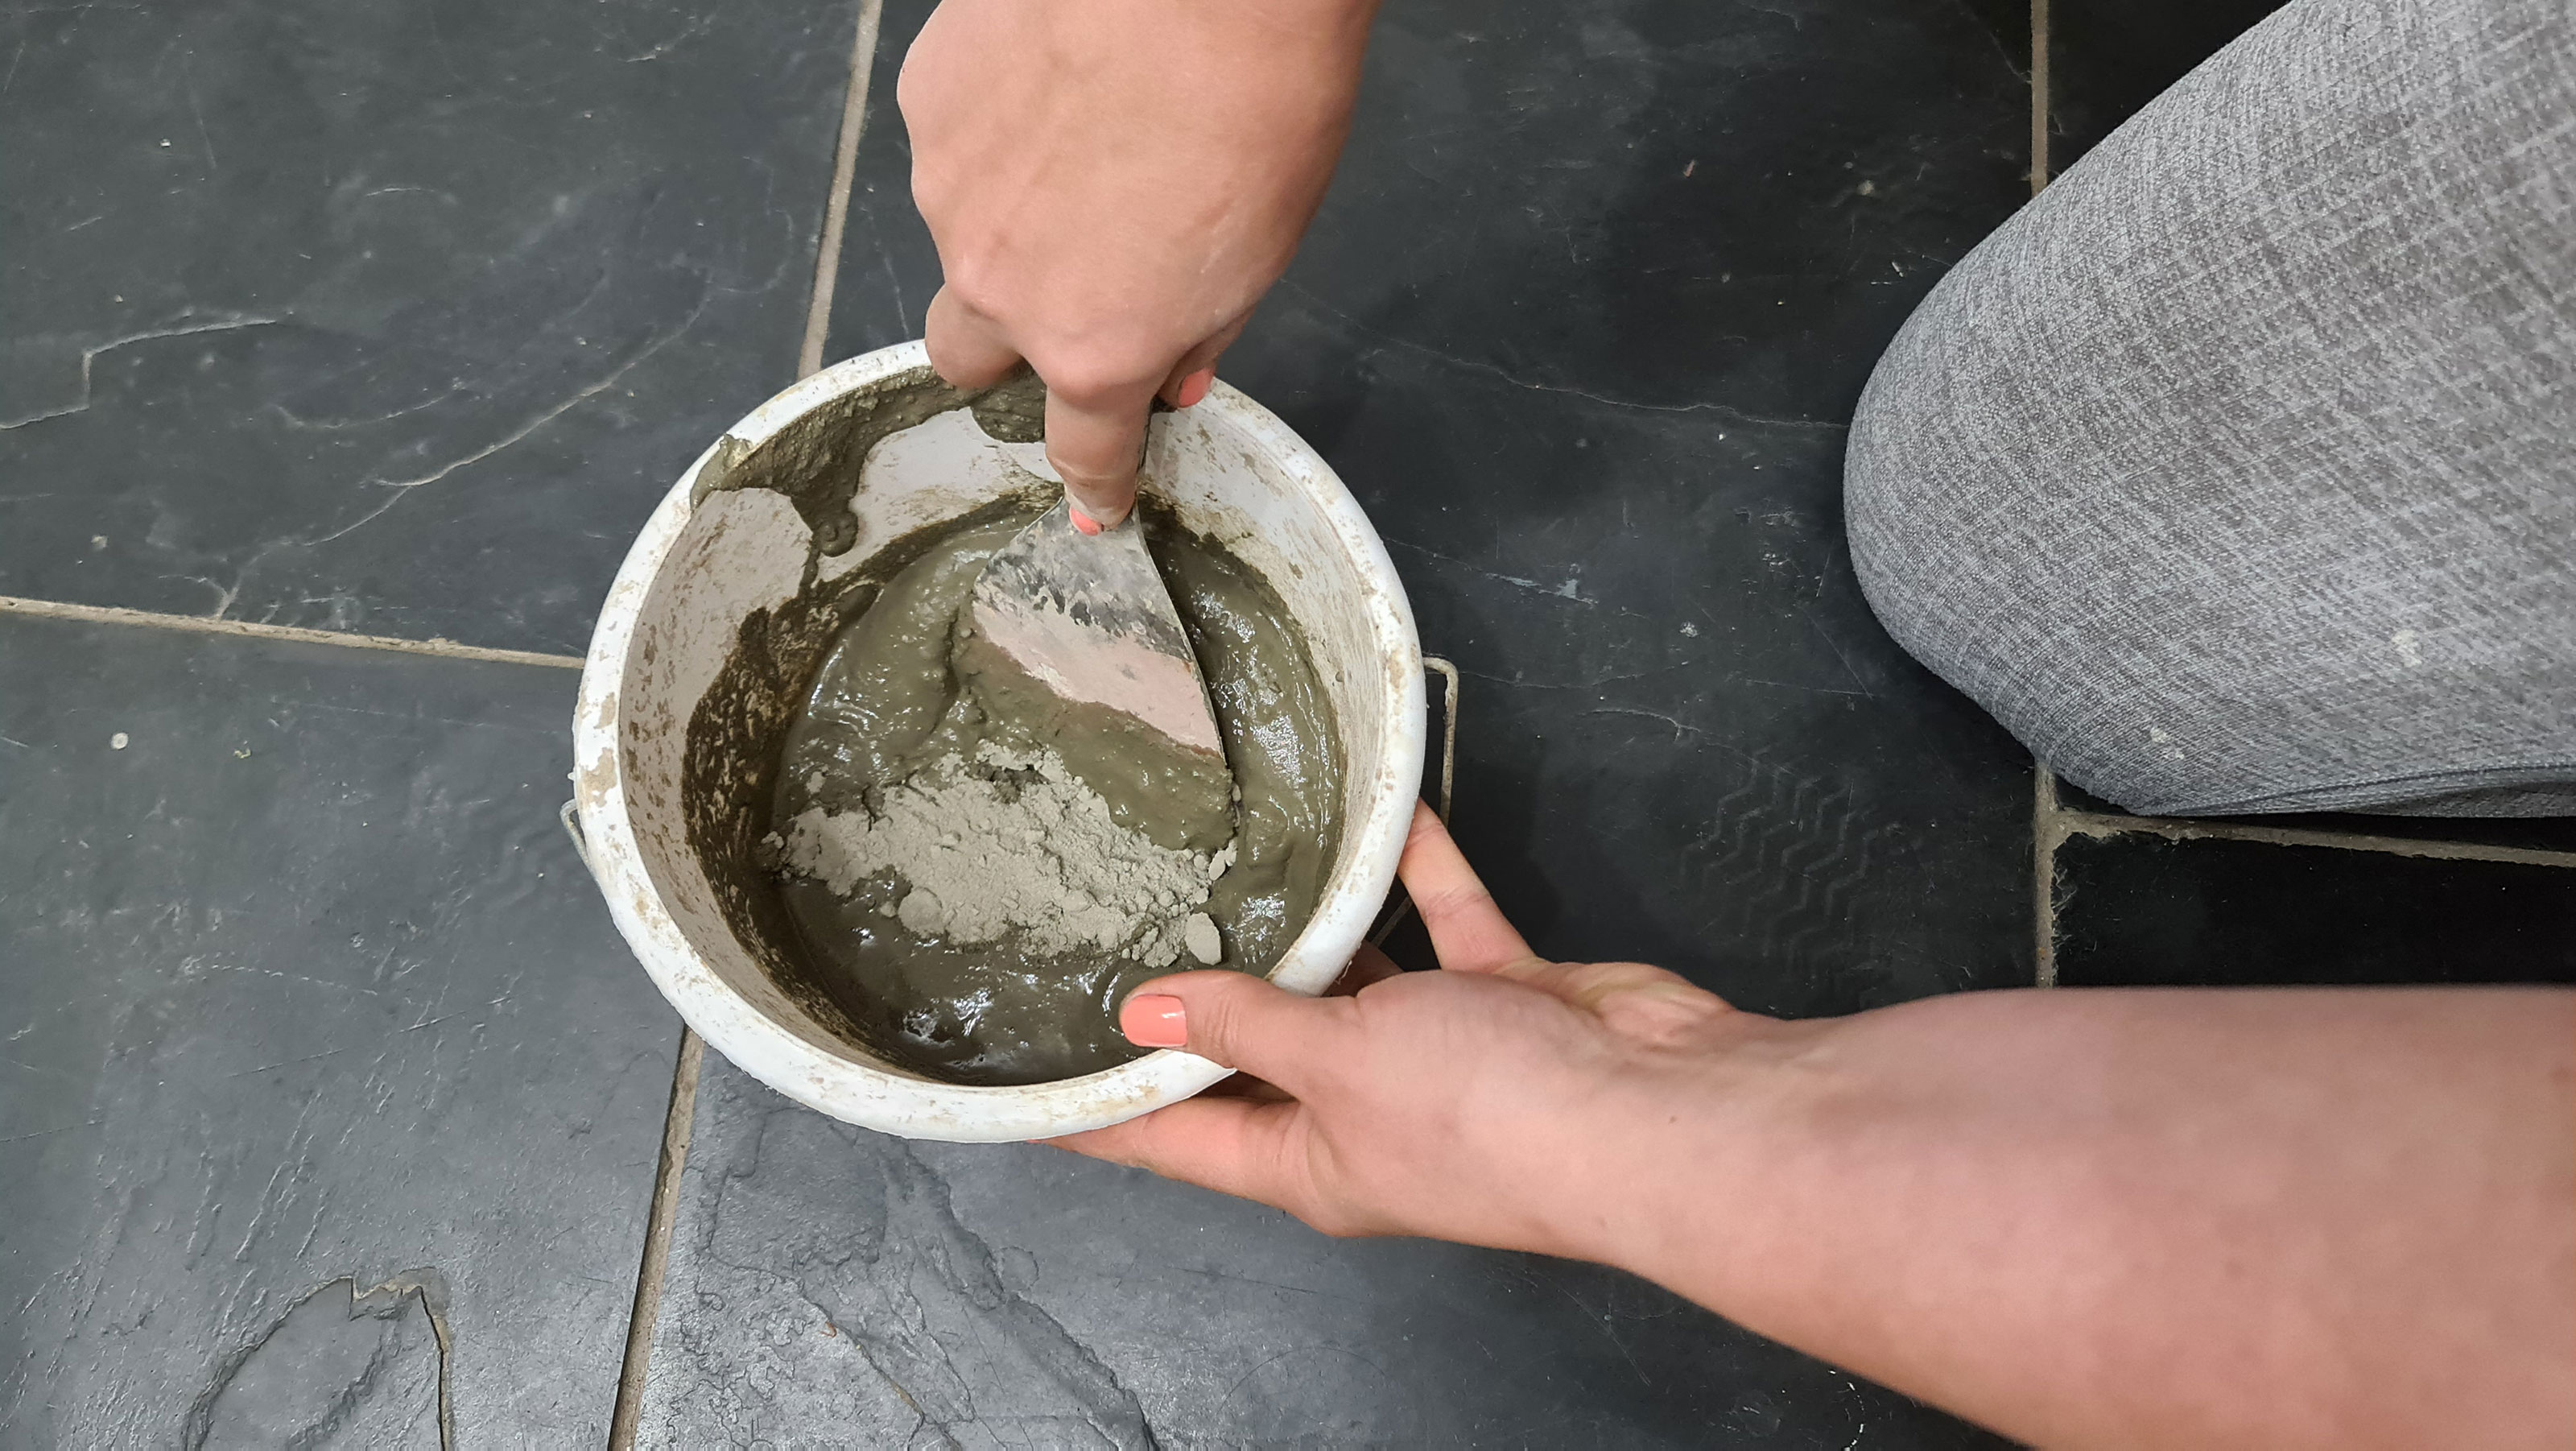
Mix the water and powder together in a bucket using the scraper tool, then add the water first and mix only as much as you can use in about 30 minutes. This will prevent the mixture from drying out.
Step 3: Applying the Grout
For strong colours such as black be prepared to rinse the sponge a few times before the grout is removed fully.
Different colour grouts work well with kitchen wall tile ideas but you still apply the same way. Start with a small amount of mixed product to the grout float or spreader and use a pumping action to push the grout into the seams.
Move the float diagonally to stop the grout falling into the gaps, and go over the same lines a few times in multiple directions. The aim is to make sure the gap is filled entirely, not just the top layer.
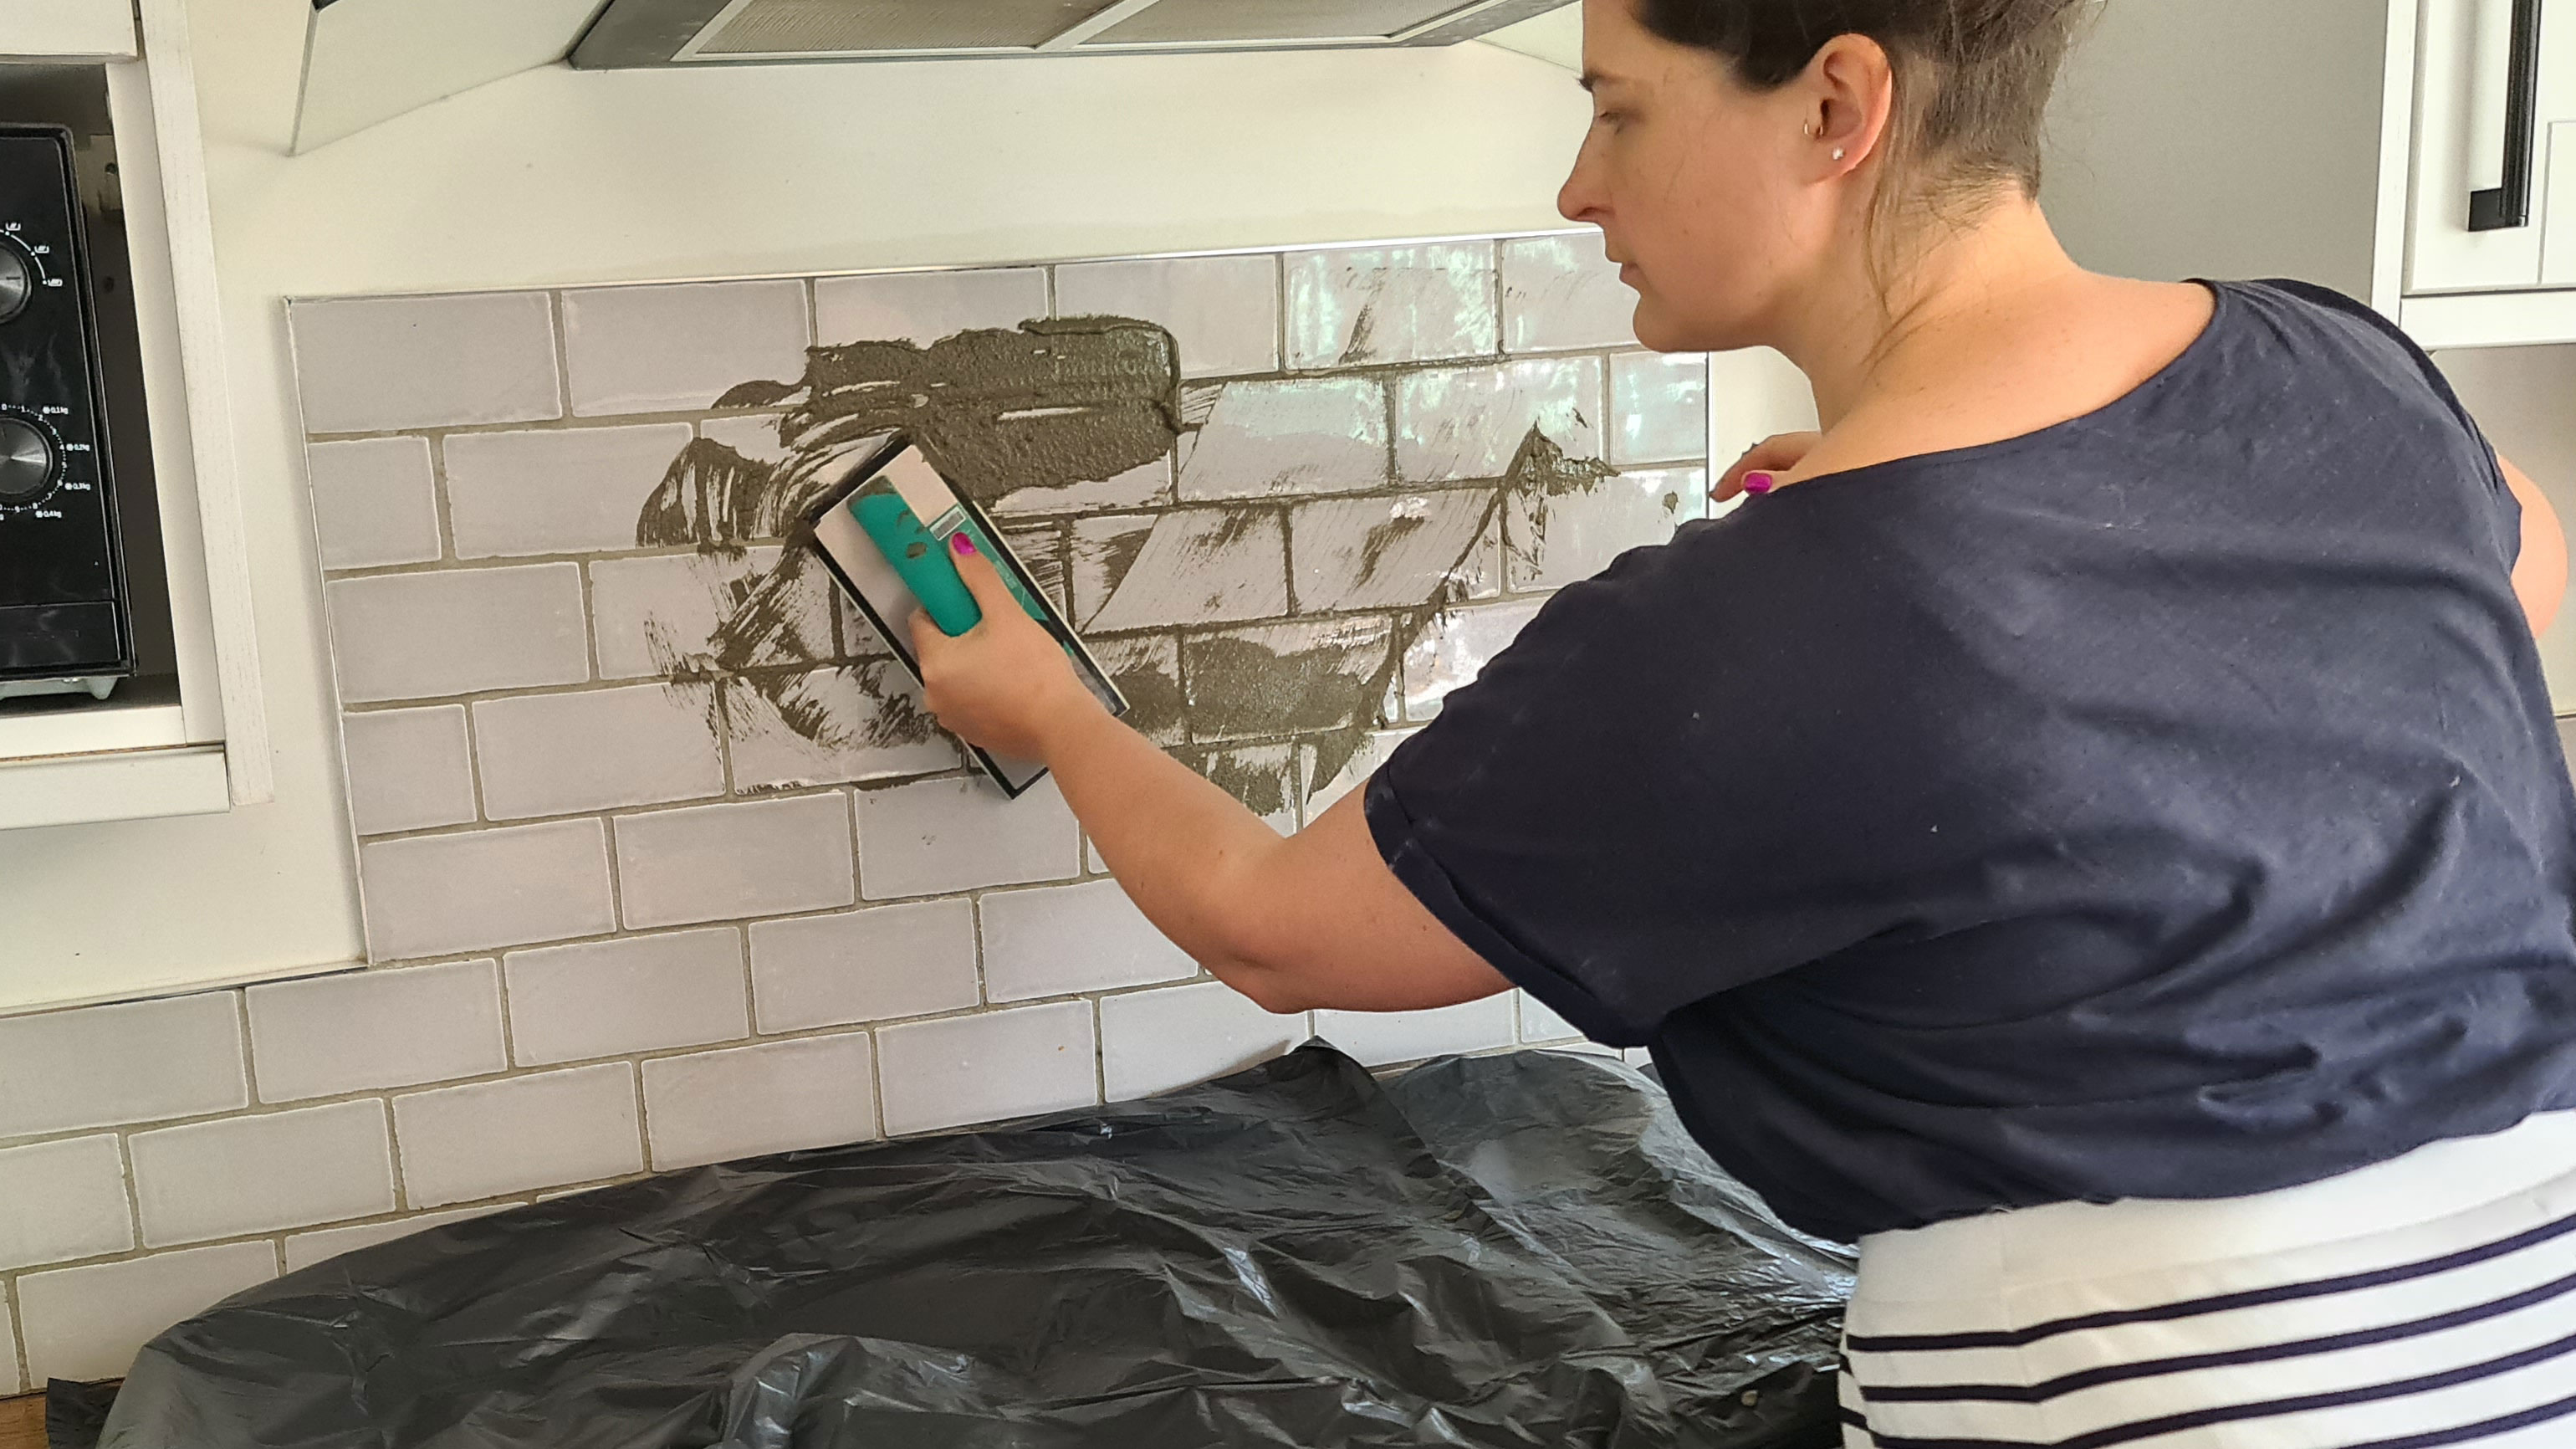
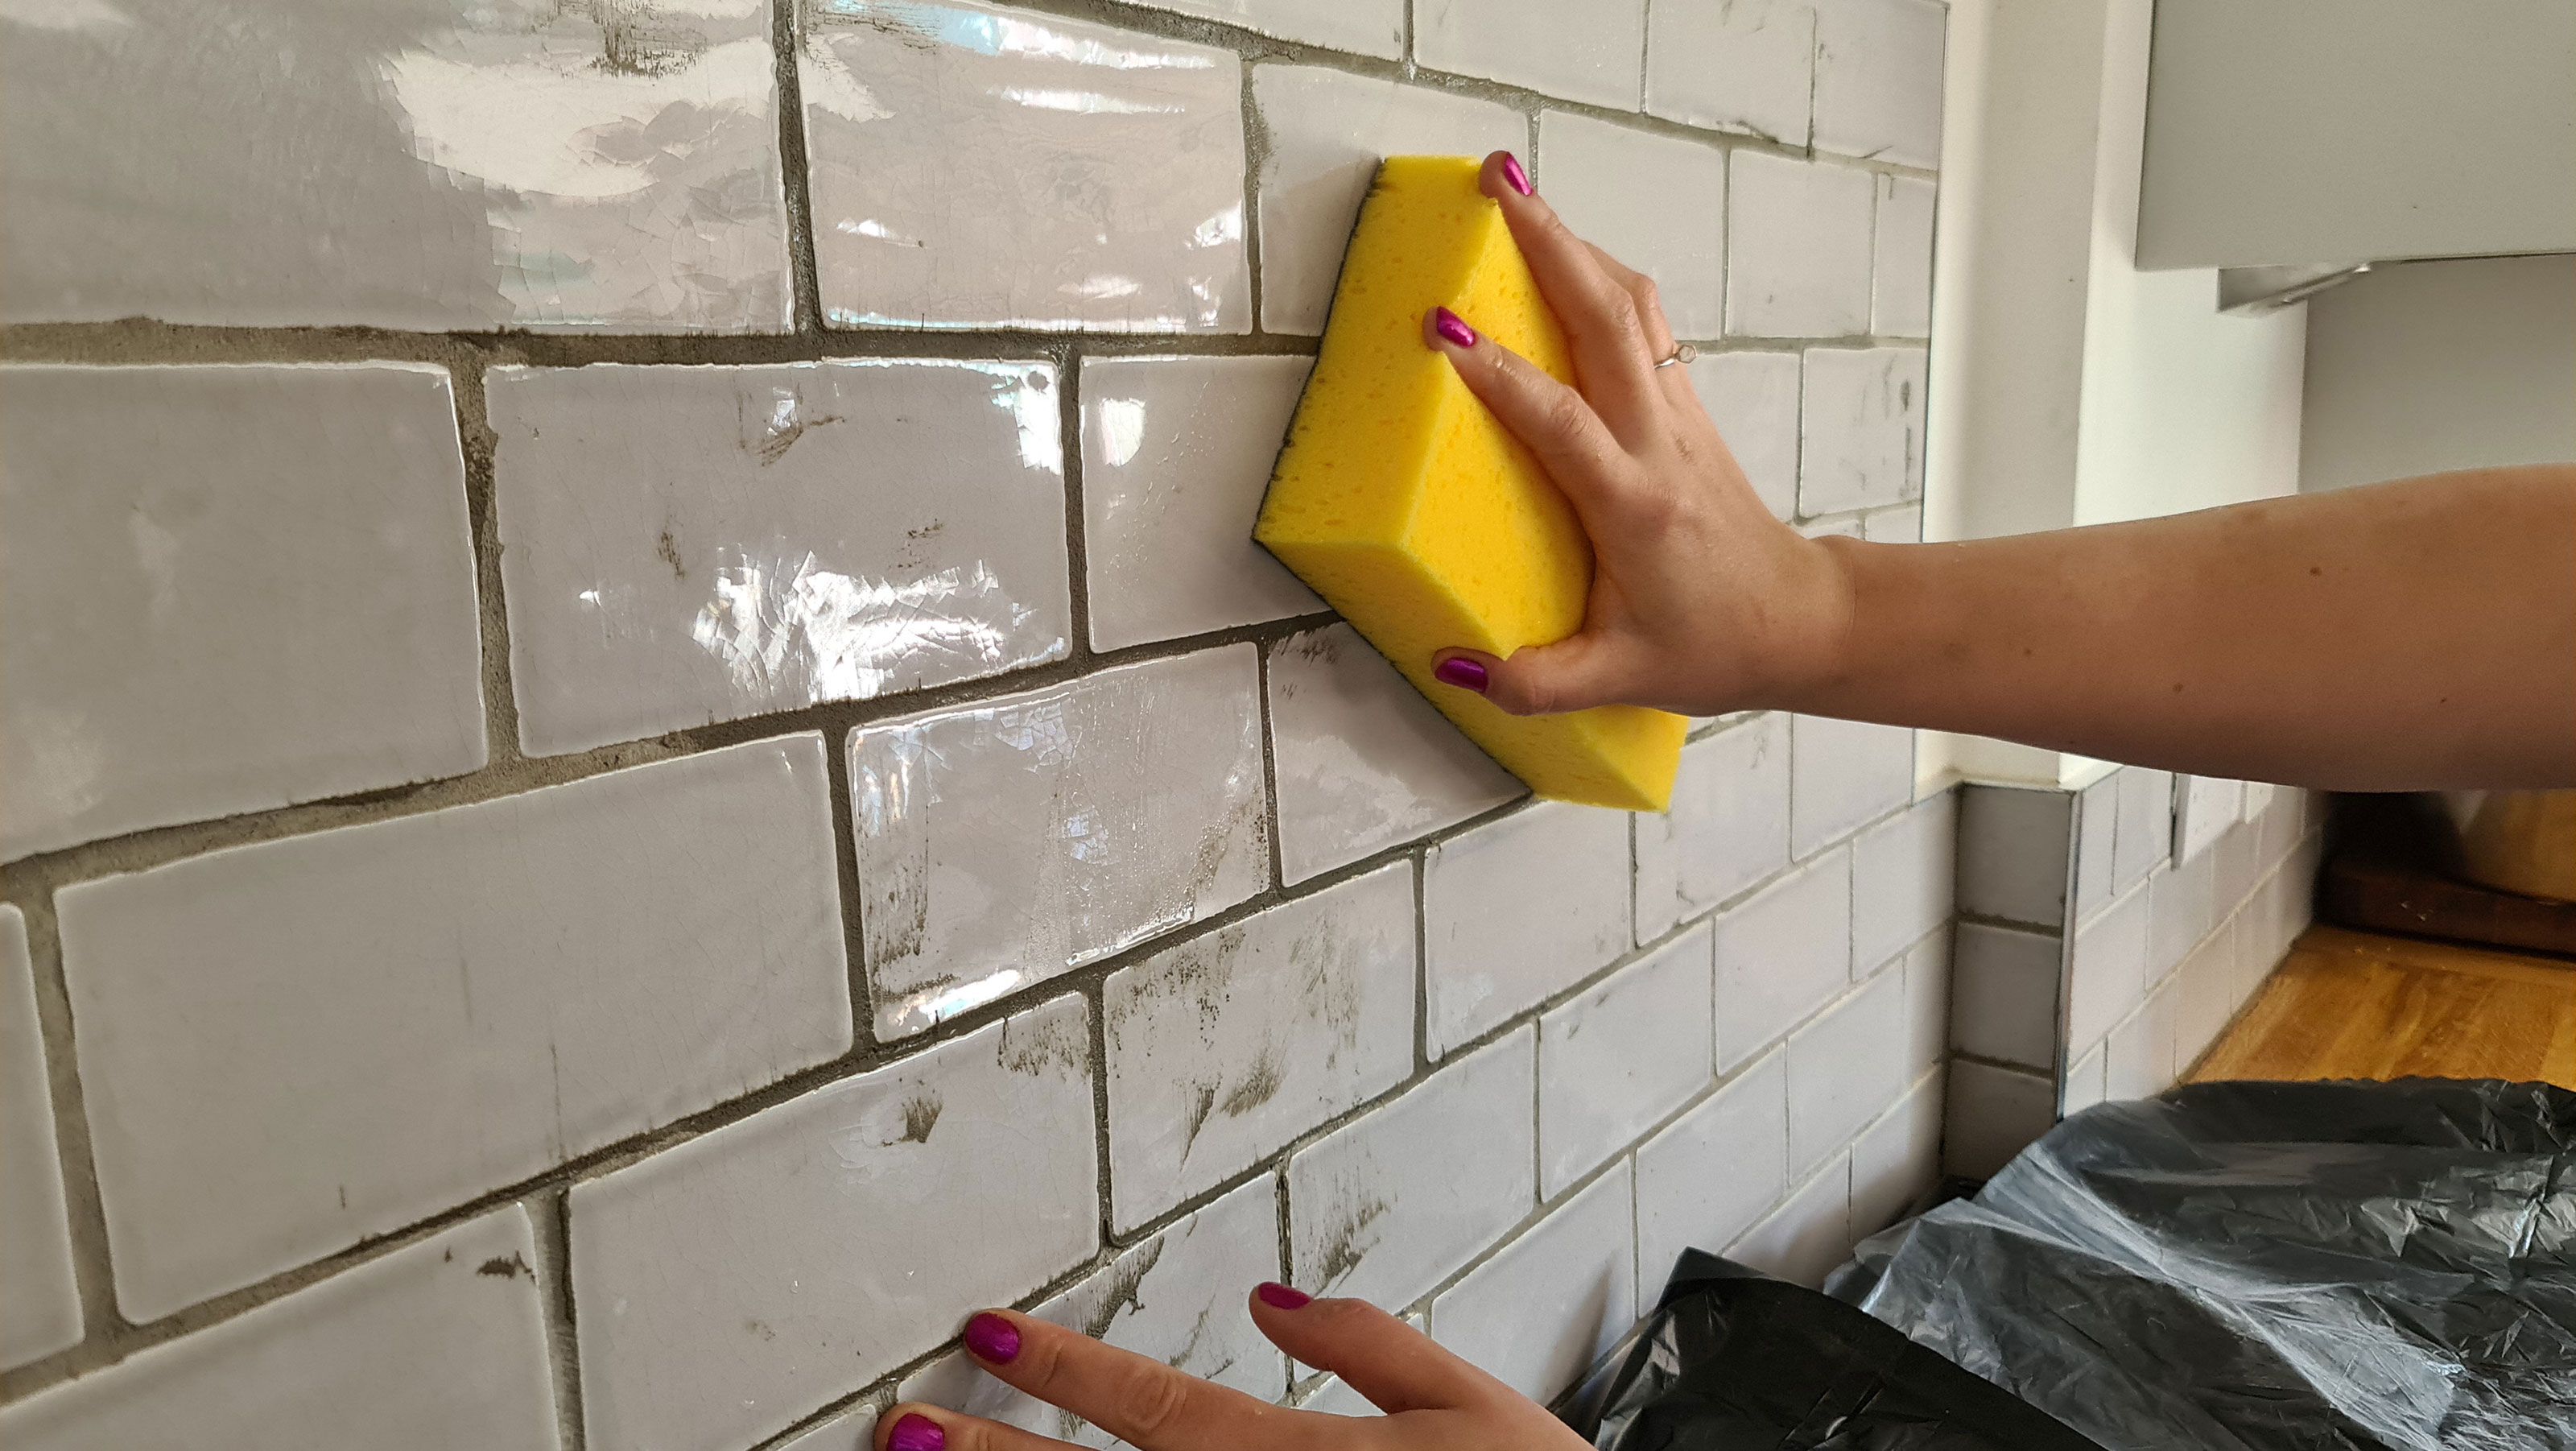
Remove as much product as possible with the float and then use a damp sponge to remove the rest. Wring the sponge out well; you don’t want it to be too wet as this may dribble and remove the grout as you wipe.
Next, run a grout finishing tool along the seams - this is just one of the best tiling tools you'll need for grouting. The ball on the tool removes excess grout and will give an even and professional finish. Wipe away any excess again with the sponge.
Once you have allowed the grout to dry and cure - leave it for between 48 to 72 hours - you’ll then need to polish the top of the tile with a dry cloth to remove the powdery film left on the tile.
Step 4: Sealing the Grout
Sealing the grout makes tiles easier to maintain as the dirt and moisture aren’t picked up by the porous holes in the grout.
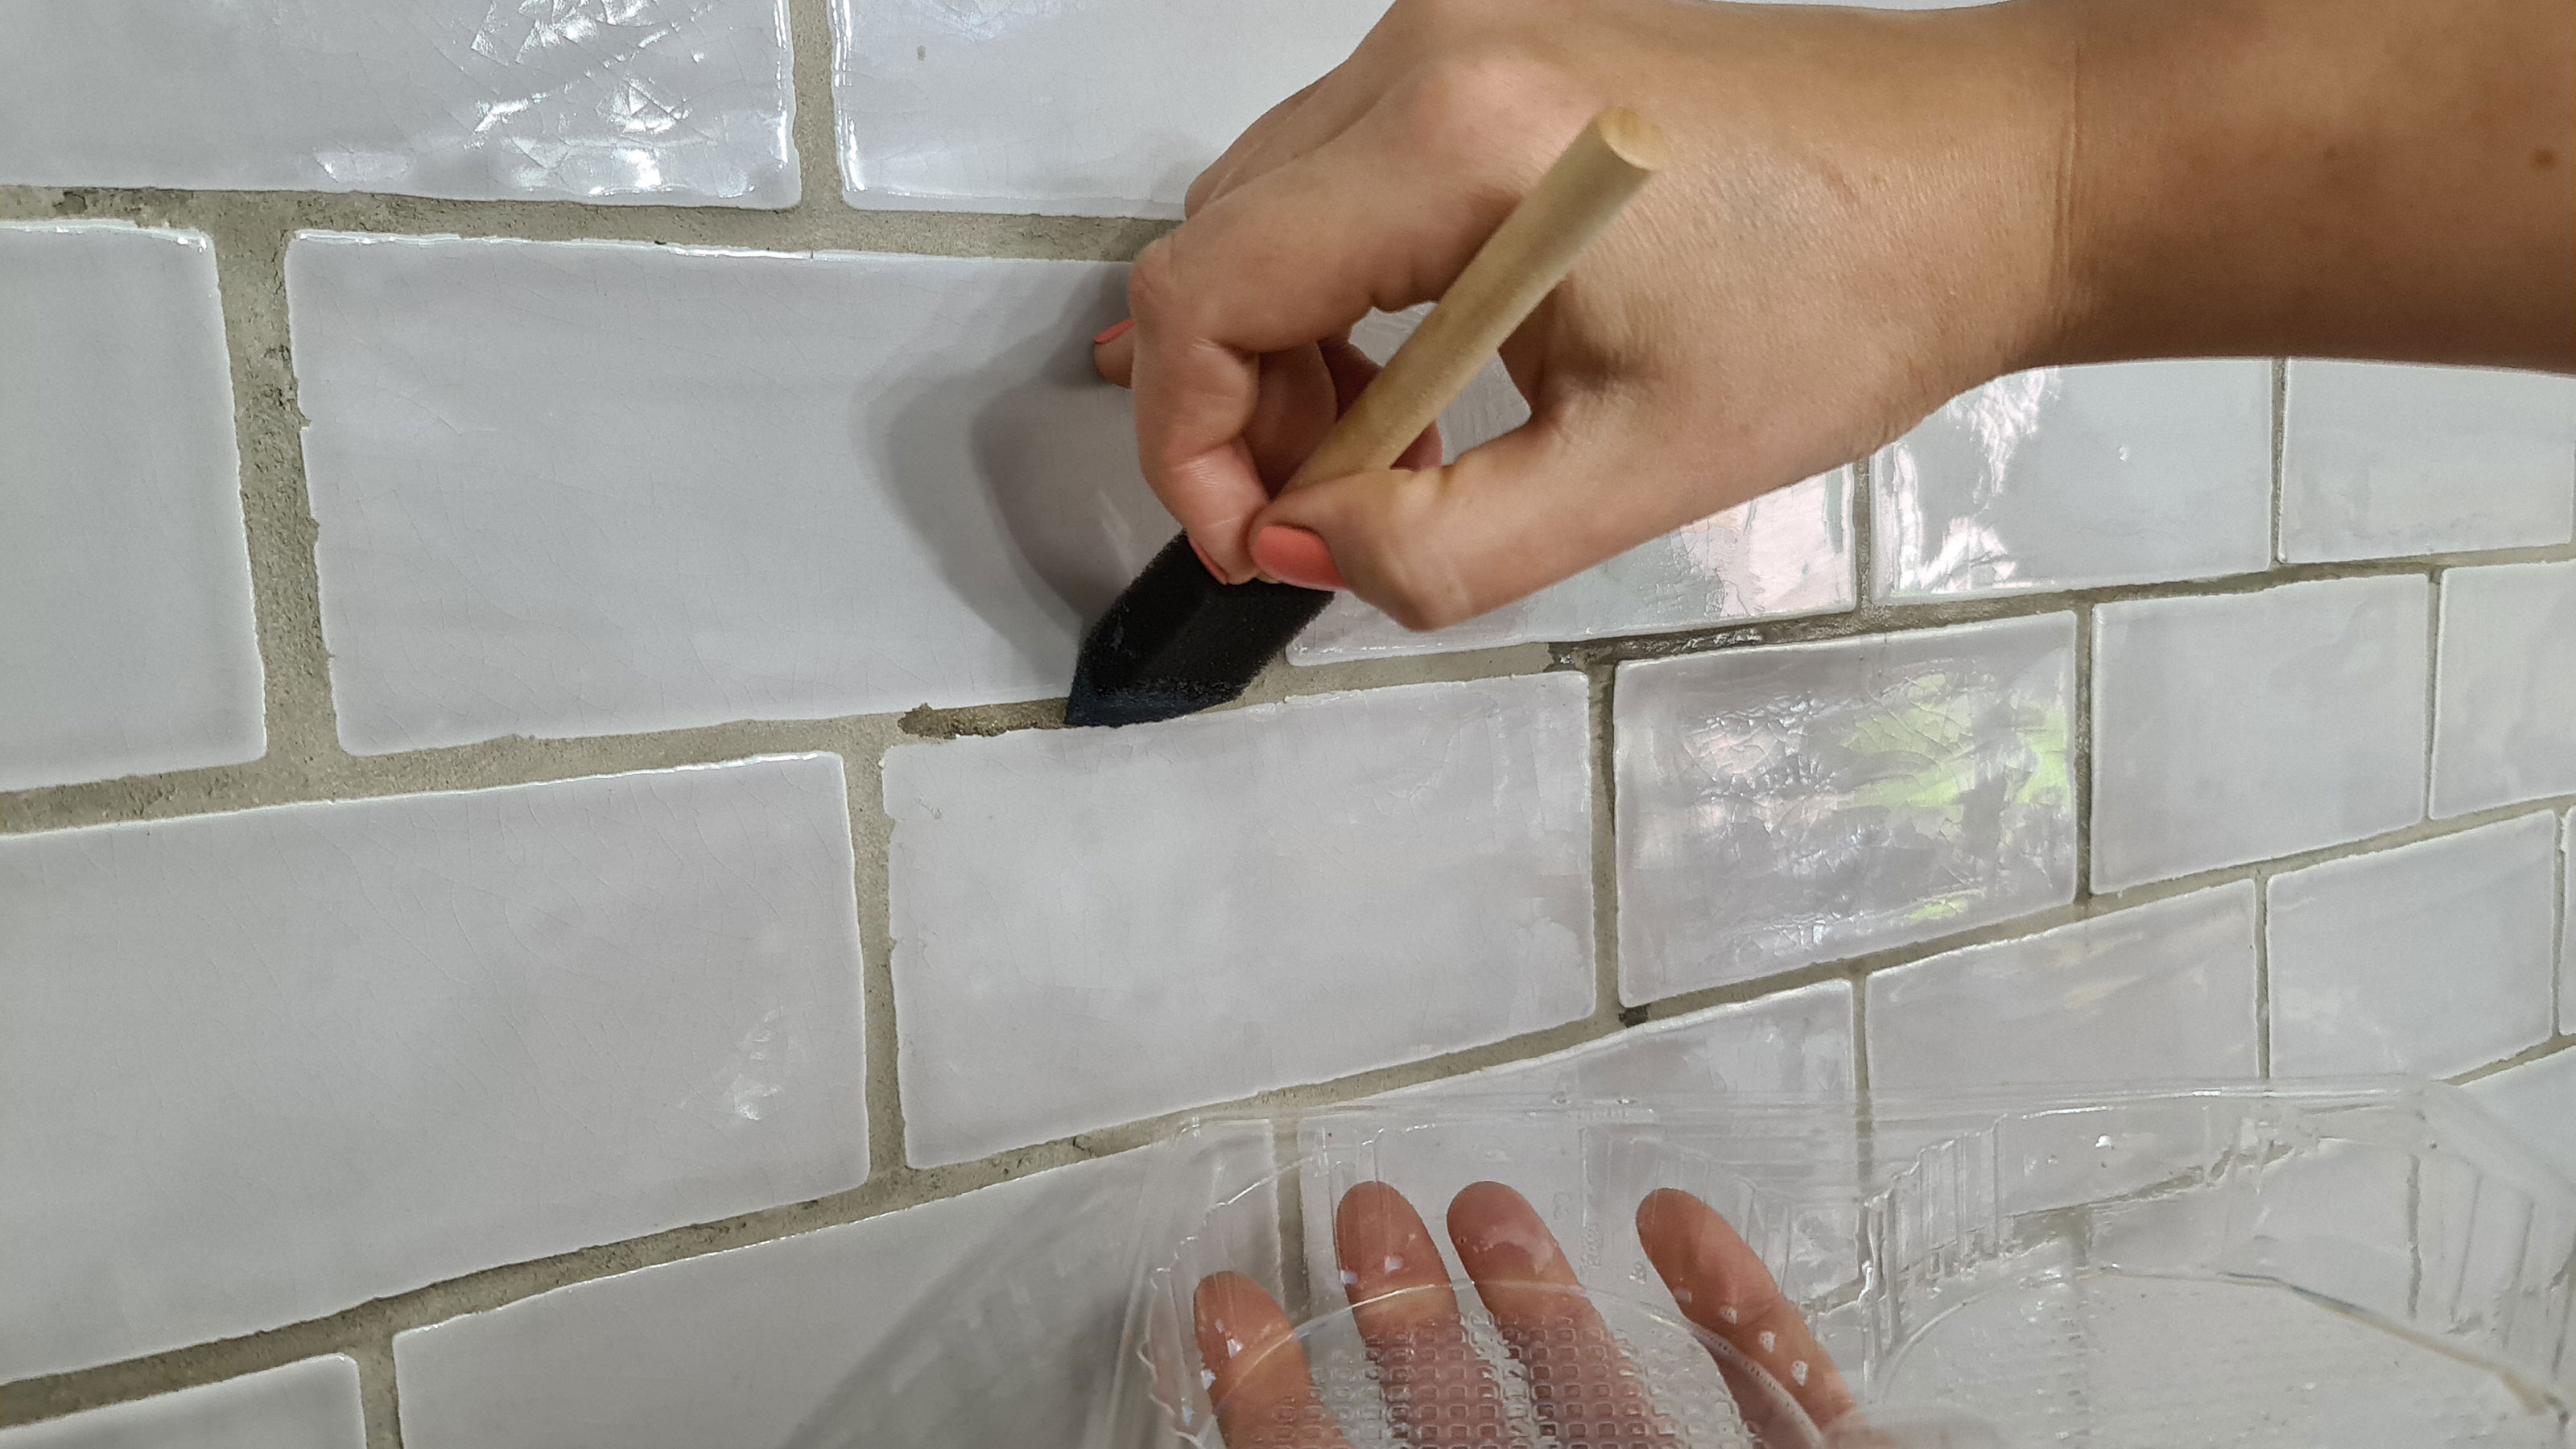
Using a grout sealer you can apply the sealant with a foam brush, foam roller or even a pipette to the seams, removing any excess sealant from the tile itself.
Depending on the sealant brand you may need to apply more than one coat.
Sprayable sealant products are available for this job, though keep in mind that the application will be less precise, so have the cloth handy to remove the excess from the tile.
The sealer will usually dry within 48 hours. A great way to test to see if the sealant has worked is to add a drop of water onto the grout line to see if it pools.
You don't want to spoil your nice new sealed grout once its completely dry. So if you are looking to hang a towel rail in your bathroom or a shelf in your kitchen you need to know how to drill into tile to get the best scratch free finish.
Do I Need to Reseal Grout?
Yes. Grout sealant doesn't last forever, so you need to think about resealing the grout on a regular basis. If the grout is in an area that is in constant contact with water i.e. a shower, you should reseal every 12 months.
If your grout resides in an area that where it is only in contact with water occasionally – sink surround – or moisture i.e a kitchen, think about resealing every two years.
Can You Put New Grout Over Old Grout?
Yes, you can. But, you’ll need to remove the existing grout, or at the very least take a few millimetres off of the top of the surface of the old grout. Then you will need to clean to remove dust and debris before you start adding the new grout.
If the grout is old and cracking or falling out, it is best to remove all the old grout – use a grout removal tool – and replace with new grout.
Can You Use Caulk Instead of Grout?
Yes you can, but its not recommended as a wholesale replacement. Grout is developed to provide a solid, hard wearing finish in areas that have no – or very minimal – movement, such as walls and floors.
Caulk – or silicone – offers more flexibility and is waterproof and is used in areas where there may be more movement, such as around the edge of a bath. You could use silicone caulk in the vertical where two walls meet as an extra water repellent in showers.
What Can I Use Instead Of a Grouting Tool?
For most tiling jobs a grouting tool is the ideal choice for getting a smooth uniform finish on larger gaps i.e. 5mm or larger.
But if you are using 2mm or 3mm tile spacers and don't have a grouting tool to hand you can use the top of a round pencil to get the uniform finish. Leave in water to moisten and dip each time you use the pencil.
Can I Apply Grout Without A Float?
A grouting float is a good choice for those new to tiling and grouting. It helps make sure that the grout gets spread around evenly and worked into all the joints.
However, if you do not have one get a well fitting rubber glove apply with your finger or thumb. This helps push the grout into the joint and can get the job done quicker, especially after you have got used to this method.
How Often Does Grout Need Cleaning?
Grout should be cleaned as part of your regular cleaning schedule and as long as it has been sealed correctly you shouldn’t notice discolouration.
You can use one of the best grout cleaners to easily do this. Alternatively, you can use a 50/50 bleach and water mix and scrub with a toothbrush. Or, for a harsher clean, you can try a bicarbonate of soda and distilled white vinegar mix. Make sure you reseal the grout afterwards to prevent further discolouration.
If the grout is more than five years old and beyond cleaning, it's worth regrouting tiles to give your bathroom or splashback a fresh new look.
Are Grout Pens Any Good?
Opinion is divided, but they are not a long term solution to old and grubby grout. They serve a purpose and are a good option for a quick refresh. But in reality they won't last long especially in areas that are in contact with water frequently i.e. bathrooms and showers.
Get the Homebuilding & Renovating Newsletter
Bring your dream home to life with expert advice, how to guides and design inspiration. Sign up for our newsletter and get two free tickets to a Homebuilding & Renovating Show near you.
Emma is a UK-based DIY educator and director of the social media brand DIY With Emma, whose primary mission is to help more people get into DIY through sharing DIY hacks and how-tos. The DIY influencer, whose videos have received millions of views, has recently renovated her 19th-century cottage on a tight budget, has also created DIY content for Homebuilding & Renovating.

