How to Fit Your Own Glazing
Find out how to update or repair your double-glazed window units on a DIY basis
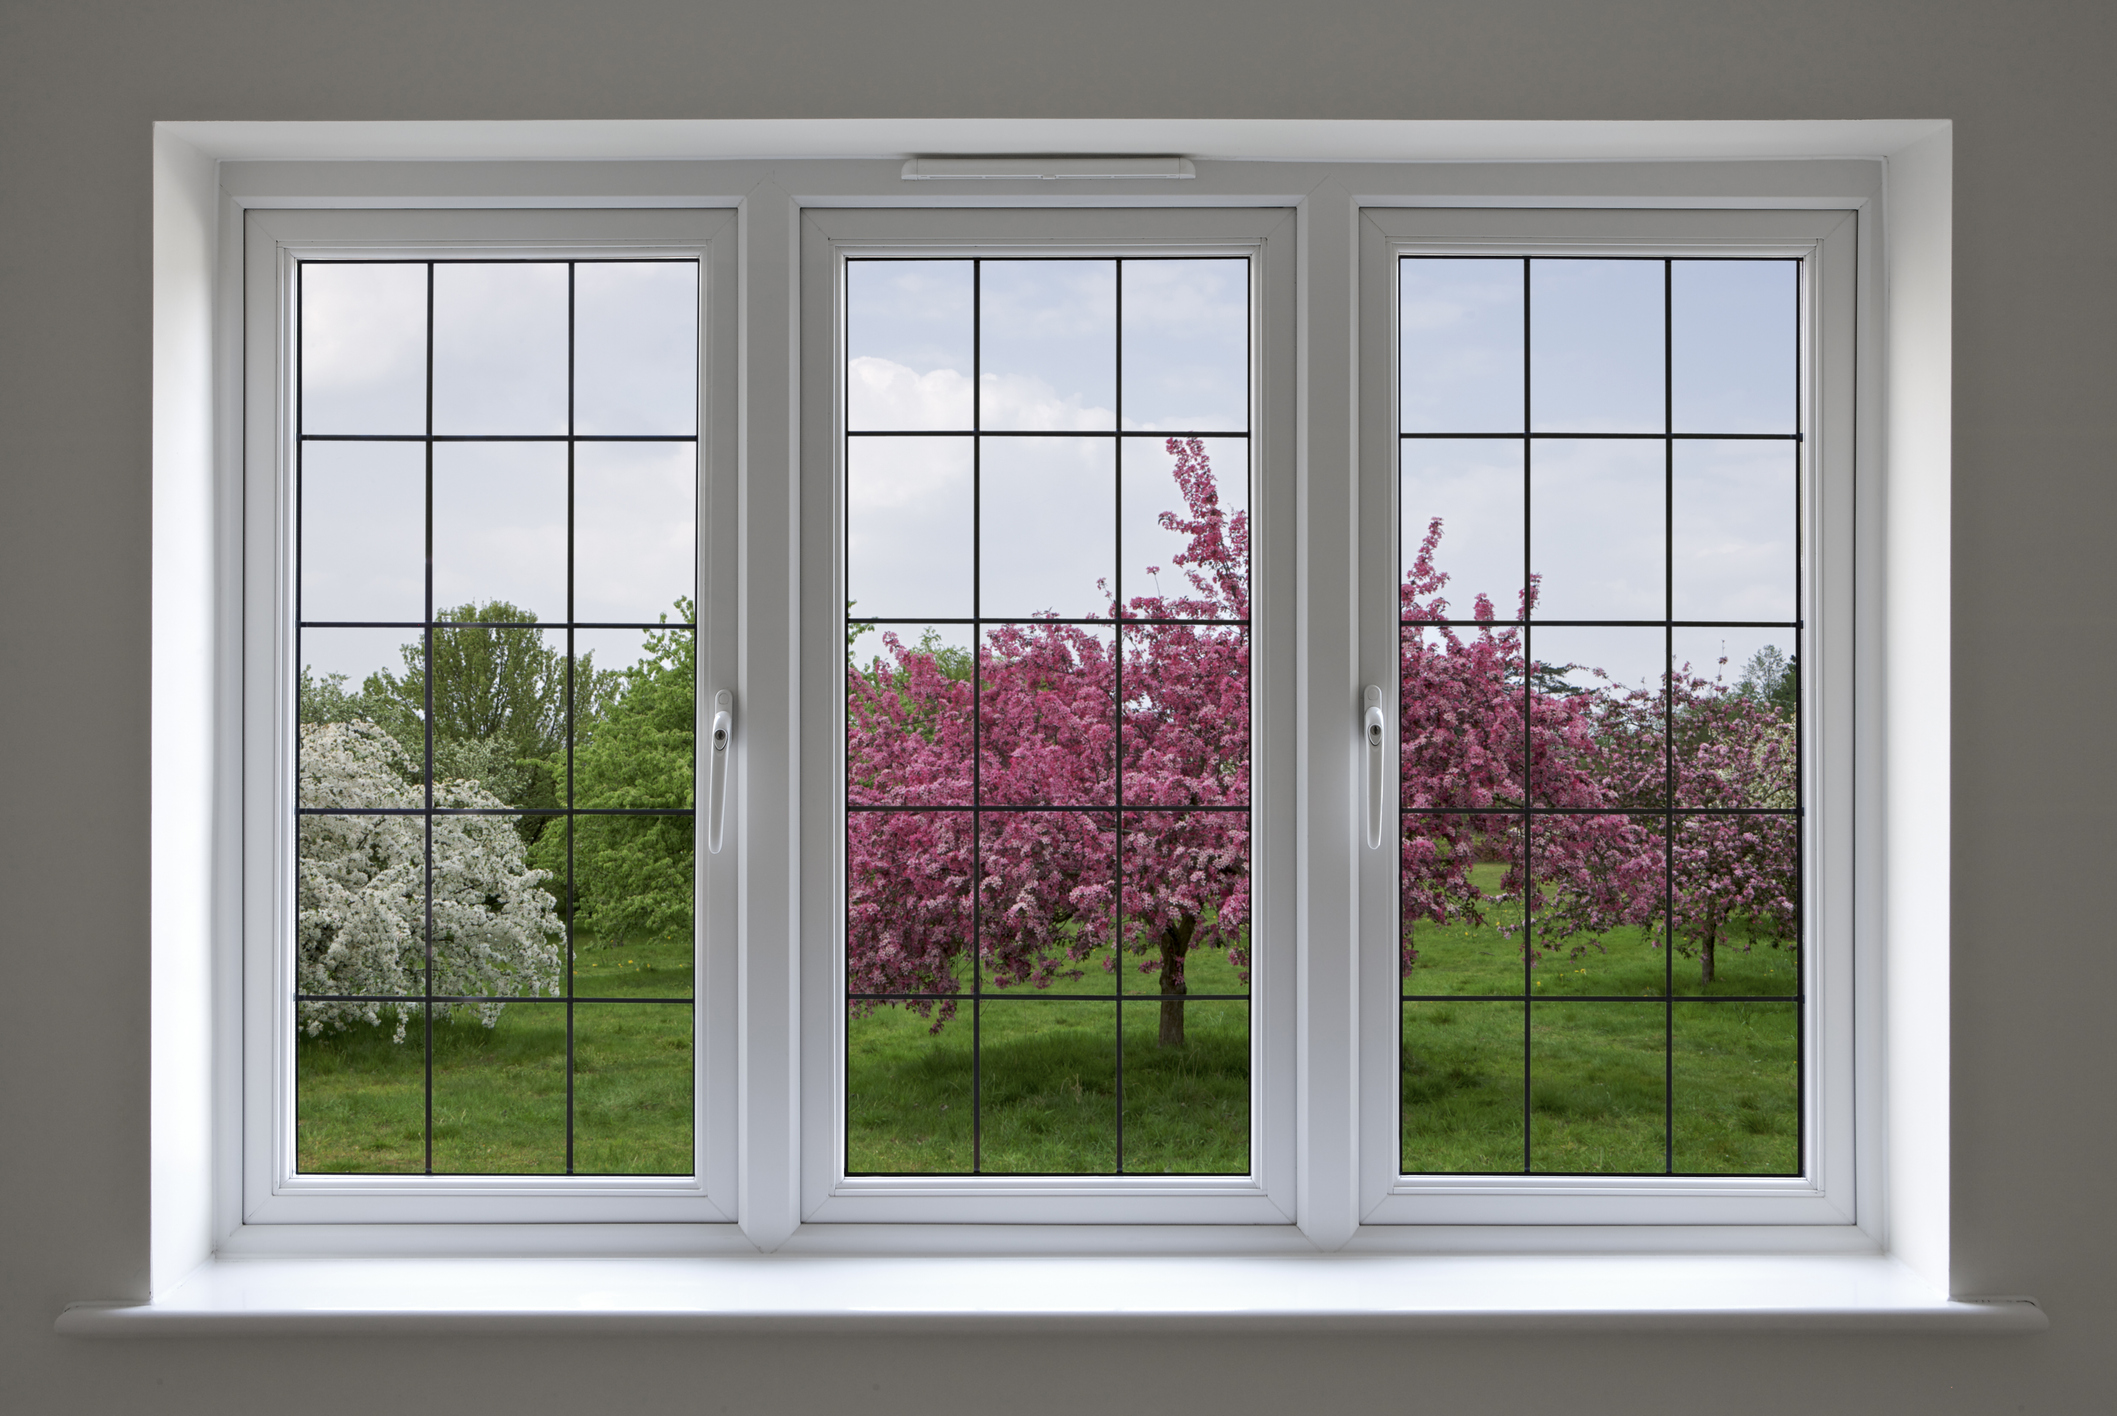
In its basic form, double glazing is two pieces of glass hermetically sealed with a cavity in between. The main benefits are improved heat and sound insulation. Cavity sizes vary, but you’re most likely to see a gap of between 12mm to 20mm sandwiched between two sheets of glass either 4mm or 6mm thick. If you have a big enough rebate in your window frame, larger gaps between offer greater insulation, but go wider than 300mm and convection currents increase heat loss.
Over the years, there have been some significant leaps in technology for both the glass used in double glazed units and the gas that goes between it. And as units occasionally fail, it’s a good chance to upgrade your window’s performance. Even better, you can do it on a DIY basis.
Tools and materials needed:
- Tape measure
- Hammer
- Nail punch
- Scraper
- Double glazed unit
- Non-hardening butyl putty
- Roll(s) of high-security glazing tape
- Spacing blocks
- Beading tacks
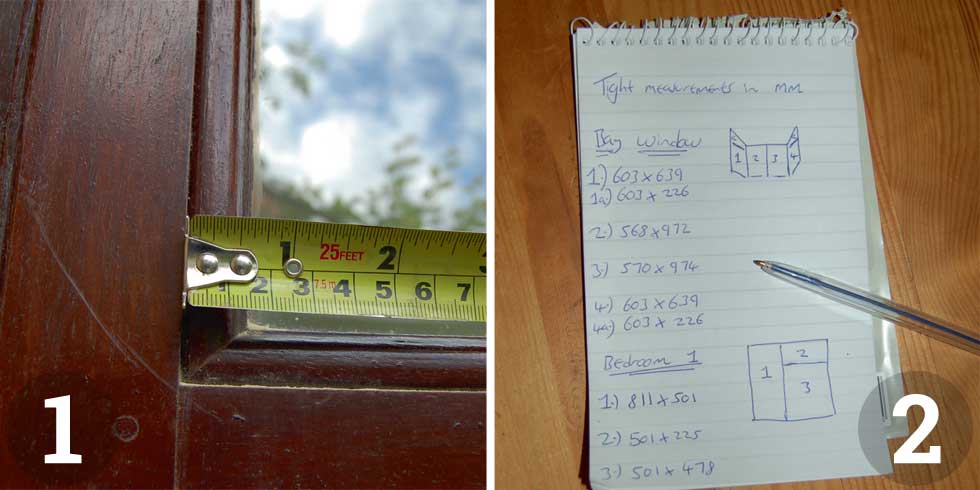
1. Start by working out the size of the glass you need. Measure frame edge to frame edge. Make sure you also know the thickness of the unit. The 20mm size (also known as 4-12-4, meaning two panes of 4mm glass with a 12mm gap in between) is common in domestic windows. But to check what thickness unit you have in your frames, remove one piece of beading (see steps 3 and 4) and slide a ruler into the rebate to measure the overall thickness of the glass.
2. If you are replacing several panes then a rough sketch of the window with the various measurements next to it means none will get left off the order. When ordering, tell the glass merchant that the measurements are ‘tight’ to the frame. The merchant will then deduct a small amount off each dimension (normally 5mm) for clearance.
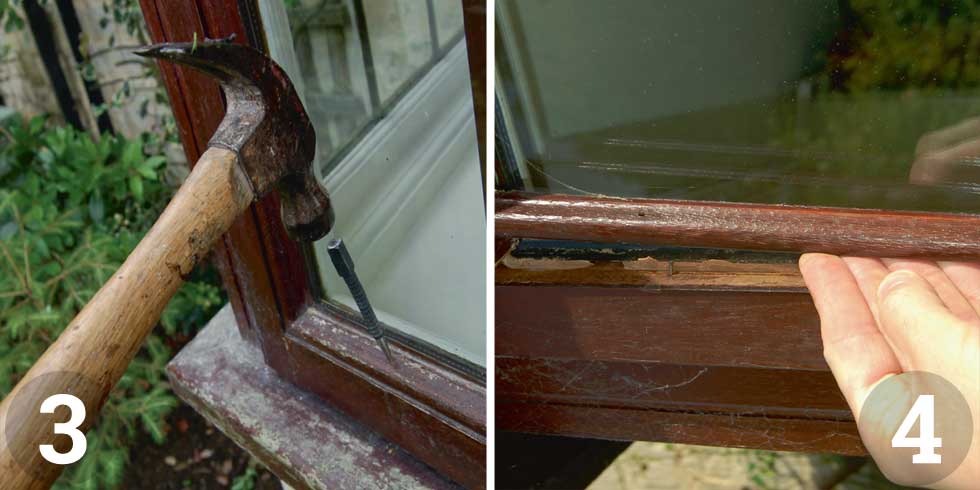
3. The beading that holds the glass in on plastic window frames snaps into a recess and can be removed with careful prising and then reused. If you have wooden window frames (as here), the beading can also be reused but you’ll need to knock the nails that secure it to the frame through with a nail punch. Some windows have the removable beading on the outside (as here) and are said to be externally glazed. Others have the beading on the inside and are known as internally glazed windows.
4. Pull beading away. If possible, leave the top section of beading until last and then support the glass as you remove it. Glass units fitted in wooden windows are normally sealed in with some form of putty-based fixing compound. This will need to be cut away before the glass can be removed.
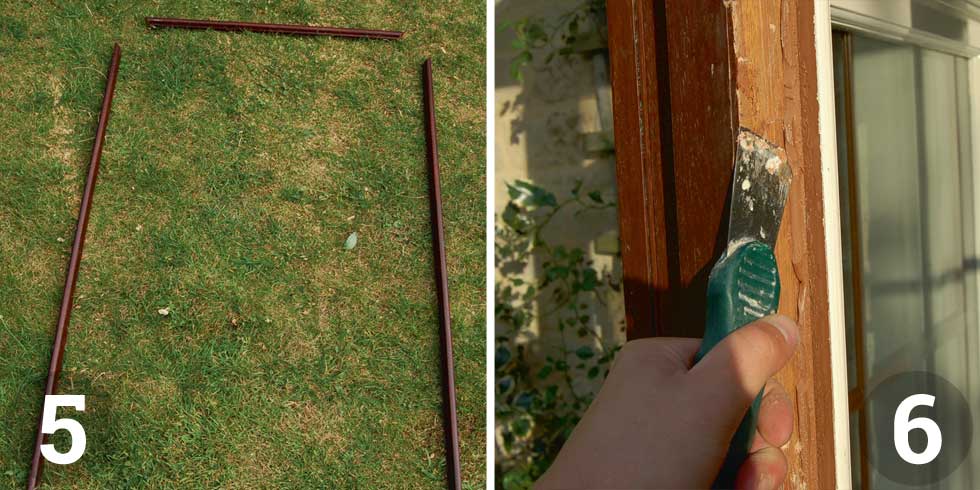
5. Lay out the beading in the shape of the window so it can be refitted easily later on.
6. On wooden frames, remove all traces of excess fixing compound with a scraper and then thoroughly clean out the window rebate with a soft brush.
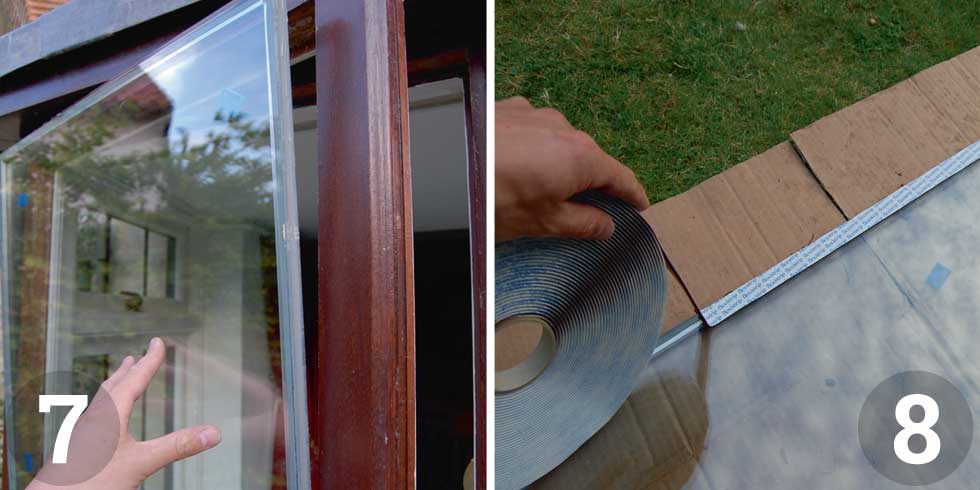
7. Trial fit the replacement double glazed unit in the window aperture. If it doesn’t fit, don’t try and force it. Pull the glass out and check for any obstructions before trying again. Don’t move on to the next stage until the unit slides into the frame easily.
8. Once you’re happy with the fit of the unit it’s time to tape it up. Windows in plastic frames are sandwiched between a pair of gaskets. For added security on externally glazed frames it’s a good idea to replace the internal gasket with a high-security glazing tape. This double-sided PVC foam tape sticks to the frame and glass and makes it virtually impossible for the window to be removed without breaking it. If you’re fitting glass to a wooden frame, apply strips of flexible non-setting butyl putty (we’re using Flexistrip here) to both sides of the glass. You can also use high-security glazing tape as above for externally glazed wooden frames.
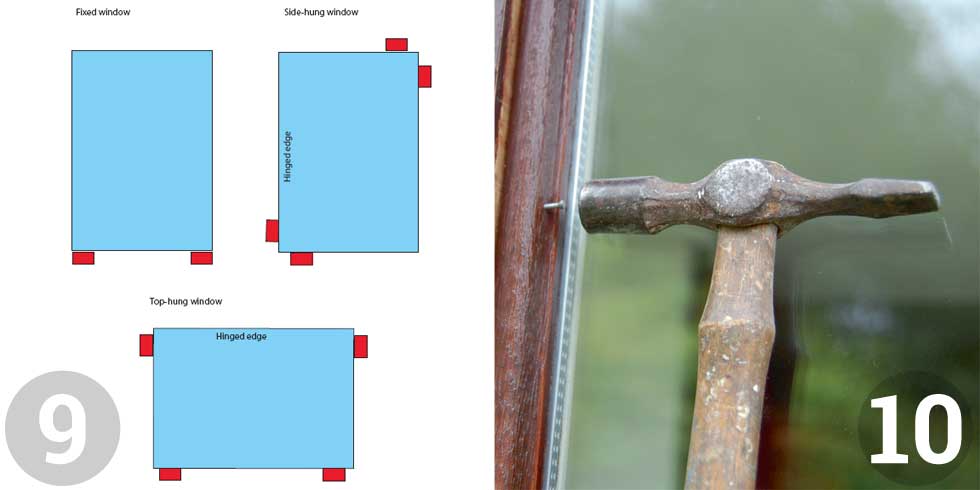
9. Fit and centralise the glass in the frame. Special units (as mentioned in the introduction) will be labelled up to show which side should face outwards. If the unit is going into a fixed window, fit spacers as shown in the diagram. Glass in opening windows needs to be stopped from moving in the frame so spacers need to be placed as shown for side- and top-hung openings. For side-hung openings with the hinge on the opposite side, the position of the spacers needs to be reversed. Try opening and closing the window (holding the glass in place, of course) to make sure it works smoothly. If the window doesn’t operate easily, slight adjustment of the spacer blocks will normally get it sorted.
10. Finally, press plastic beading or nail wooden beading back into place and the job is complete. Next window, please…
Get the Homebuilding & Renovating Newsletter
Bring your dream home to life with expert advice, how to guides and design inspiration. Sign up for our newsletter and get two free tickets to a Homebuilding & Renovating Show near you.
Ben is a writer and a keen DIYer, and has undertaken a multiple of tasks from installing loft insulation, tiling, painting windows to fitting garden fences and reviving period fireplaces. He has also converted his loft on a DIY basis.
