How to Create a Loft Storage Area
Follow this step-by-step guide to turn your loft in to a practical storage space

Here Loft Leg explains how to create a useful loft storage area step by step.
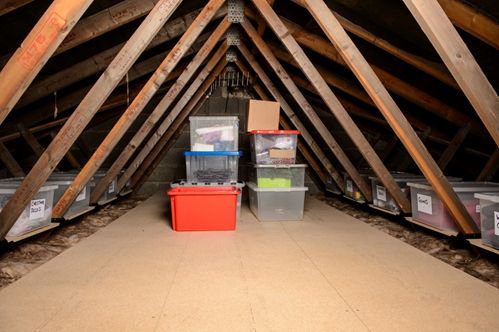
The loft provides an ideal answer to most householders’ storage needs. Instead of the occasional storage of Christmas decorations and suitcases, the loft can be easily and inexpensively developed into a much more usable, organised storage space.
Creating safe, energy efficient loft storage is a relatively simple job that can be achieved with basic DIY skills, in a single weekend and without breaking the bank.
Safety
Before starting make sure you have the necessary safety equipment. It is recommended that crawl boards, knee pads, gloves, masks, a long sleeved shirt, and long-legged trousers are used.
Insulation
The project firstly requires an understanding of the existing insulation in your loft. Current government guidelines recommend 270mm of glass fibre or quilt insulation in the loft. This is generally achieved by having 100mm running between the joists and 170mm across the joists. Glass fibre insulation is widely available at all major DIY stores and is generally discounted if buying in bulk. The correct level of insulation can save households up to £240 per annum on their energy bills
Downlights
Before installing insulation ensure that any downlights are covered and sealed with a downlight protector to reduce drafts and potential house fires, insulation coming into contact with downlights can create a fire risk.
There are a number of different downlight protectors available to choose from. Ensure the selected product is approved to the latest EN60695 and EN60598 standards and can be sealed to the plasterboard ceiling.
Storage Platform
When creating the storage platform do not squash the insulation. Studies have shown that compressing insulation with stored items or boards reduces its thermal performance by over 50%.
Creating storage above the 270mm insulation is easily achieved with a stilted system such as Loft Leg. Legs are 175mm tall and when placed onto a 100mm joist create the required height.
- Roll back any existing insulation above the joists or trusses.
- Position the legs across the joists/trusses and screw through the base into the timber to secure.
- Measure and position the legs along the joists at a maximum distance of 600mm centre-to-centre and screw through to secure.
- Roll the 170mm insulation top up layer across the joists and in-between or around the legs.
- If the insulation does not fit in-between the legs, a craft knife can be used to make slits in the insulation so it fits tightly around the legs.
- Screw 18mm tong and groove loft panels or large 18mm chipboard sheets directly to the legs’ top platform to create a strong, safe, storage deck. The size of chipboard sheet you select is generally determined on the size of your loft hatch so check before buying. The larger the chipboard sheet the fewer the legs required. Loft panels and chipboard sheets are inexpensive and widely available through national DIY retailers.

It is also recommended that screws are pre-loaded into the base of the legs before taking them into the loft. This makes things a lot quicker and less stressful when working in the loft space.
Care should be taken when using platform systems with metal supporting structures as these significantly increase the chance of condensation building up on the metal elements between the insulation and the boards.
Once constructed the storage deck will be easily strong enough to walk on however be careful not to overload it, structural engineers recommend long term static loading of no more than 50Kg per square metre. It is recommended to consult a structural engineer if there are any concerns with the load bearing characteristics of your roof structure.
Shelving
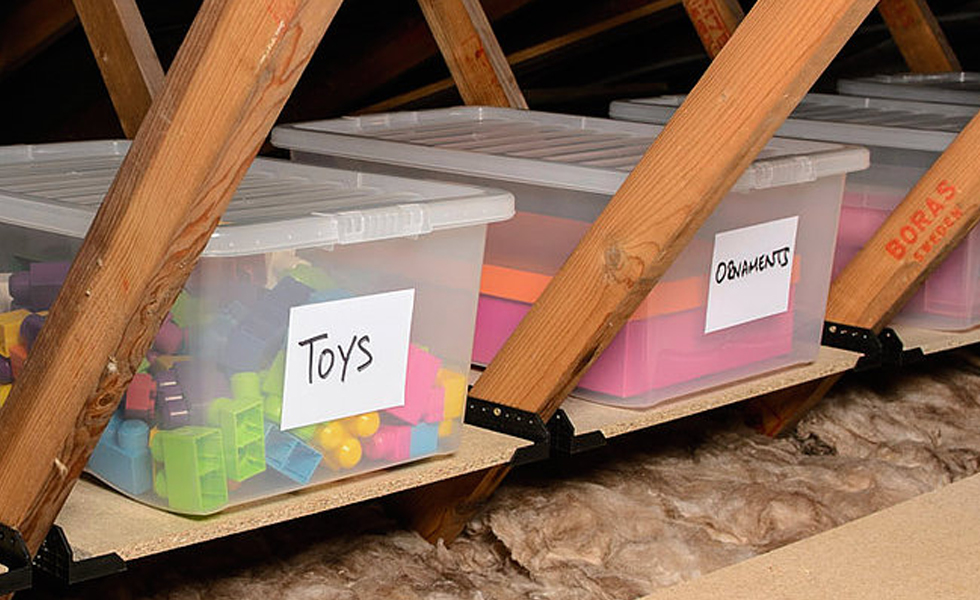
Most modern homes will have a roof constructed using timber trusses. Trusses will limit the area that can be boarded but additional storage can be created by utilising the normally unused space between the trusses. A truss shelf can easily be created between each truss above the insulation creating lots of organised and useful bays along the length of the loft.
Lighting
Good lighting in the loft is also essential. This will ensure safe access in and out of the loft and help with accessing the stored items. A mains operated light and switch can be installed by a qualified electrician or a bright battery powered LED loft light with pull string can be used. There are many battery operated LED lights on the market but it is important to pick one that is specifically designed for lofts and distributes light in a similar way to a mains powered bulb. High power battery LED lights can provide equivalent light to a 32W bulb.
Finally you will need some suitable plastic boxes with lids, labels and markers to create your perfect, organized, safe and energy efficient loft storage room.

Get the Homebuilding & Renovating Newsletter
Bring your dream home to life with expert advice, how to guides and design inspiration. Sign up for our newsletter and get two free tickets to a Homebuilding & Renovating Show near you.
