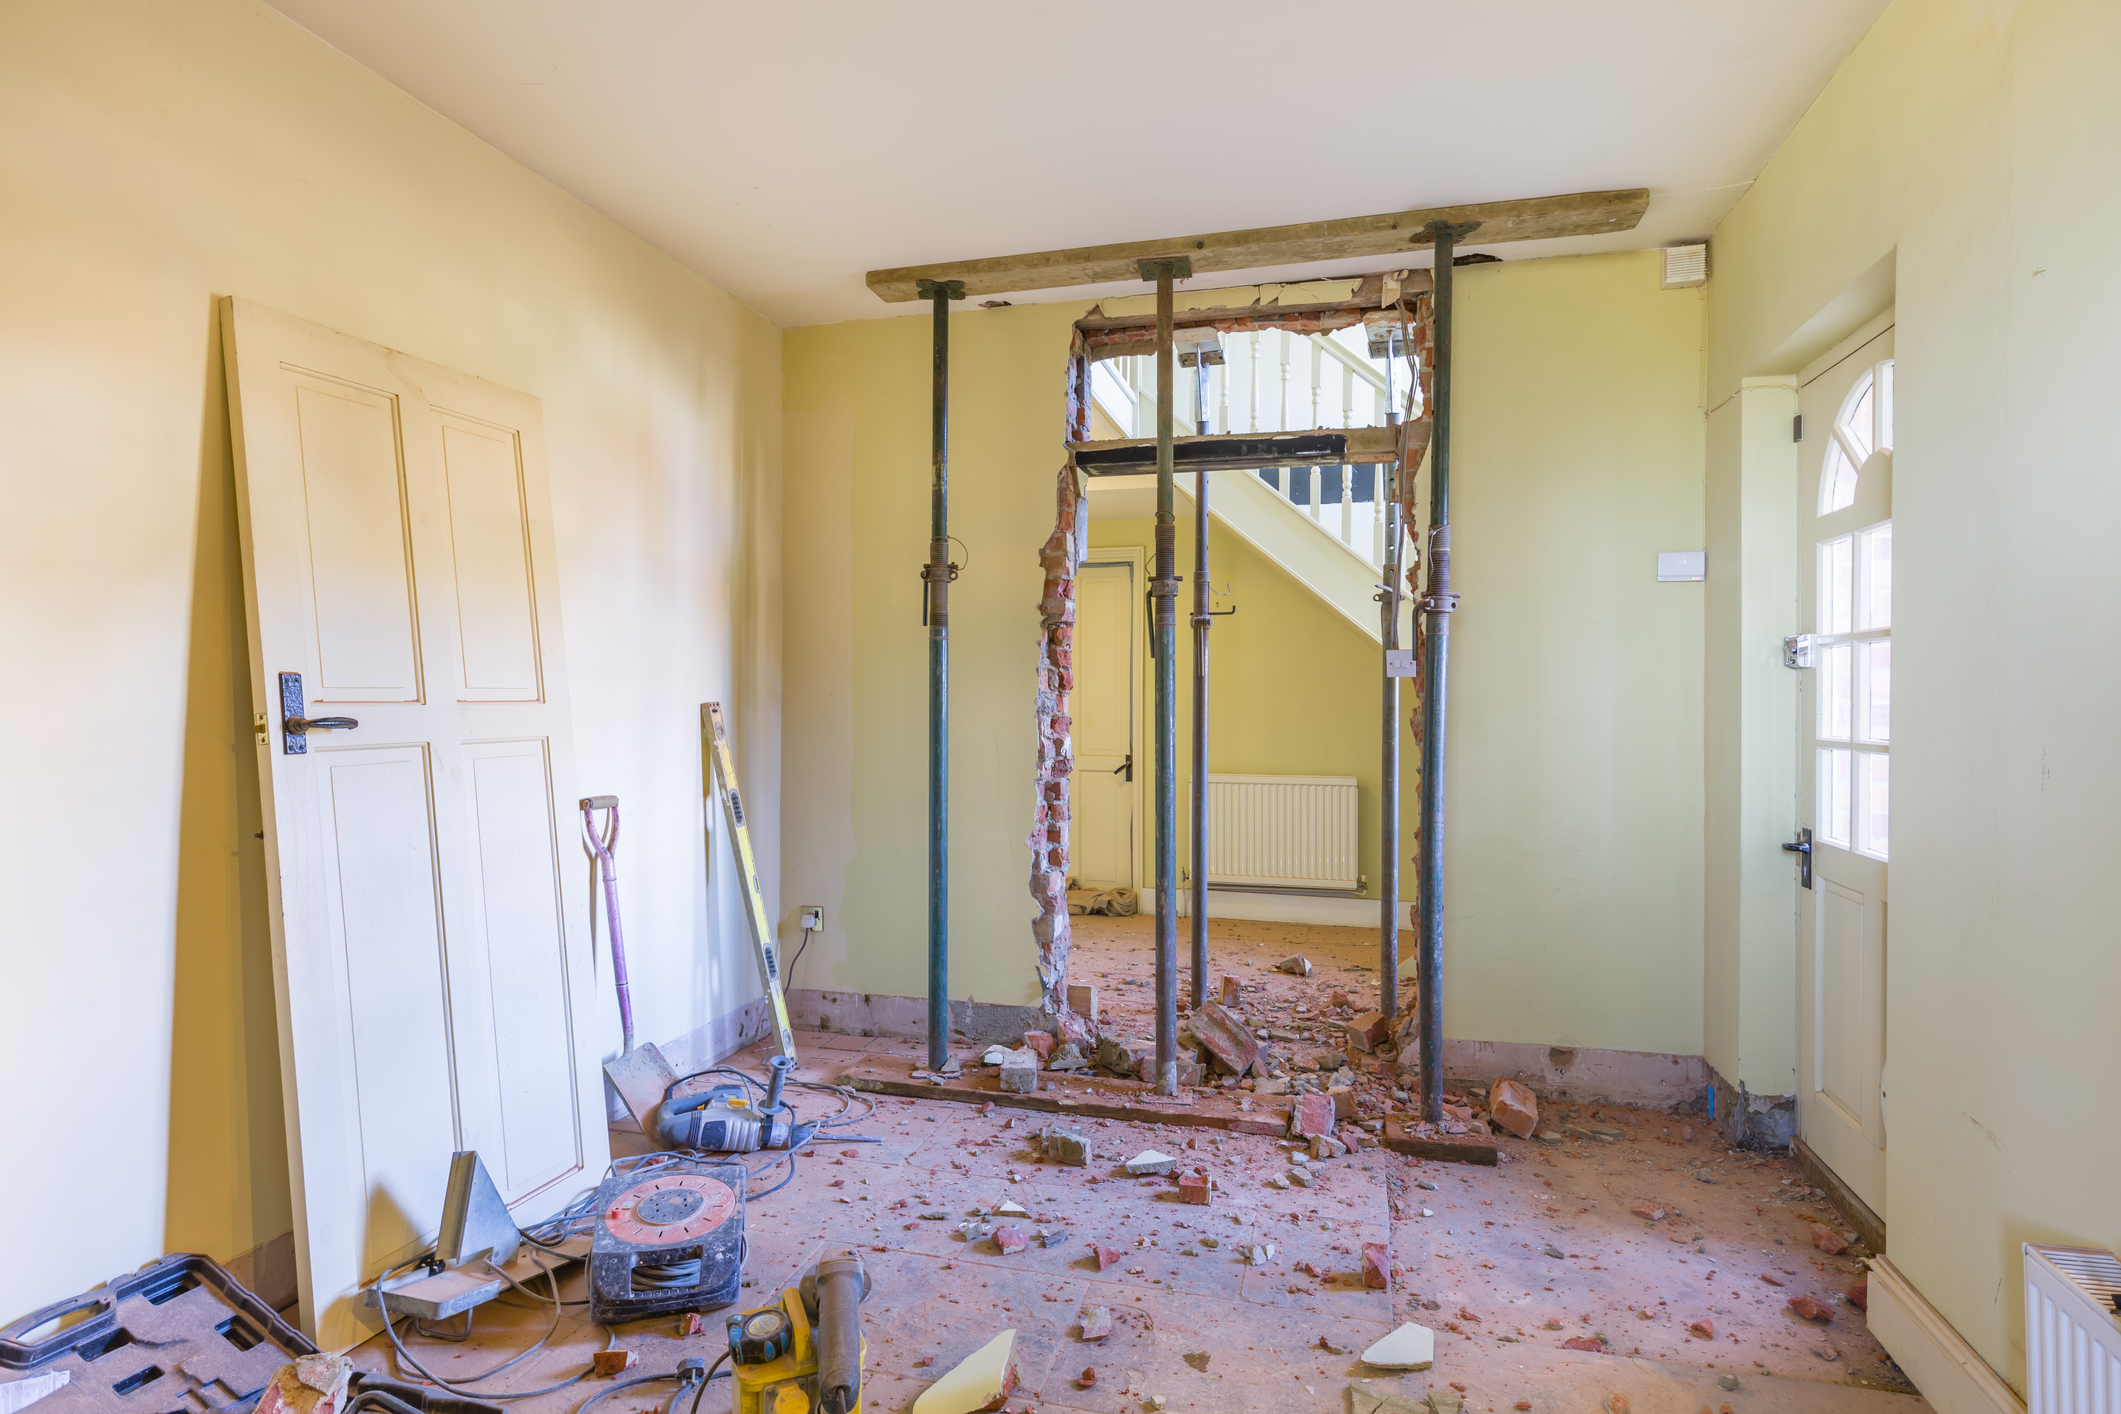
How to Build a New Doorway
Knocking a wall through to introduce a new door is not beyond the keen DIYer. Natasha Brinsmead explains the process and what to look out for

Sometimes a new doorway will be needed in a house, whether it is to connect an existing section of the house to a newly built extension, or is simply required to turn separate rooms into one larger space.
Unless you live in a listed building, planning permission will not be required, but it is still necessary to let Building Control know and they will, in all likelihood want to send a building inspector out (particularly if it’s a loadbearing wall you are dealing with). If the wall is loadbearing, and depending on the complexity of the job you are carrying out, a structural engineer may be required too. This will obviously add to costs.
Depending on the size of the opening and the type of wall you are working with, the job should take no more than three days. Keeping a spray bottle of water to hand should help keep the dust down, but be sure to cover any furniture or move it to another room, and wear a mask when carrying out the work.
If it is just a single doorway that needs to be cut, carrying this out on a DIY basis is quite possible. If you are confident enough to give it a go, and the job is straightforward, a concrete lintel is all that will be required above.
If, on the other hand, the opening is for double doors or a larger opening, then a steel lintel is likely to be required. In this case it could be a good idea to call in a builder or structural engineer to at least give you an idea of the sizes and the level of work involved.
Step-by-Step
- Measure the position of the new door and mark out the wall for the new opening. This should be 20mm wider and 10mm higher than the door frame.
- Mark out the opening for the new lintel. This should overlap each side of the door frame by at least 150m.
- Drill holes using a masonry drill bit, then cut a horizontal slot in the centre of new doorway, just above the top line above the lintel. This must be large enough to take a strongboy support attachment.
- Once the attachment is fitted and the weight of the wall above where you will be cutting is supported, the doorway can be cut. Remove plaster from the wall and enough bricks to make space for the lintel to be fitted — this should be left to dry overnight.
- Remove the remainder of the bricks using a hammer and bolster, and once the bricks from both sides have been removed, install the door frame.
Our Estimate
2–3 days; £300 (labour)
Is my Wall Loadbearing?
It is quite possible to knock a new doorway out of a loadbearing wall, but obviously more planning and experience is necessary. If the wall is a timber stud wall, then it is unlikely to be loadbearing, but if it is a solid wall then there is a chance that it could be. You can check yourself whether the wall is loadbearing, but it is always wise to get a builder to confirm this for you.
- Examine where the wall meets the ceiling joists or roof supports and follow the line to the room above or into the loft.
- The wall will either disappear, or continue up through the room you are in.
- If the wall continues, the wall beneath is bound to be loadbearing.
- If not, lift the surrounding floorboards to expose the top of the wall and the joists — never take the direction of the floorboards as an indication of how the joists below may run.
- If the joists run in the same direction as the wall and are not supporting the roof structure, the wall cannot be loadbearing.
- However, if the joists cross the line of the wall, they are likely to be supported by the wall beneath them (although not always, which is why it is still best to get a professional to take a look).
Get the Homebuilding & Renovating Newsletter
Bring your dream home to life with expert advice, how to guides and design inspiration. Sign up for our newsletter and get two free tickets to a Homebuilding & Renovating Show near you.
Natasha was Homebuilding & Renovating’s Associate Content Editor and was a member of the Homebuilding team for over two decades. In her role on Homebuilding & Renovating she imparted her knowledge on a wide range of renovation topics, from window condensation to renovating bathrooms, to removing walls and adding an extension. She continues to write for Homebuilding on these topics, and more. An experienced journalist and renovation expert, she also writes for a number of other homes titles, including Homes & Gardens and Ideal Homes. Over the years Natasha has renovated and carried out a side extension to a Victorian terrace. She is currently living in the rural Edwardian cottage she renovated and extended on a largely DIY basis, living on site for the duration of the project.

