What is airtightness and why does it matter?
Just what is airtightness? In this guide we explain why it is a key ingredient in creating an energy efficient home, what is it and how it is measured
Bring your dream home to life with expert advice, how to guides and design inspiration. Sign up for our newsletter and get two free tickets to a Homebuilding & Renovating Show near you.
You are now subscribed
Your newsletter sign-up was successful
You might have heard the term, but what is airtightness? While it is often talked about when discussing eco homes, when comes to the future of our houses it can be a little confusing to understand exactly what it is and why it is important.
Like insulation, airtightness is part of a fabric first approach to building, designed to limit reliance on space heating, creating houses that are thermally efficient at their core. Therefore, when it comes to building your own home, airtightness is an important factor. But what exactly do we mean by an airtight home? How is it measured and tested?
There are many technical areas that need a bit of head scratching and working out when building a home — especially if you’re building an energy-efficient one. While you’ll have experts on hand to do this job for you, it’s always good to try and gain an understanding of these areas. It’ll give you the confidence to discuss them with your build team from the off. Airtightness is one such area.
Here, our experts delve into the world of airtightness to explain exactly what you need to know.
What is airtightness?
Airtightness, which focuses on the level of air leakage, should be considered as part of a fabric first approach to building a house.
Air leakage is the uncontrolled movement of air into and out of a building that is not for the planned purpose of exhausting stale air or bringing in fresh air, like a mechanical ventilation system would.
Airtightness is aimed at stopping this uncontrolled movement of air by closing the gaps and cracks in the construction of the building (the fabric, the windows and doors, and around cables and pipes, for example) through which warm air can escape and cold air can get in.
Bring your dream home to life with expert advice, how to guides and design inspiration. Sign up for our newsletter and get two free tickets to a Homebuilding & Renovating Show near you.
How is airtightness measured?
Air leakage is measured as the rate of leakage per m of external envelope per hour at an artificial pressure differential through the envelope of 50 Pascals. This is to simulate higher wind pressure and to ensure the airtightness layer is robust.
Air leakage, then, is expressed as Xm./hr/m.@50Pa. This is the measure the Building Regulations in the UK uses.
Alternatively, air change is measured as the rate the volume of air changes in the building per hour at 50 Pa. Air changes are expressed as Xach/hr@50Pa. This is the measure used by Passivhaus, for example.
The larger and simpler the building, the easier it is to achieve a good air change rate as the proportion of envelope per volume reduces. Air leakage is a more constant measure that’s less affected by building size and form. However, at average house sizes the two measures are roughly comparable.
What is 'good' airtightness?
Building Regulations technically demands a maximum air leakage of 10m3/hr/m2@50Pa, although most projects now aim for 5 to get a Standard Assessment Procedure or SAP pass.
A SAP is done to find out the energy and CO2 performance of a house to comply with Building Regs: Part L in England and Wales, Section 6 in Scotland and Part F1 in Northern Ireland.
However, Passivhaus demands 0.6ach/hr@50Pa and the AECB building standard 1.5ach/ hr@50Pa.
The big housebuilders have long held that improving on 10m3/hr is too onerous, which may be why the regulation has not changed since 2006. But 5m3/hr is now fairly standard for SIPs (structural insulated panels) and ICF (insulated concrete formwork) builds, and even some timber frame systems.
For a new build I would suggest that a figure of 1.5 in either metric is the minimum you should be aiming for and many self-builders are achieving notably better than Passivhaus by using a simple and robust airtightness strategy.
In which areas of my house do I need airtightness?
There are very broadly three key areas to address when creating an airtight home:
The fabric envelope: The walls, floor and roof. The ease of achieving a desired airtightness in the walls will vary with the construction system. With SIPs or ICF it’s very easy, timber frame not so easy, and with masonry it is quite difficult. It is the junction between the floor and wall, and the wall and the roof where the problems particularly lie.
Windows and doors: We focus on U-values, but what we really need to be asking for is the airtightness we want as well. Where the frame meets the wall is outside the remit of the window manufacturer, but how the window or door closes within its frame is very much their responsibility. It must be airtight on the day it is installed and the seal needs to last at least as long as the window or door itself.
Other penetrations to the fabric such as pipes and cables: They’re not difficult to deal with and it is largely a matter of attention to detail and especially to ensuring they are all found and dealt with.
Another area which needs serious attention is open fires and their chimneys — they’re the anathema to the airtight house. The purpose of a chimney is to draw air out of the house in enormous quantities — exactly what we are trying to prevent.
If the target is an airtightness of less than 3m³/hr, it will be necessary to consider designing out items like keyholes, cat flaps and letter boxes. Getting down to near-Passivhaus levels is a serious business and needs serious consideration.
Your architect should be specifying what needs to be done but there are handy, free websites, such as the Planning Portal, which provide construction diagrams and photos of ‘common problems’ to help homeowners understand what’s at play.
The longevity of the materials used to achieve airtightness is also vital. Materials like standard mastic, for instance, will not do as a joint sealer: in time they will dry out, crack and allow air leakage. Instead, a long-lasting, flexible mastic should be used.
A visit to a materials supplier that specialises in eco builds will offer a good idea of the specialist tapes, mastics, grommets and membranes available for an airtight build.
How do you design an airtight house?
The building needs to have an identifiable continuous line of airtightness. On drawings, you need to be able to trace your finger around it continuously without lifting your finger. This should be possible on any plans and sections of the proposal.
You need to consider what elements in your construction are forming the airtightness line. This should only ever be one thing in a given construction. Is it a membrane; is it an airtight rigid board for floors or walls; is it some solid concrete or is it a layer of plaster? Don’t be fooled into thinking that multiple layers are okay; airtightness will be as good as or better with a single excellent layer. A leaky bucket inside a leaky bucket is still a leaky bucket.
You also need to think about where – within the layers of construction – the airtightness layer sits. In most cases it’s one of the first layers on the warm side of the construction i.e. the interior-facing side of the building. This ensures that the fabric is fully protected from interstitial condensation. A good rule of thumb with most insulations and constructions is to have a maximum of one third of the insulation value between the room and the airtight line. The less, the better.
At what stage in the build should airtightness be considered?
The performance of your build should be considered from the outset. From setting your target performance to agreeing the strategies to achieve this. The form factor (ratio of building envelope to floor area) of a building has the biggest effect on cost per m2 for any given performance. The higher the number, the thicker the insulation you need and the more area you need to cover with that insulation. Along with that, the larger the number the more complex the build is likely to be and the more difficult the airtightness will be to achieve in the complex areas.
Setting out with an early commitment to a standard and understanding the implications that early design decisions will have on how realistic that will be to achieve is fundamental to a successful outcome that doesn’t cost more than it should.
Which construction system is best for airtightness?
The most cost-effective way of achieving airtightness is to choose the right construction system. As previously stated, 5m³/hr is now standard with SIPs and ICF builds. SIPs may have an edge because SIPs panels can also be used to form the roof, leaving only the airtightness of the ground floor to deal with.
A SIPs supplier, for instance, will guarantee the airtightness of the walls and may even extend that to the windows and doors if they are supplying and installing them, but they will not guarantee the roof (if they’re not supplying it) or floor. For airtightness to be achieved, every aspect must be properly addressed.
With timber frame, it’s a matter of taping all the joints and attention to detail, while masonry construction will mean applying a parge coat (sand, lime and cement) to the internal surface before plastering.
The loft hatch is just as important as any other part of the build and there are proprietary products available, like the Manthorpe hatch from Sustainable Building Solutions. The Green Building Store offers a number of airtightness products including loft hatches, services boxes and downlighter housings, too.
What are the benefits of an airtight home?
There are several benefits to living in an airtight home, including:
- Feeling the effects of insulation: The better a home is insulated, the more important airtightness arguably becomes. Because gaps and holes not made airtight in the insulation and structure could mean a higher proportion of its heat loss is through air leakage. As such, ensuring you’re addressing insulation alongside airtightness means you’re going to realise the full benefit of the insulation
- Increasing thermal comfort: Once you’ve got reasonably warm external building elements, your main source of thermal discomfort is draughts. Cold air movement can significantly reduce your comfort and good airtightness can completely eliminate this issue
- Protect your building fabric: Any warm air escaping through your construction will contain moisture. As this air passes through the construction, it will meet cold air and the water vapour will condense forming liquid water inside the wall/floor/roof of your home. This is known as interstitial condensation. This water can damage the fabric of your building and cause its early failure. Good airtightness minimises this risk.
How can I make my home airtight?
The flat, uninterrupted, bits of airtightness should be relatively straightforward. If you’re using boards or membranes, the intermediate joints in these will need taping. We’ve tended to move away from membranes where we can over the last few years, as boards are much easier to join reliably without the risk of creases that you get with a membrane. Concrete is airtight, as is a plaster or render layer of around 10mm.
Ground floor to wall junction: This is normally quite a simple junction to consider. Ideally the whole ground floor has a continuous, uninterrupted airtight layer. This means you only have to consider the external perimeter junction with the external walls. In terms of comfort, this is one of the most important places to get airtightness right.
First floor to wall junction: This is somewhere where design decisions can have a fundamental impact on how easy airtightness is to achieve. Ideally, the wall airtightness layer is continuous, past the end of the floor structure. Otherwise you’ll have to seal around the ends of every one of the floor joists, which is very time consuming and gives much greater risk of leakage. Consider a balloon frame where the vertical studs run from foundation to roof (rather than a platform frame) if you’re using a timber structure and consider a wall plate fixed after a layer of airtightness if you’re using a masonry construction.
Eaves: There are similar considerations here to the intermediate floors. You need to consider sequencing and what happens to any ceiling joists you have.
Window and door reveals: These affect comfort and energy performance considerably. You can also ruin an otherwise thermally efficient window and wall construction with poor detailing. Air leakage can lead to visible condensation and mould growth. Carefully taping the window to the reveal construction can eliminate this risk and make the thermal comfort around the window considerably better.
Door thresholds: These are particularly tricky to get right, especially if you have a flush threshold. This is not a detail you can leave until the doors are already installed as they require preparation of the opening to achieve a good seal. Green Building Store have some great details that they have used on their website.
Service penetrations: Technically, these are easy to seal with tapes, or grommets or with paint on liquid membranes. The difficulty comes from catching all the penetrations in the building as and when they’re made. Having a site team that understand how important the airtight line is key. Also watch out for making penetrations, especially waste pipe pop-ups, too close to an adjacent wall so that it’s tricky to seal around them later.
Cat flaps and letter boxes: These are obvious gaps in your airtight line. The simple answer to letter boxes is to have a separate post box outside the house to avoid any penetrations into the house. Cat flaps are, for many cat owners, a necessary evil. There are now some excellent airtight cat flap products. From the relatively cost-effective Freedom Pet Pass to the all-singing, all-dancing Petwalk. Like any penetration, they need carefully sealing in position, but there’s no reason now to sacrifice performance for the sake of giving your cat free rein of the house.
Does airtightness affect air quality?
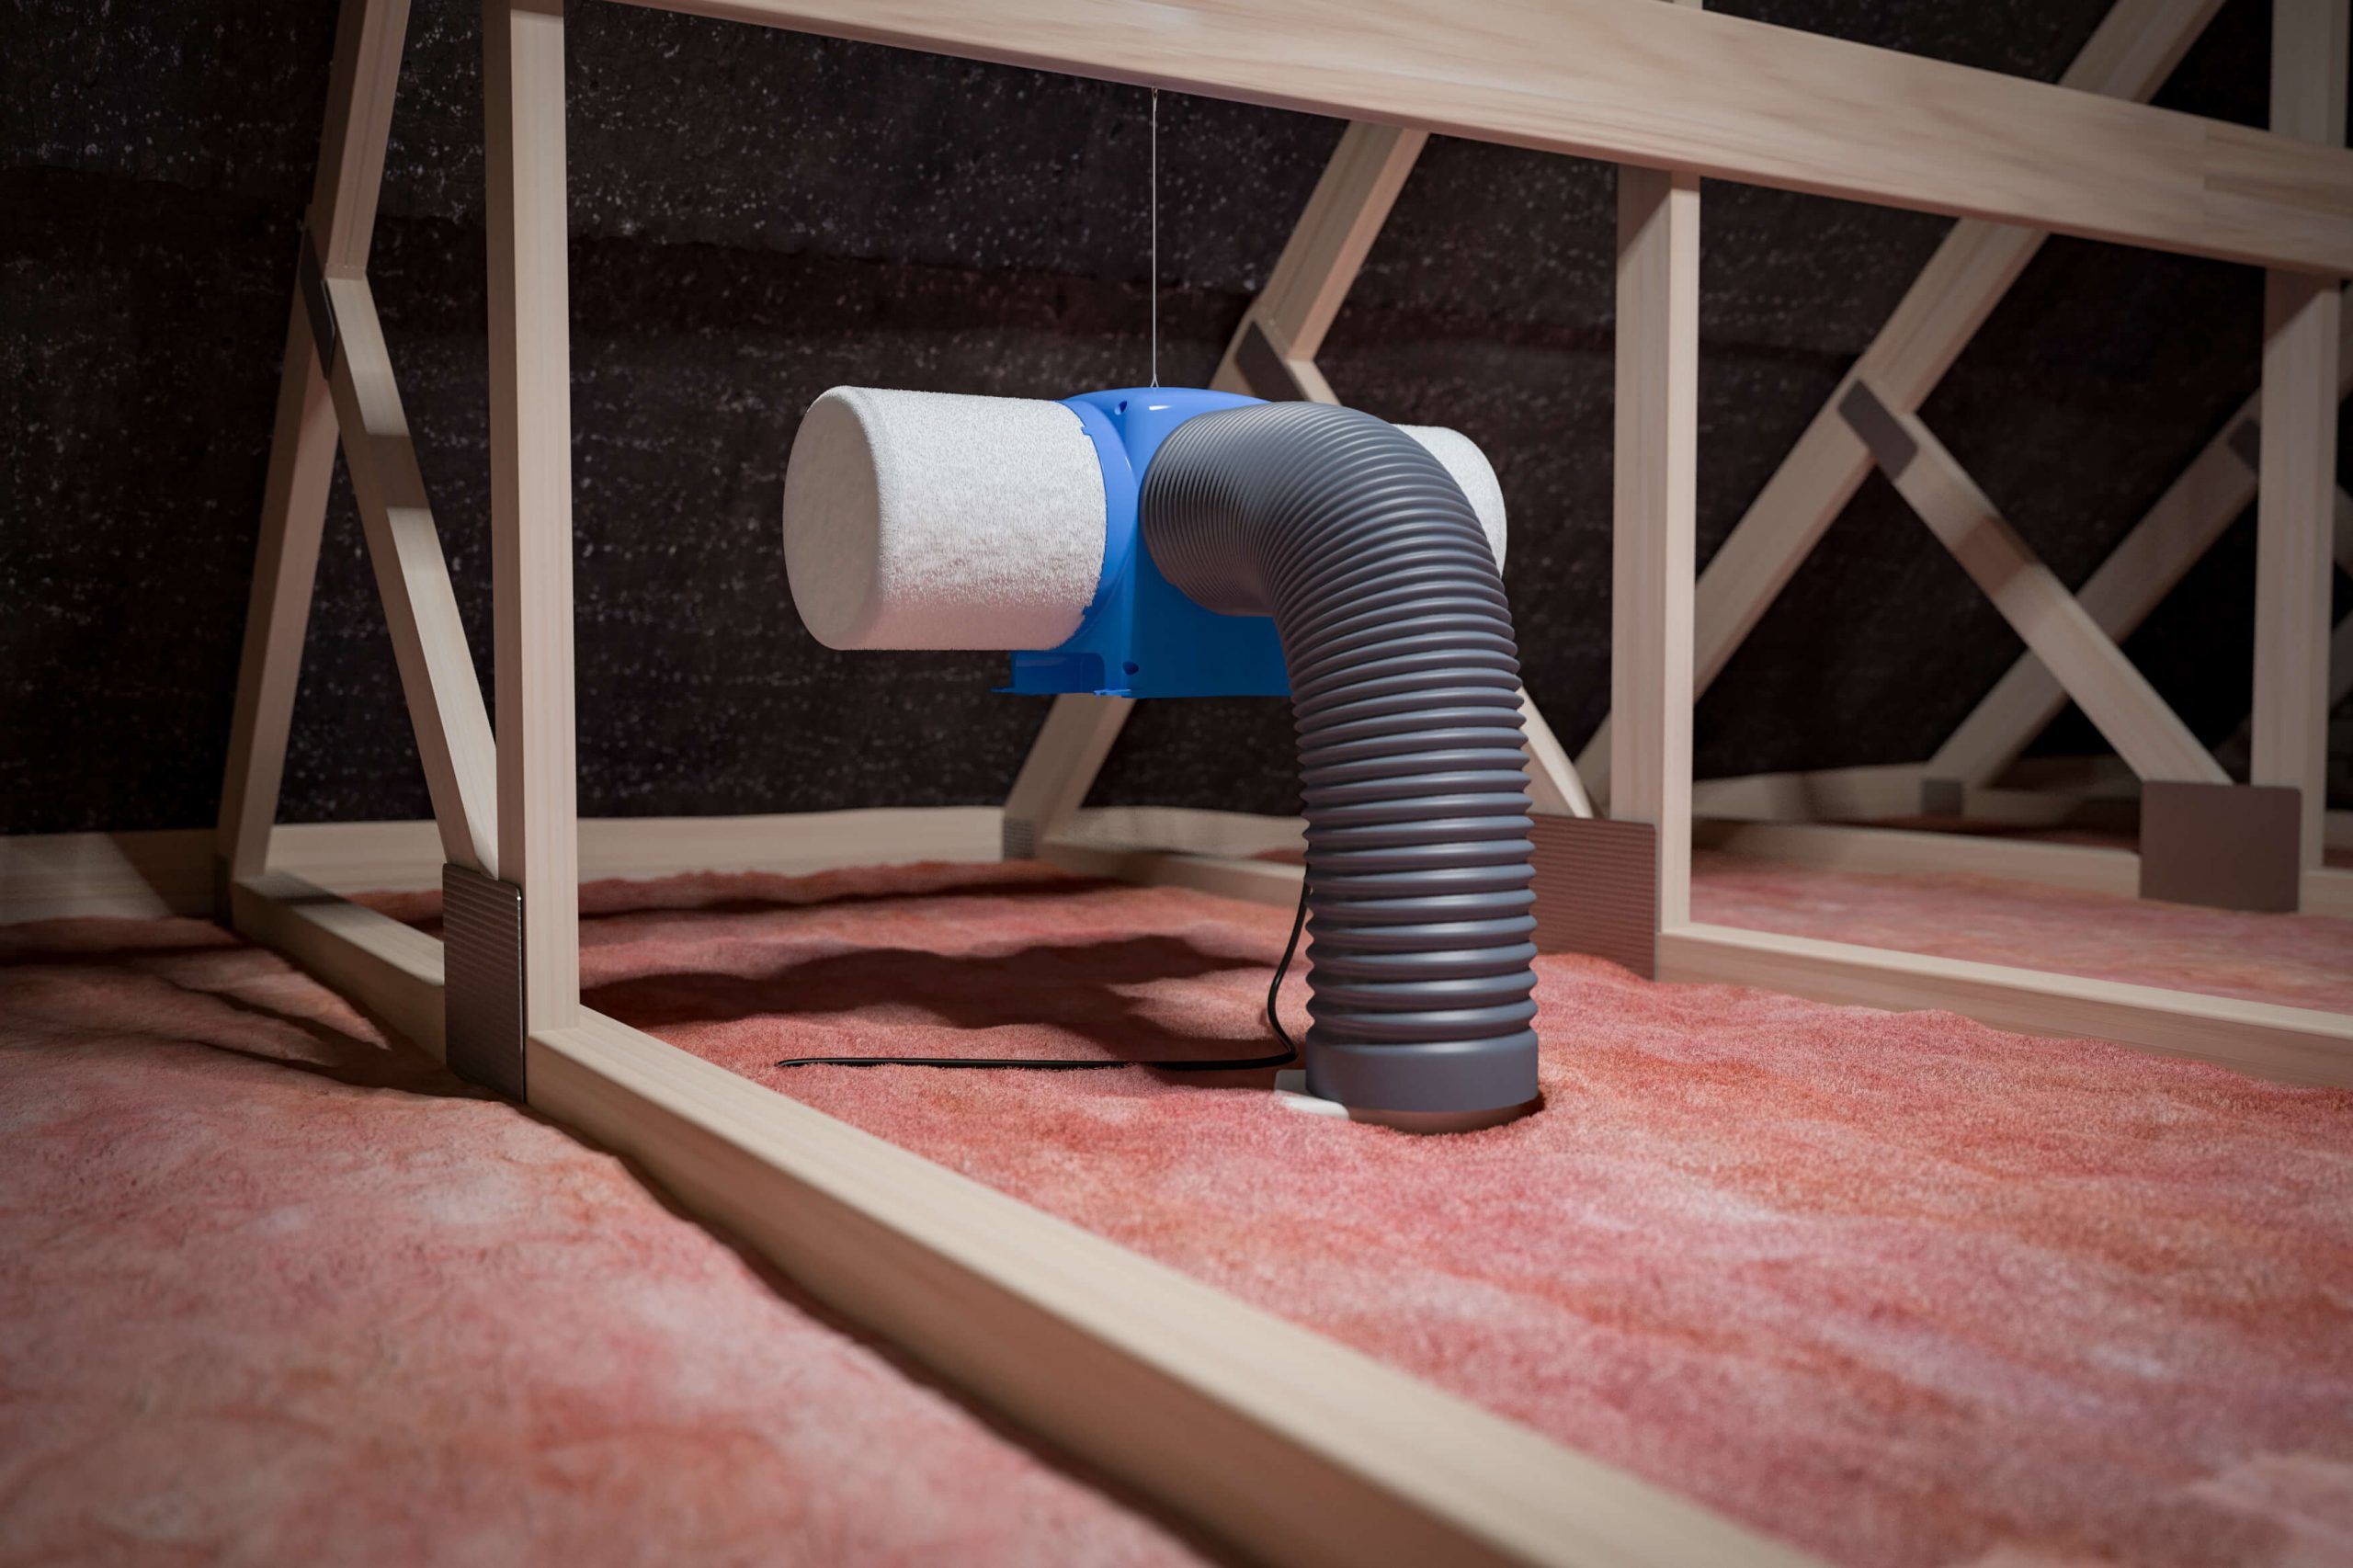
It’s commonly misconceived that some air leakage is required as part of a building’s ventilation strategy. However, we shouldn’t be relying on dusty cracks in construction to provide the fresh air that we breathe.
Ventilation needs to be purposeful and designed. It’s true that some ventilation strategies, e.g. mechanical ventilation heat recovery, work better with better airtightness, but airtightness and ventilation should be thought of as separate things with different purposes.
A ventilation strategy (natural ventilation and/or mechanical) would be made based on the airtightness levels measured. Follow the rule of 'build tight and ventilate right'.
With airtightness levels of 7m³/hr or better, a ventilation system is needed to maintain a healthy atmosphere. However, if you specify a mechanical ventilation with heat recovery (MVHR) system, then unless an airtightness of less than 5m³/hr is achieved, the heat recovery element will not work. It will instead draw in more cold external air than the heat recovered and have a negative impact on the energy efficiency of the house.
How can I ensure quality control for an airtight build?
More than anything else, quality control is imperative to the success of creating an airtight home, which pre-supposes that the person in charge of quality control knows what they are looking for.
With SIPs and some timber frame systems, an element of quality control is done in the factory by people who do know. All the on site work needs the same level of attention and skill. The first step is to ensure the main contractor or project manager has built at least one airtight house previously and acquired the knowledge.
If you’ve followed a robust design process up to starting on site that makes the airtight line as accessible and achievable as possible then the following steps should ensure a successful build:
Airtightness champion: One person on site should have oversight of the airtightness strategy and of all the penetrations being made in the airtight layer. This person should be on site most of the time and not be the site manager.
Site operative education: It makes a huge difference if the team on site understand the implications of damaging the airtight layer. Have an environment of no-risk reporting so that the team aren’t afraid of identifying where they’ve penetrated the airtight layer.
Forward planning: Sequencing is key. Think about the processes that lie ahead and plan as a team to ensure that the airtight line is built correctly and not compromised.
Airtight vs breathable: What's the difference?
Breathable construction doesn’t breathe in the way that we do. It’s not about air passing through the building fabric. It refers to how the building fabric deals with moisture; whether it can absorb moisture in times of high humidity and then release it in times of low humidity. Or, indeed, whether moisture can safely pass through the construction.
Good airtightness and a breathable construction are not conflicting requirements — nor are they mutually exclusive.
Natural materials, especially natural insulation, are more hygroscopic (breathable) than synthetic ones. The term ‘vapour permeable’ also gets used in this context as it means the rate at which water vapour passes through a material.

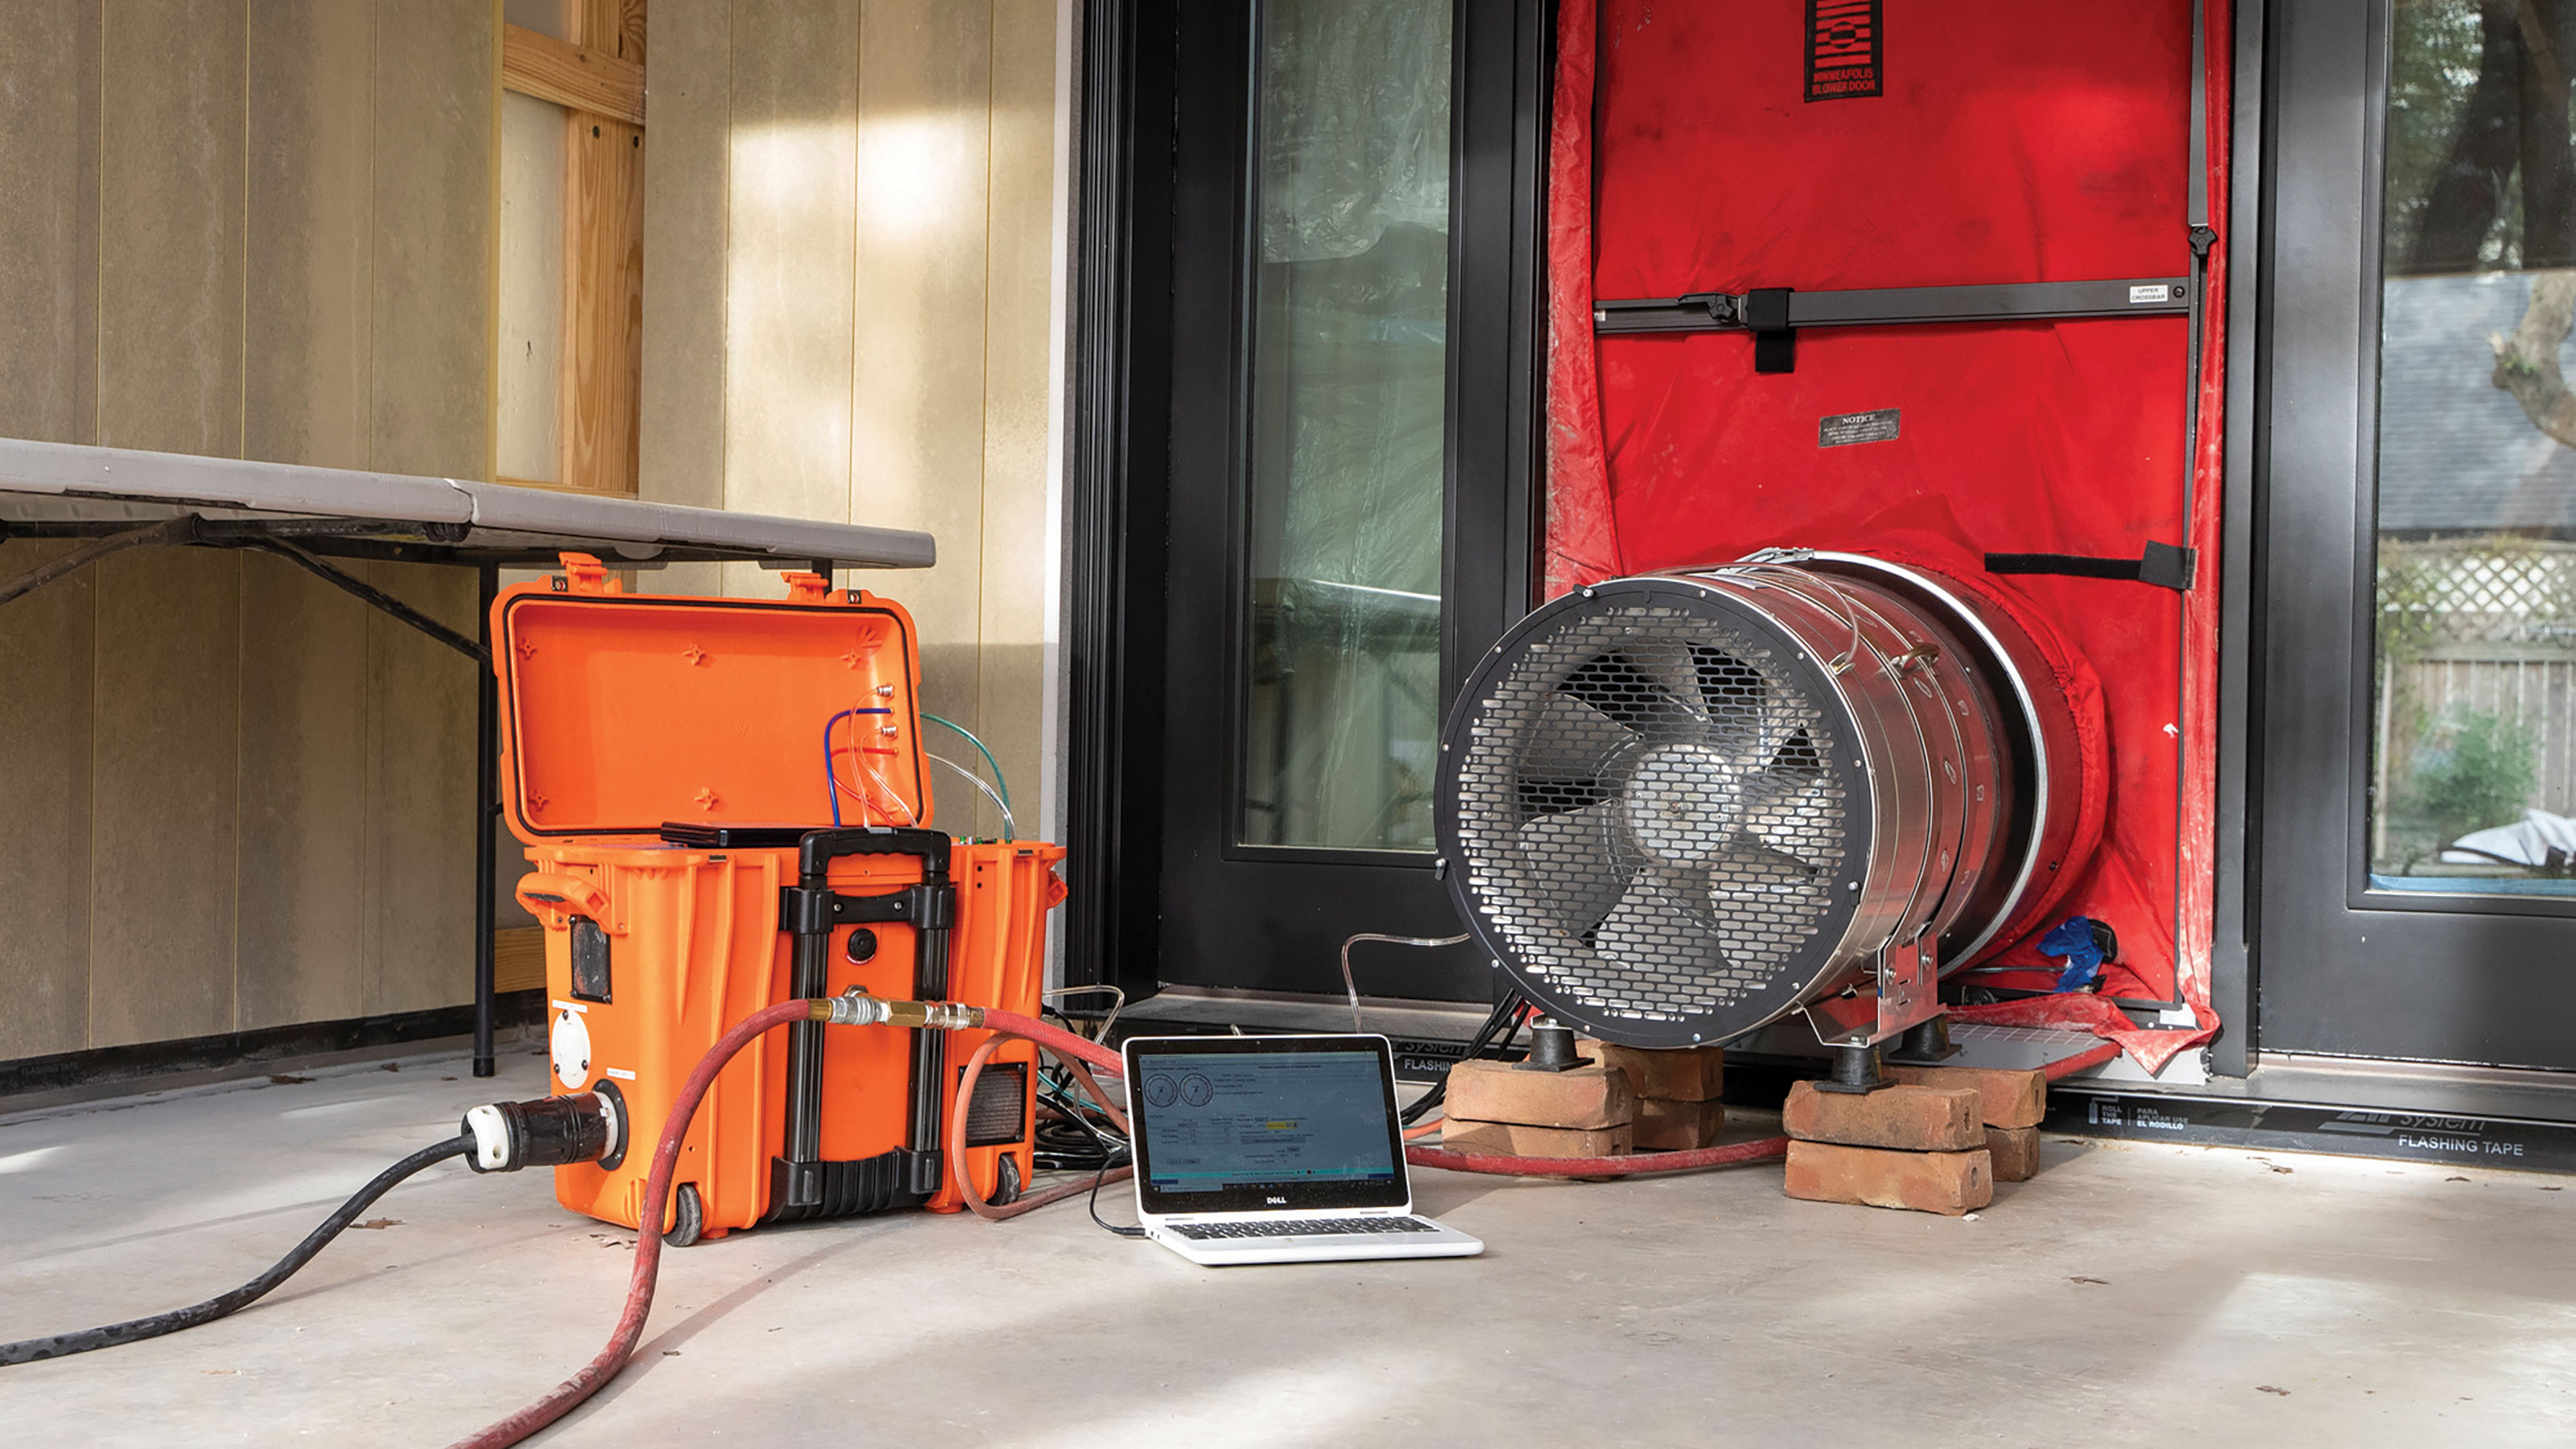
How do you test for airtightness?
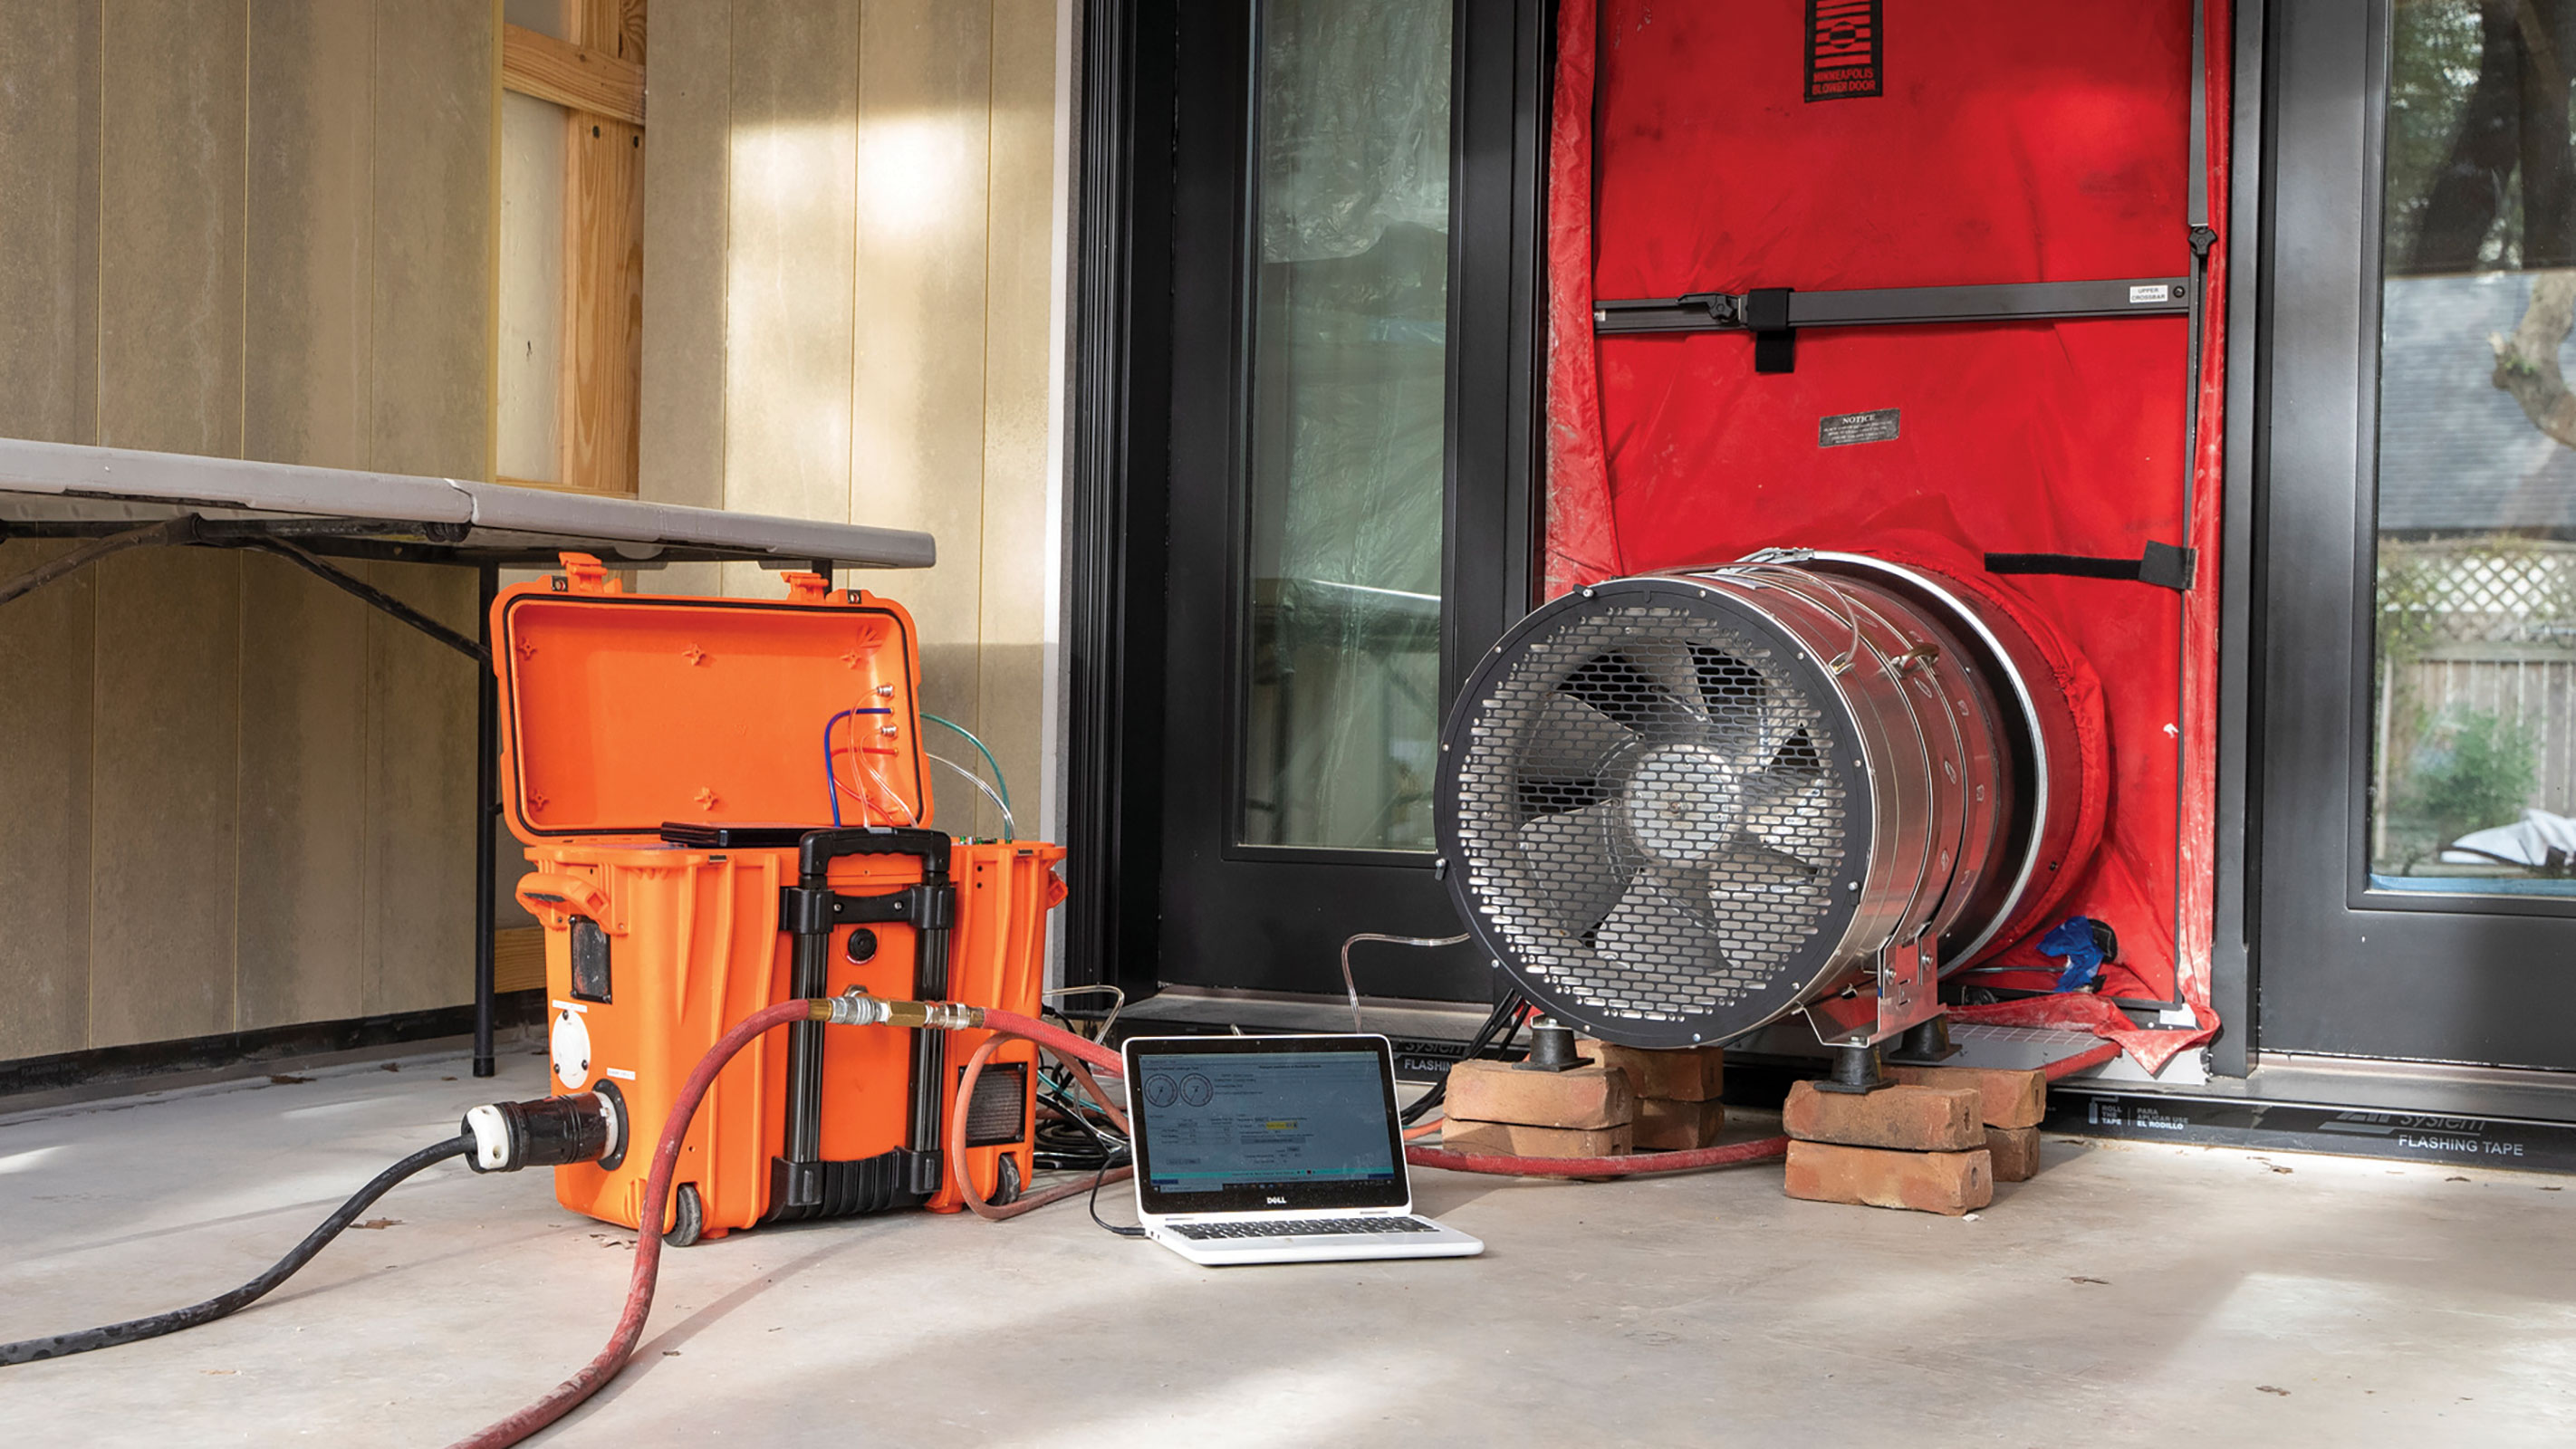
Airtightness testing is cheap (around £250), easy and essential, and there is almost an inexhaustible list of companies who will undertake the testing. A smoke pen or pencil can be useful in indicating exactly where the leaks are too.
Expect to do the test more than twice. The first test should always be done when the build is wind and watertight, before any internal finishes are installed, in order to ensure that the fabric reaches the desired standard and that any resulting remedial work does not involve removing expensive finishes.
How much does it cost to build an airtight home?
The extra cost of achieving airtightness will vary with the construction system and with the level of airtightness being sought. To achieve 5m³/hr, budget an extra five per cent of the envelope cost for a SIPs build and 15 per cent for a masonry build. Timber frame and ICF will be somewhere between the two.
It’s worth noting that airtightness can and has been achieved in renovation projects too, but tends to be very difficult and expensive.
Will I save money by building an airtight home?
It is inarguable that airtightness improves thermal efficiency and reduces space heating costs. Improving airtightness from 10m³/hr to 5m³/hr will reduce energy demand (and consequently cost) by around 22 per cent, if everything else remains the same. Improve the airtightness to PassivHaus standard and the cost reduction is over 52 per cent. That’s not an inconsiderable cost.
That said, improving airtightness is not typically done in isolation; it is often accompanied by better build quality and better insulation. Airtightness is the biggest single factor affecting heat loss, but good thermal efficiency needs a broader view and a holistic approach.

Tim is an expert in sustainable building methods and energy efficiency in residential homes and writes on the subject for magazines and national newspapers. He is the author of The Sustainable Building Bible, Simply Sustainable Homes and Anaerobic Digestion - Making Biogas - Making Energy: The Earthscan Expert Guide.
He formally ran energy efficiency consultancy WeatherWorks and was a speaker and expert at the Homebuilding & Renovating Shows across the country

Is an architect, the director of HEM Architects and a specialist in low energy design.
Tim was an expert in sustainable building methods and energy efficiency in residential homes and wrote on the subject for magazines and national newspapers. He is the author of The Sustainable Building Bible, Simply Sustainable Homes and Anaerobic Digestion - Making Biogas - Making Energy: The Earthscan Expert Guide.
Tim's interest in renewable energy was first inspired by visits to the Royal Festival Hall heat pump and the Edmonton heat-from-waste projects. Moving to a small-holding in South Wales fanned his enthusiasm for sustainability. He went on to install renewable technology at the property, including biomass boiler and wind turbine.
He formally ran energy-efficiency consultancy WeatherWorks and was a speaker and expert at the Homebuilding & Renovating Shows across the country.
